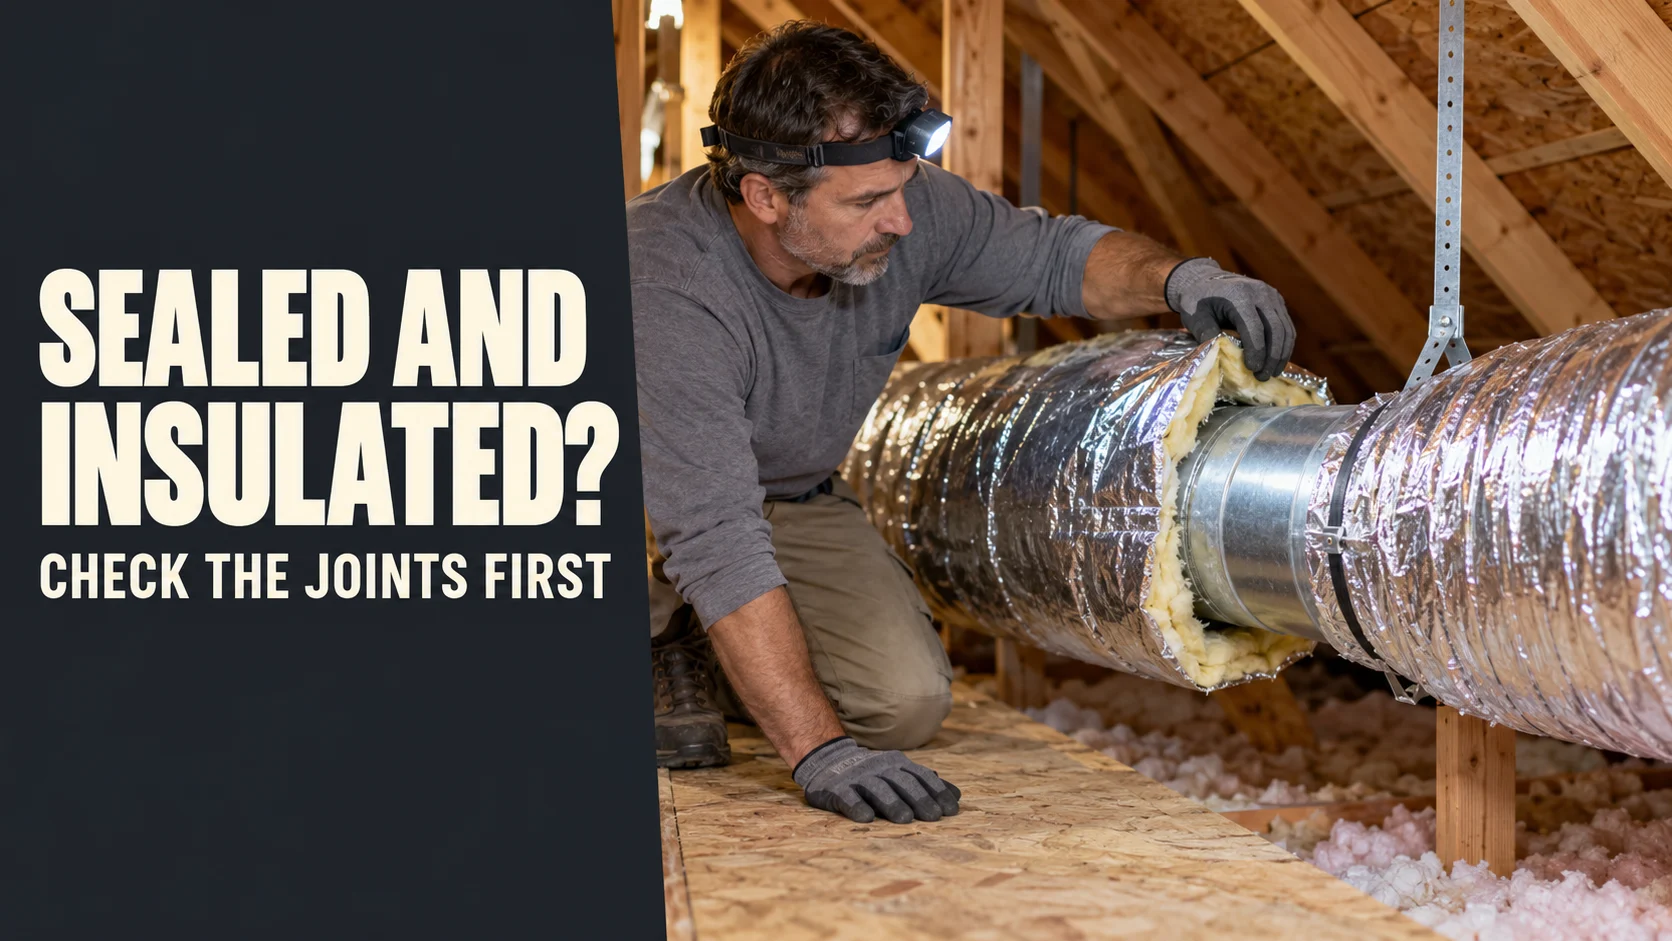

Your air conditioning ducts are in good shape when their air-carrying joints are sealed, ducts outside conditioned rooms have continuous insulation, and cooled air reaches each room without major restrictions. A shiny outer jacket or a strip of tape cannot confirm all three. Start with the accessible connections, insulation gaps and flex duct bends, then use professional testing if the symptoms persist or the ducts are hidden.
The five-minute answer: what to look for
| What you find | What it may mean | Your next move |
|---|---|---|
| A loose branch, visible hole, open seam or moving air at a duct joint | Air may escape from a supply duct or enter a return duct | Document the location; repair an accessible sound connection or arrange duct repair |
| Bare metal in an attic, garage or vented crawlspace | The duct may gain heat while carrying cool air and may be prone to condensation | Check the insulation specification and plan a continuous, suitable wrap |
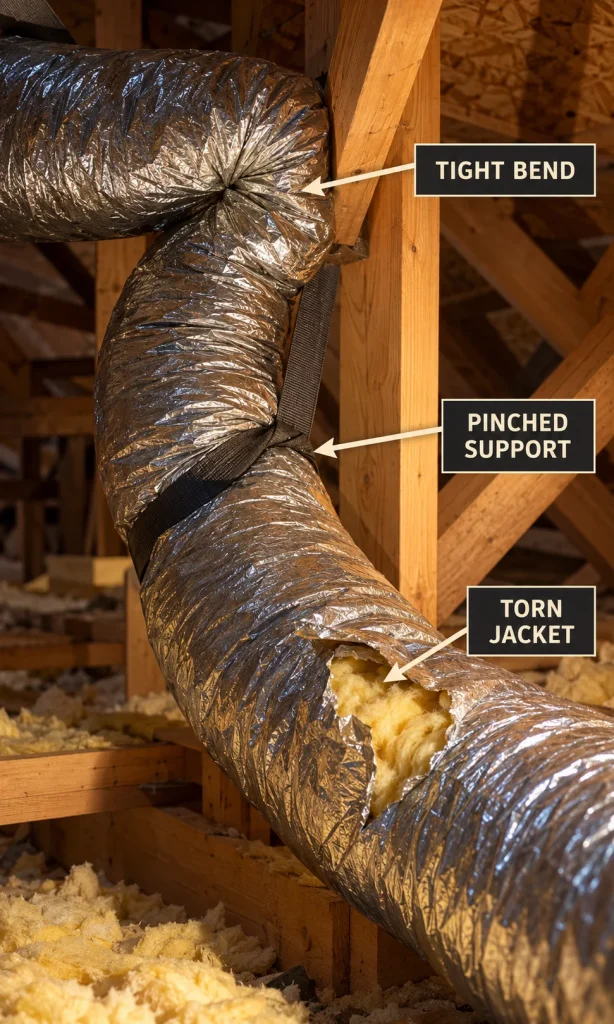
| Foil or plastic jacket torn near a flex duct connection | The insulation and vapor retarder may be exposed even if the inner air duct remains attached | Inspect the inner liner before deciding whether the connection needs resealing, rewrapping or replacement |
| A crushed, sharply bent or sagging flexible duct | Airflow can fall even when the duct is airtight | Correct the route and support without squeezing the duct; seek help for major rerouting |
| One room stays warm, the bill rises, or dust appears at a return | A duct fault is possible, but the symptom is not a diagnosis | Check the filter, registers and visible ductwork; test the system if the cause remains unclear |
The reason to inspect both sealing and insulation is that they solve different problems. A sealed but bare metal duct can warm the cooled air as it crosses a hot attic. An insulated duct with a disconnected inner liner can dump conditioned air into the attic beneath an apparently intact foil jacket. The ENERGY STAR duct sealing guide recommends sealing accessible leaks and insulating accessible ducts in unconditioned areas.
First, identify the duct and the space around it
Find the supply ducts carrying cooled air toward room registers and the return ducts drawing indoor air back to the air handler. Follow an accessible branch from a main trunk or distribution box to its register boot. Include the air handler connections, plenum, branches, joints and boots in the inspection; a sound straight section does not rule out a leak at either end.
Now identify whether the duct is inside the home’s conditioned envelope. A duct in a vented attic, garage or vented crawlspace faces outdoor-like temperatures and usually needs insulation along its length and at the fittings. A duct in a truly conditioned attic may face a different requirement, but a ceiling cavity is not automatically conditioned merely because it sits above a living room. Local building rules and the assembly design determine the required insulation level.
Take photographs before touching anything. Show the route, the connection, the insulation label if present and the surrounding area in separate pictures. Those details help distinguish a split outer jacket from a disconnected air-carrying liner and make a professional quotation more precise.
Signs your AC ducts may be leaking
Uneven room temperatures, unexpectedly high cooling use, weak airflow, a whistling joint and visible disconnected ductwork justify a closer look. ENERGY STAR lists uncomfortable rooms, high utility bills and kinked flex ducts among common warning signs. None proves a leak on its own: a clogged filter, closed damper, poor equipment performance, undersized duct or inadequate return path can produce similar complaints.
The location of a leak changes what happens. A supply leak in an attic sends cooled air away from the rooms that need it. A return leak can pull attic or crawlspace air into the system, bringing heat and potentially particles from that space. Gaps where a register boot meets the ceiling or floor are also worth checking; air can move through the framing gap even when the grille looks secure.
Dust around a grille is a clue to investigate, not proof that every duct needs cleaning. If a return connection is open to a dusty cavity, fixing that connection addresses an entry route. If you also see wet materials or suspect growth, trace and correct the moisture source; the related guide to water damage in an attic helps with the broader building inspection.
A safe homeowner inspection, step by step
- Start indoors. Confirm that supply registers and return grilles are unobstructed, the filter is installed correctly, and the thermostat is calling for cooling. Note which rooms have a problem rather than assuming every branch is affected.
- Inspect accessible ducts with the system off. Use a light to look for detached sections, open seams, bare metal, torn jackets, compressed insulation, crushed flex duct, sharp bends, damp spots and poor support. Stay on safe, supported walking surfaces; attic ceiling material is not a walkway.
- Check visible connections with the fan running. At a reachable supply joint, feel for a stream of air without reaching into equipment or rotating parts. A small strip of tissue held near the outside of a joint may move when air escapes; it is only a clue, because nearby airflow can also move it. Return leaks are harder to interpret with this method.
- Record the precise location. Note whether the suspected fault is in metal duct, the flex duct’s inner liner, the insulation layer, the outer jacket or the register-to-ceiling junction. A photograph from a second angle often reveals which layer is affected.
- Stop if access or materials are uncertain. Do not step between attic framing, disturb unidentified older insulation, open an electrical enclosure or work next to a hot flue. Ask a qualified contractor to inspect concealed or unsafe sections.
Avoid relying on incense or smoke near insulation, stored materials or combustion equipment. The visual and tissue checks help prioritize a repair, but they do not measure the duct system’s leakage. A contractor can use a calibrated duct pressure test, inspect supply and return connections and check delivered airflow when a reliable answer matters.
Duct Reality Check
Separate likely air leaks, missing insulation, airflow restrictions and moisture clues. Get a practical inspection order for your home.
No score or invented savings estimate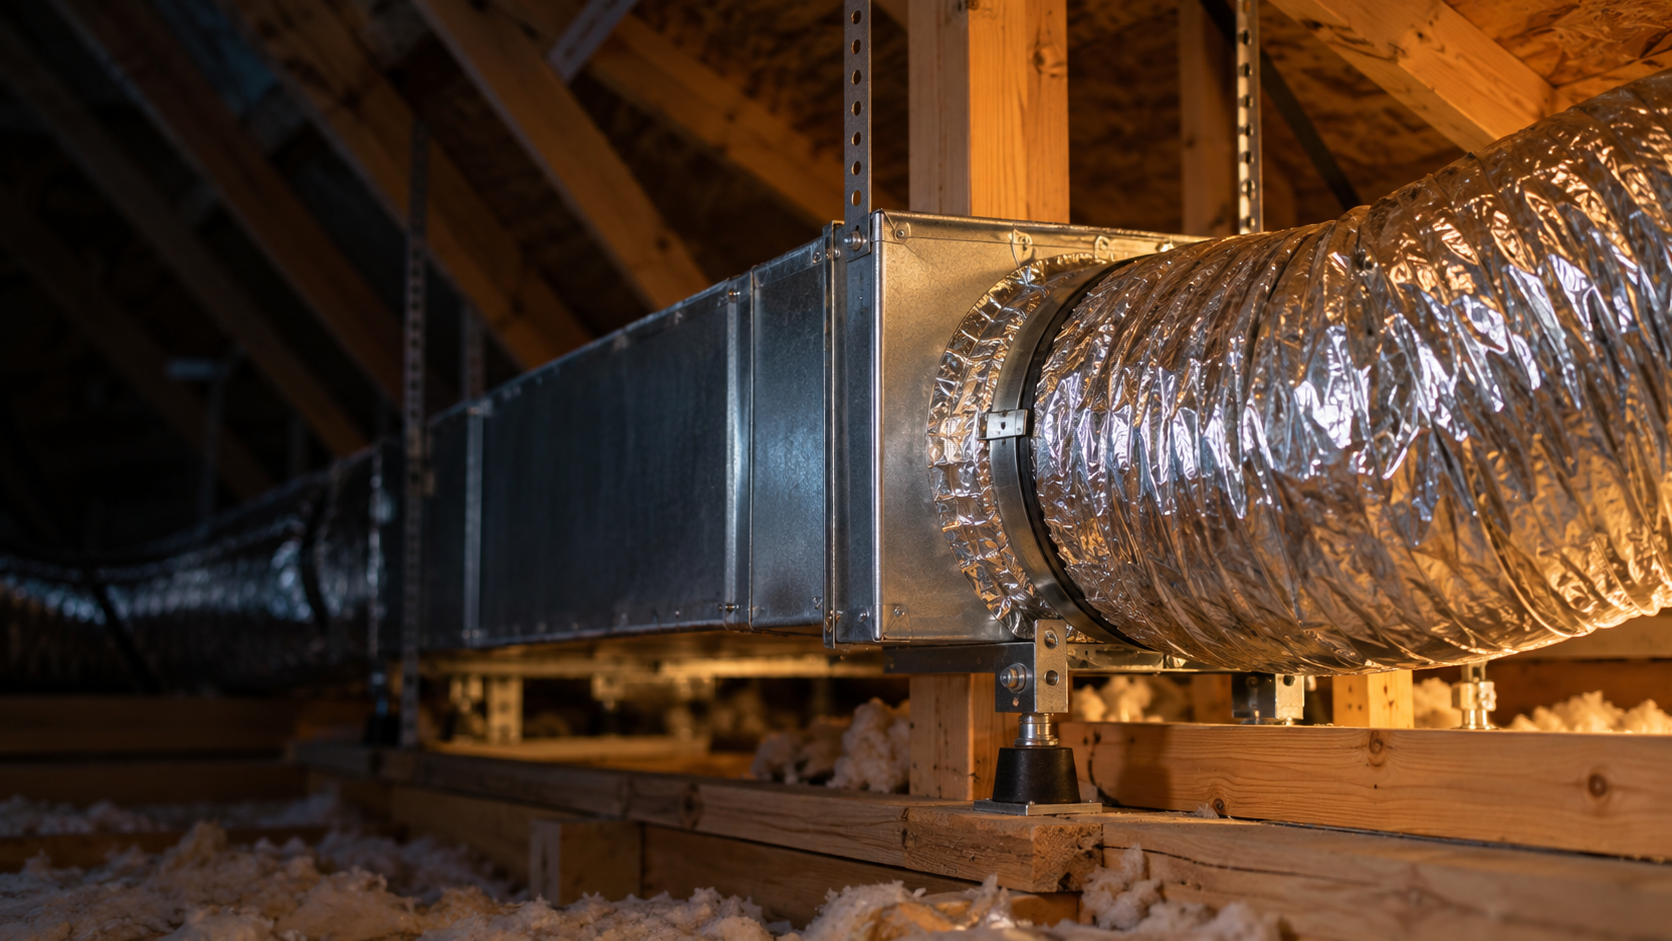
What to check next
This guide cannot confirm duct tightness, the installed R-value or the cause of a room's poor airflow. A calibrated duct leakage test and airflow assessment can resolve uncertain or hidden problems.
How to tell whether the ducts are insulated well enough
Check the full run, including the fittings
On rigid metal duct, look for a continuous duct wrap with its foil-faced vapor retarder on the outside. Check around elbows, branch takeoffs, junction boxes and register boots, where straight sections may be covered while fittings remain exposed. The insulation should sit against the duct without missing patches or being cinched so tightly that its thickness is crushed.
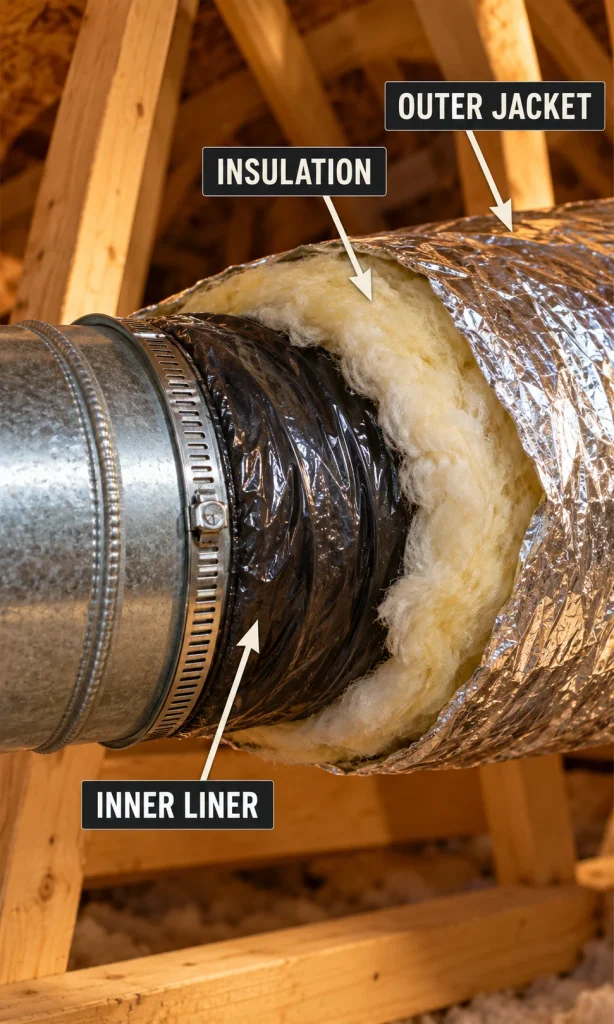
Insulated flexible duct has several layers: an inner air-carrying liner, insulation around it and an outer jacket that acts as a vapor retarder. A silver outer surface by itself says little about the insulation’s actual R-value, condition or continuity. Read an intact product label or installation documentation if available, and check that the insulation and outer jacket cover each connection completely.
Verify the R-value and watch for moisture
R-value is the rated resistance to heat flow, not a visual grade. The appropriate minimum depends on the adopted local code, whether the duct is supply or return, its diameter, whether the space is conditioned and any applicable efficiency program. As a U.S. benchmark, the Department of Energy’s Building America guidance for sealed and insulated flex ducts describes R-8 supply ducts and R-6 return ducts in unconditioned spaces under an older model-code provision; its current guidance directs installers to verify the applicable code or program requirement. Do not treat R-6 or R-8 as a universal answer for every house.
Condensation is a separate reason to take gaps seriously in humid climates. Warm, moisture-laden air can contact a cold duct surface where insulation or the vapor barrier is missing, allowing water to form and wet nearby material. DOE’s flex duct installation job aid calls for a continuous vapor barrier, sealed insulation seams and covered fittings. If you find active dripping or wet insulation, resolve the source and have damaged materials evaluated before covering them back up. The guide to moisture meter readings after water damage explains why a single dry reading cannot settle the condition of a damp assembly.
Why the order matters: seal first, then insulate
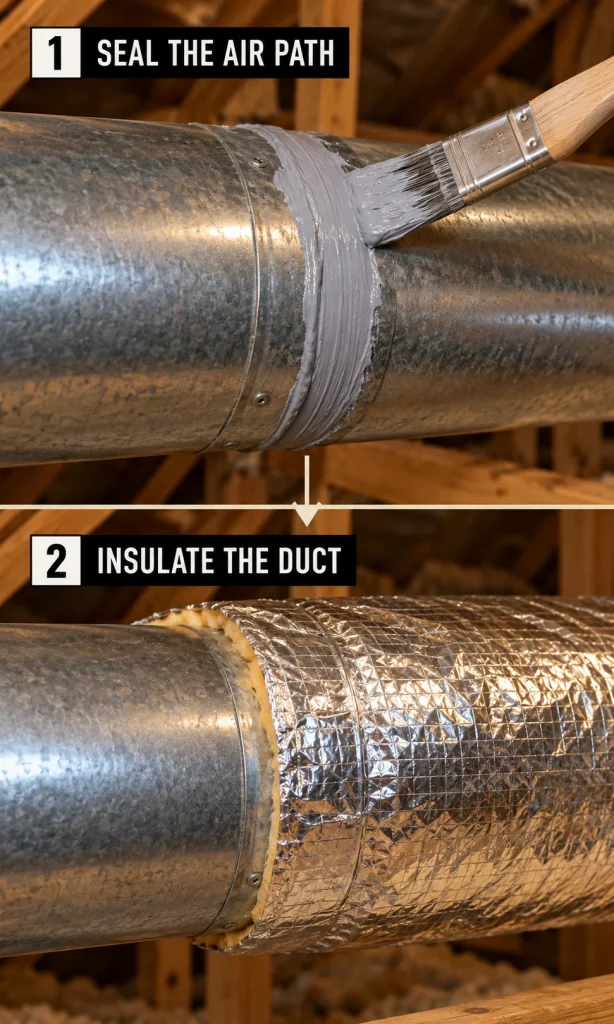
The air barrier is the inner duct or metal shell and its connections. The outer insulation slows heat transfer; its foil or plastic jacket helps keep water vapor away from cold surfaces. Covering an open metal joint with insulation may hide the leak without fixing it. Taping a torn outer flex jacket while its inner liner has come off a collar can create the same false sense of completion.
For metal duct, expose the joint safely, fasten or repair the connection as needed, clean and dry the surface, seal the seam with a suitable duct mastic or correctly rated tape, and let the seal cure according to its instructions. Then apply the specified duct wrap so its rated thickness is preserved and seal the outer facing’s seams. Building America’s metal duct installation guidance describes sealing the metal joints before wrapping and covering fittings as well as straight runs.
For flex duct, the order is more particular: reconnect and mechanically secure the inner liner to the collar, seal the inner connection with a product approved for that assembly, pull the insulation back over the fitting, and close the outer jacket to restore the vapor barrier. A damaged inner liner, crushed run or missing collar may need replacement rather than another layer of tape. The Building America flex duct detail illustrates these separate connections.
Mastic, foil tape and aerosol sealing: which repair fits?
| Method | Best use | Limit |
|---|---|---|
| Duct mastic | Accessible seams and properly secured connections when the product suits the duct material | It cannot reconnect a detached branch by itself; surface preparation and cure matter |
| Metal-backed tape rated for the specific duct use | Clean, dry joints or vapor-barrier seams where the product listing and installation instructions permit it | Ordinary household cloth-backed “duct tape” is not a durable substitute |
| Mechanical collar and tensioned band, plus approved sealant | Flex duct inner liner that must be attached to a fitting | Taping only the outer jacket leaves an inner disconnection unresolved |
| Professional aerosol duct sealing | Selected inaccessible leakage after inspection and preparation | It does not straighten crushed duct, replace wet insulation, correct undersizing or fix a disconnected section without access |
Do not assume that anything sold as “foil tape” is approved for every duct joint. Product listing, substrate, cleanliness and installation method all matter; UL 181A and UL 181B markings address different duct applications. ENERGY STAR advises against ordinary household duct tape because it does not last well on ducts. When a connection is loose, restore its mechanical support before sealing the air path.
Flex ducts in attics: the failures that get missed
A torn jacket does not reveal the inner connection
A split silver jacket is easy to see, but it may conceal a sound inner liner or a failed one. Lift or open the outer jacket only if the material and access are safe and the repair is within your ability. Inspect the actual inner connection at the boot or plenum; a zip tie around the outer insulation cannot substitute for a secured inner liner.
Airflow and moisture need separate checks
A tight bend, excess length piled in loops or a strap that pinches the duct can reduce airflow even after every seam has been sealed. Building America’s guide to flex duct routing explains how bends and sag increase resistance. Before paying to reseal a hot bedroom’s branch, ask whether the branch is crushed or poorly routed and whether the room receives the airflow it requires.
Wet insulation deserves its own investigation. Sealing the jacket over damp material traps a problem you have not solved. Check for an uncovered cold fitting, an open vapor-barrier seam, a roof or plumbing leak, and an air leak introducing humid air. A professional can determine whether a damaged section needs replacement and whether another moisture source is present.
Which work is reasonable to do yourself?
Accessible, sound metal seams and small, straightforward insulation gaps may suit a competent homeowner who follows the product instructions and can work safely. Photograph the connection, buy materials intended for that duct type, and keep sealant out of the air stream unless the product permits that use. After the repair, run the system and check for a newly noisy or weak branch.
Call an HVAC contractor when ducts are hidden, a flex liner is detached, a branch is badly kinked or crushed, insulation is wet, condensation recurs, or a room stays uncomfortable despite visible repairs. Ask for an inspection of both supply and return paths, a proposed repair at each fault, and airflow verification when comfort is the complaint. If testing is appropriate, request the measured duct leakage before and after the work and ask what the numbers include; leakage to outdoors and total system leakage are different measurements.
Be especially cautious where fuel-burning appliances share the area. Pressure changes can affect combustion venting in some homes, so a qualified professional should evaluate relevant safety conditions. ENERGY STAR’s contractor guidance calls for checking gas or oil appliance backdrafting and conducting combustion safety testing after duct sealing. Suspected asbestos-containing material should be left undisturbed and assessed by an appropriate professional; the EPA advises leaving suspect material alone.
What benefits should you expect, and what might they cost?
Sealing a substantial leak can deliver more conditioned air to the intended rooms, while properly insulating an exposed run reduces unwanted heat gain and condensation risk. The actual result depends on where the duct sits, how large the leak is, the amount of bare surface, climate, system operation and whether another airflow problem remains. An airtight but undersized or crushed branch will still perform poorly.
There is no honest universal price for “seal and insulate the ducts.” A few accessible joints and a full attic replacement have very different labor, material and testing requirements; local prices also vary. Request an itemized quote that separates connection repairs, insulation, damaged duct replacement, access work and post-repair testing. Compare the specified R-value and materials, the number and location of connections repaired, and how the contractor will verify the outcome, rather than accepting a promise of a fixed percentage saving.
Quick homeowner checklist
- Find the route: Identify the supply branches, returns, boots and ducts running through unconditioned spaces.
- Look for open air paths: Photograph disconnected sections, holes and suspect joints; check reachable supply connections with the fan running.
- Check every insulation layer: Look for bare fittings, torn outer jackets, gaps and crushed wrap; verify the labeled R-value where possible.
- Check airflow restrictions: Note tight bends, pinched supports, sagging runs and rooms with weak delivery.
- Check moisture: Treat dripping or wet insulation as a problem to investigate before covering it.
- Choose the next action: Repair accessible sound joints safely, or request leakage and airflow testing for hidden or persistent problems.
Compare Local Home Specialists Near You
Tell us what kind of help you need, then compare nearby businesses by location, Google rating, review volume and contact options.
HomeFix Local Match
Turn a home problem into a practical local hiring decision. Check the clues, see the specialist types that fit, open focused surrounding-location searches, then compare the strongest three before you call.
 YOUR PROBLEM
YOUR AREA
COMPARE 3
✓ Ready to compare
YOUR PROBLEM
YOUR AREA
COMPARE 3
✓ Ready to compare
What is happening?
Choose the closest problem type, then check every clue that applies. Your selections change the specialist order.
Where should the search focus?
Use Google’s “near me” context or enter the area you actually want a specialist to serve.
Simple local search: open nearby Google results, choose the businesses that look suitable, then compare your best three here before you call.
Problem snapshot
Who should you call first?
These are the specialist types most likely to fit the clues you selected.
Search around your location
Compare your top three
Use the same factors for each option so a high star rating does not hide a weak scope, poor diagnosis, missing credentials or unclear aftercare.
Comparison result
Your result combines the Google signals you entered with the practical hiring checks you completed.
Questions to ask every finalist
Use the same questions with each shortlisted business so the comparison stays consistent.
Frequently asked questions
Can I tell whether my AC ducts leak without special equipment?
You can find obvious holes, detached sections and some moving air at accessible joints. A tissue held near a joint may help locate a strong supply leak, but airflow around it can mislead you and return leaks may be less obvious. A calibrated duct leakage test gives a better measure of how much the system leaks.
Should I seal ducts before adding insulation?
Yes. Seal and secure the air-carrying duct and its joints first, then restore continuous insulation and the outer vapor barrier. On flex duct, this includes the inner liner at the collar; wrapping only the outside can hide a disconnection.
Is R-6 or R-8 right for attic AC ducts?
There is no single answer for every location and installation. R-8 is a common benchmark for supply ducts in unconditioned U.S. attics, while some older model-code provisions allowed R-6 for returns. Check your adopted local code, duct type and project requirements before choosing a product.
Does foil-faced duct insulation mean the duct is sealed?
No. The foil facing is normally part of the insulation’s outer vapor barrier, while the air-carrying connection lies beneath it. A neat silver jacket can cover a loose liner or an unsealed metal seam, so inspect the joint itself where safe and accessible.
Can I use ordinary duct tape on HVAC ducts?
Ordinary cloth-backed household duct tape is a poor choice for a lasting air seal. Use duct mastic or a tape approved for the specific duct material and joint, following the manufacturer’s surface and installation instructions. Secure a loose duct mechanically before applying sealant.
Will sealing the ducts fix a warm bedroom?
It may help if that branch leaks enough air to reduce delivery, but a warm room can also result from a crushed duct, inadequate airflow, a closed damper, heat gain through the room or an equipment problem. Inspect the branch and ask for airflow testing if the cause is unclear. Correcting the actual restriction or load matters more than sealing a sound joint.
What if a flex duct’s outer jacket is torn?
Check whether the inner air-carrying liner is still sound and securely attached. If it is, restoring the insulation and outer vapor barrier may be enough; if the liner is torn or disconnected, repair or replace that air path first. Repeated moisture or wet insulation needs further investigation.
The next move
Inspect the ducts you can reach and sort what you find into air leak, insulation gap, airflow restriction or moisture problem. Seal sound accessible joints before covering them, and keep insulation continuous without crushing flex duct. If the system is hidden or a room remains uncomfortable, get a contractor to test leakage and airflow so the repair targets the fault actually affecting your home.