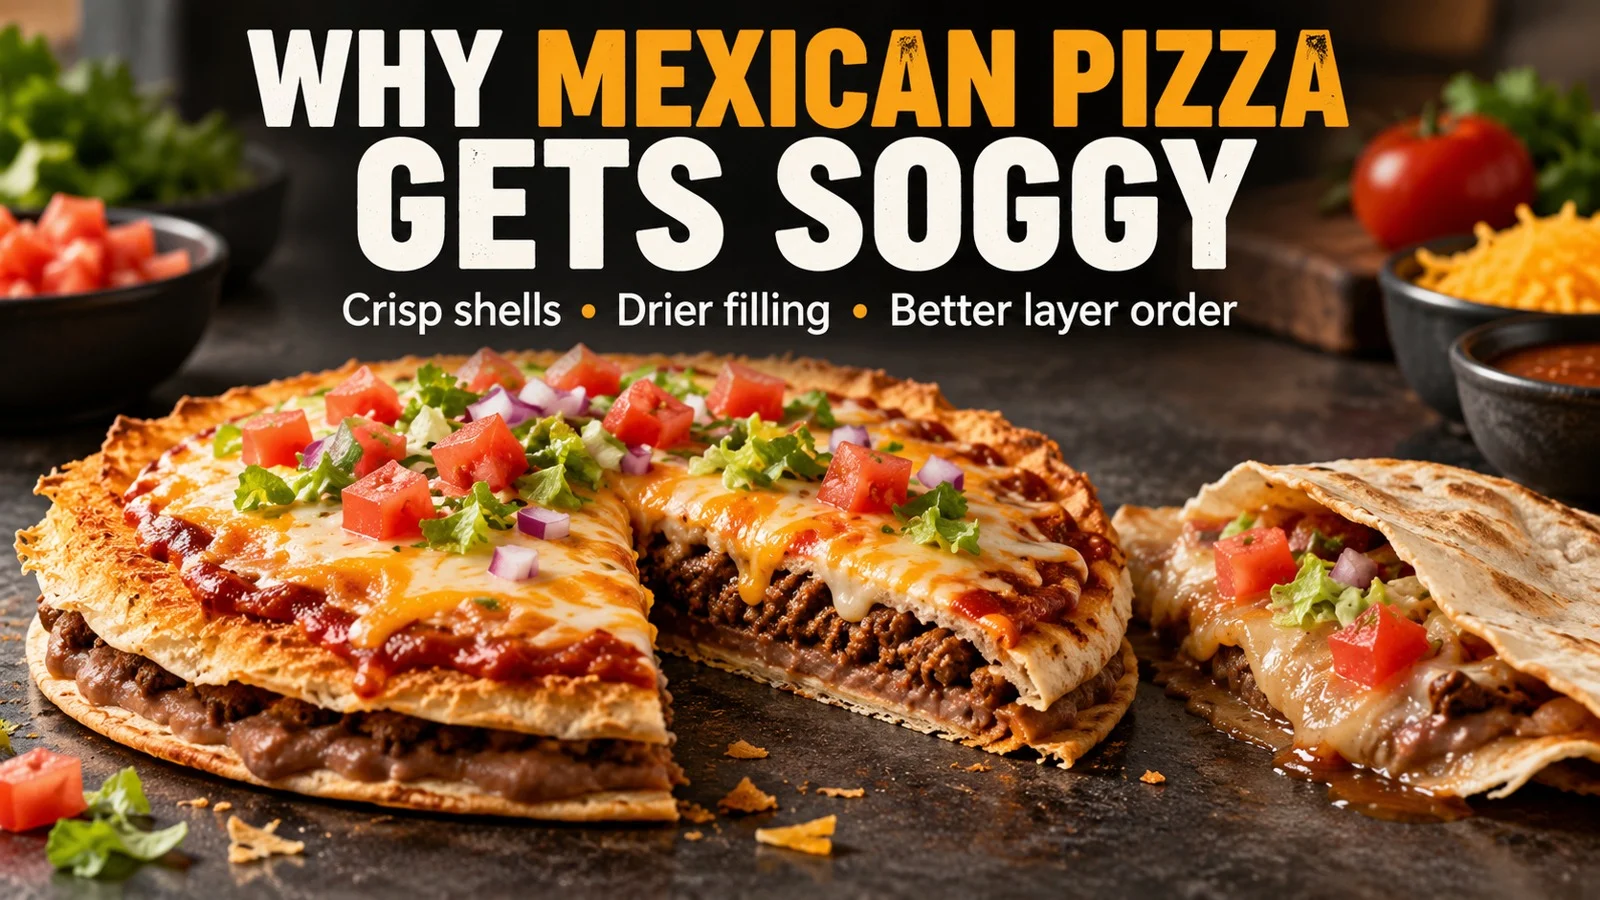
Homemade Mexican pizza gets soggy when moisture from beans, meat juices, sauce, or trapped steam reaches the crisp tortilla shells. Start with a shell that is rigid before topping, reduce free liquid in the filling, and assemble close to serving; a browned tortilla that still bends needs attention first.
The quickest way to locate the problem is to check the shell before and after assembly. If it is already leathery, change the shell preparation. If it starts crisp and softens beneath the beans, change the filling and holding sequence before adding more oil or extending the final bake.
Why this is a shell problem, not a dough-crust problem
Taco Bell’s Mexican Pizza description identifies a double flour-tortilla shell with a bean-and-beef center and sauce, cheese, and tomatoes above it. A homemade version has the same broad moisture challenge, even when the ingredients differ. Advice about fermenting dough or baking a thick yeast crust therefore misses the part that needs fixing here.
Crispness depends on a dry, rigid structure. The Exploratorium’s explanation of crust formation describes surface drying as a key part of that process. Applied to this thin-shell build, the practical implication is straightforward: moisture returning from a wet topping can soften the shell, even after successful crisping.
Find the first point of failure
| What you notice | Likely issue | First change |
|---|---|---|
| Bends before topping | The shell is not fully crisp or has softened during holding. | Finish drying it; rest separately on a rack. |
| Pale and oily after frying | Heat, crowding, or insufficient crisping may be involved. | Check oil temperature and test one tortilla. |
| Large puff with chewy patches | Uneven contact and steam pockets during baking. | Dock the tortilla and expose both sides to heat. |
| Bottom softens beneath beans | Wet filling contacts the lower shell. | Reduce loose beans and drain cooked meat. |
| Both shells soften under a cover | Trapped moisture and delayed serving. | Keep uncovered and assemble closer to serving. |
These signs suggest where to look; they do not identify one cause with certainty. Tortilla thickness, formulation, oil, and equipment all change the result. Use one small trial shell to separate the preparation problem from the filling problem, rather than altering the whole batch at once.
Get the empty shell crisp first
Use an untopped shell as your checkpoint. A few brown spots are not enough if the center remains pliable and leathery. Let the shell become safe to handle, then check a spare edge for rigidity; it should resist folding rather than behaving like a soft wrap.
- Frying: check the oil with a thermometer, cook one shell at a time if crowding drops the heat, and watch its texture as well as its color.
- Baking: lightly oil both sides, pierce large steam-pocket areas with a fork before baking, and allow heat to reach both surfaces.
- After either method: rest shells separately on a wire rack until excess surface steam has escaped.
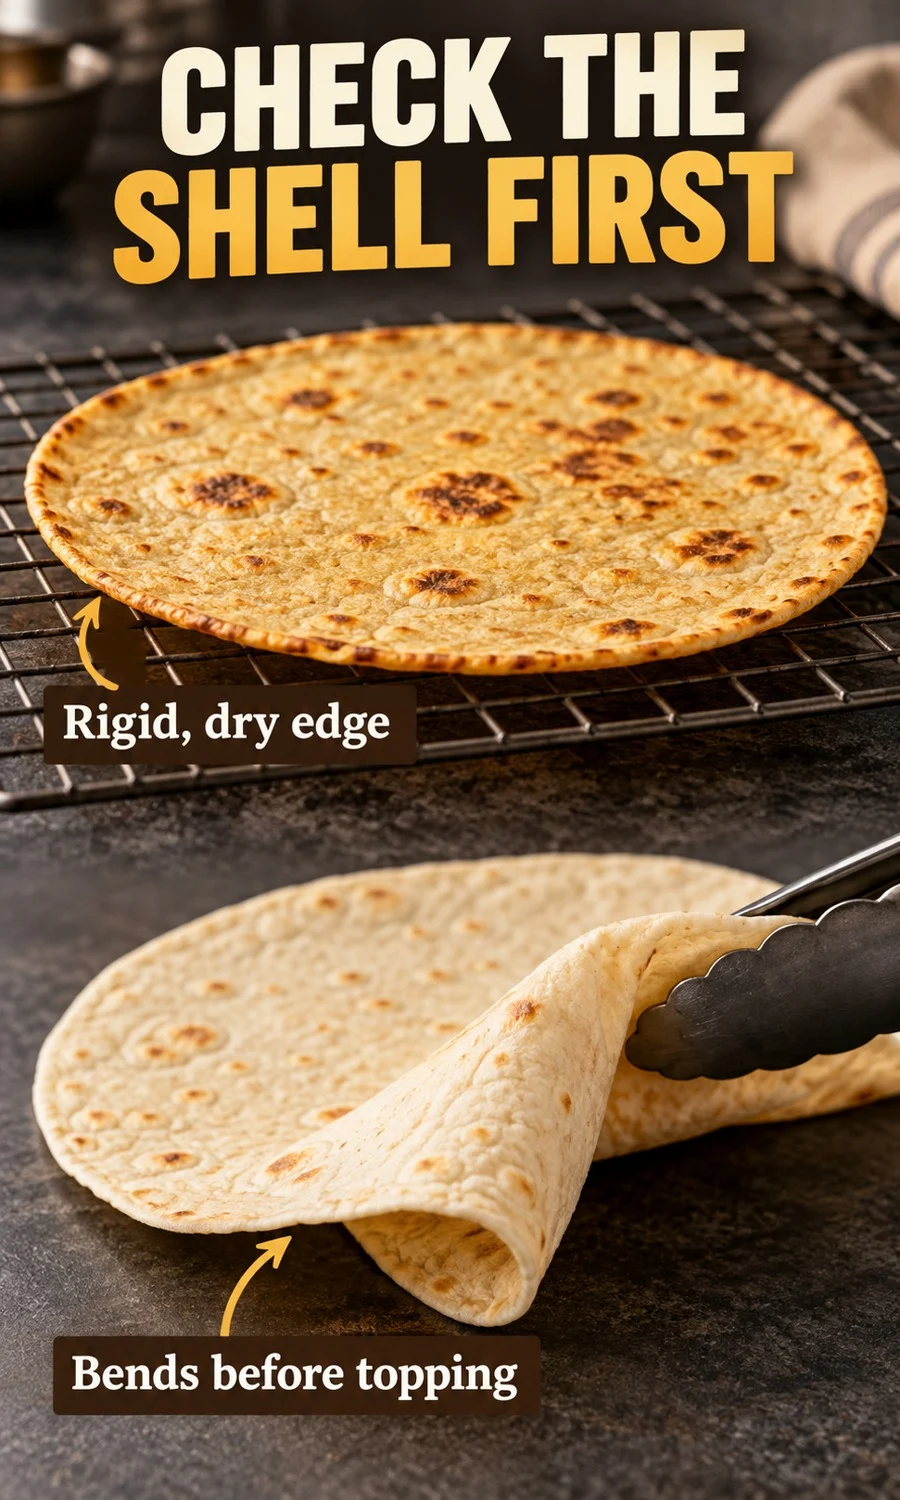
About 350°F / 175°C is a practical starting point for frying a tortilla, not a universal setting that guarantees success. Mission’s corn-tortilla frying instructions use 350°F; flour tortillas need their own texture check because thickness and formulation differ. If the shell darkens before becoming rigid, lower the heat or choose a thinner tortilla rather than continuing until it burns.
Use a stable pan with room above the oil, dry utensils, and tongs suitable for hot oil. Do not add wet ingredients to the oil or leave the pan unattended. If oil smokes or smells rancid, stop and resolve that problem rather than treating it as a shell-crisping adjustment.
Why baked tortillas puff and stay chewy
A tortilla can brown around its edges while a large steam pocket lifts the middle away from the hot surface. That makes the finish uneven and leaves sections that still fold. Docking makes small escape points for steam; it reduces large balloons but does not make a thick, soft tortilla behave exactly like a restaurant shell.
Follow your tortilla or measured recipe’s baking instructions, then inspect the center before adding toppings. A suitable oven-safe rack can help expose the underside, provided the tortilla is supported and does not sag. If using a tray, turn the shell as needed and avoid assuming the first browned side means both surfaces are finished.
The bottom shell meets the wettest filling
Beans and meat juices sit directly against the lower tortilla, while sauce creates a separate moisture contact on the upper shell. A bottom that softens first is therefore a reason to inspect the filling, not proof that the frying oil was wrong. Start by looking for liquid that pools when you tilt the pan or move a spoon through the beans.
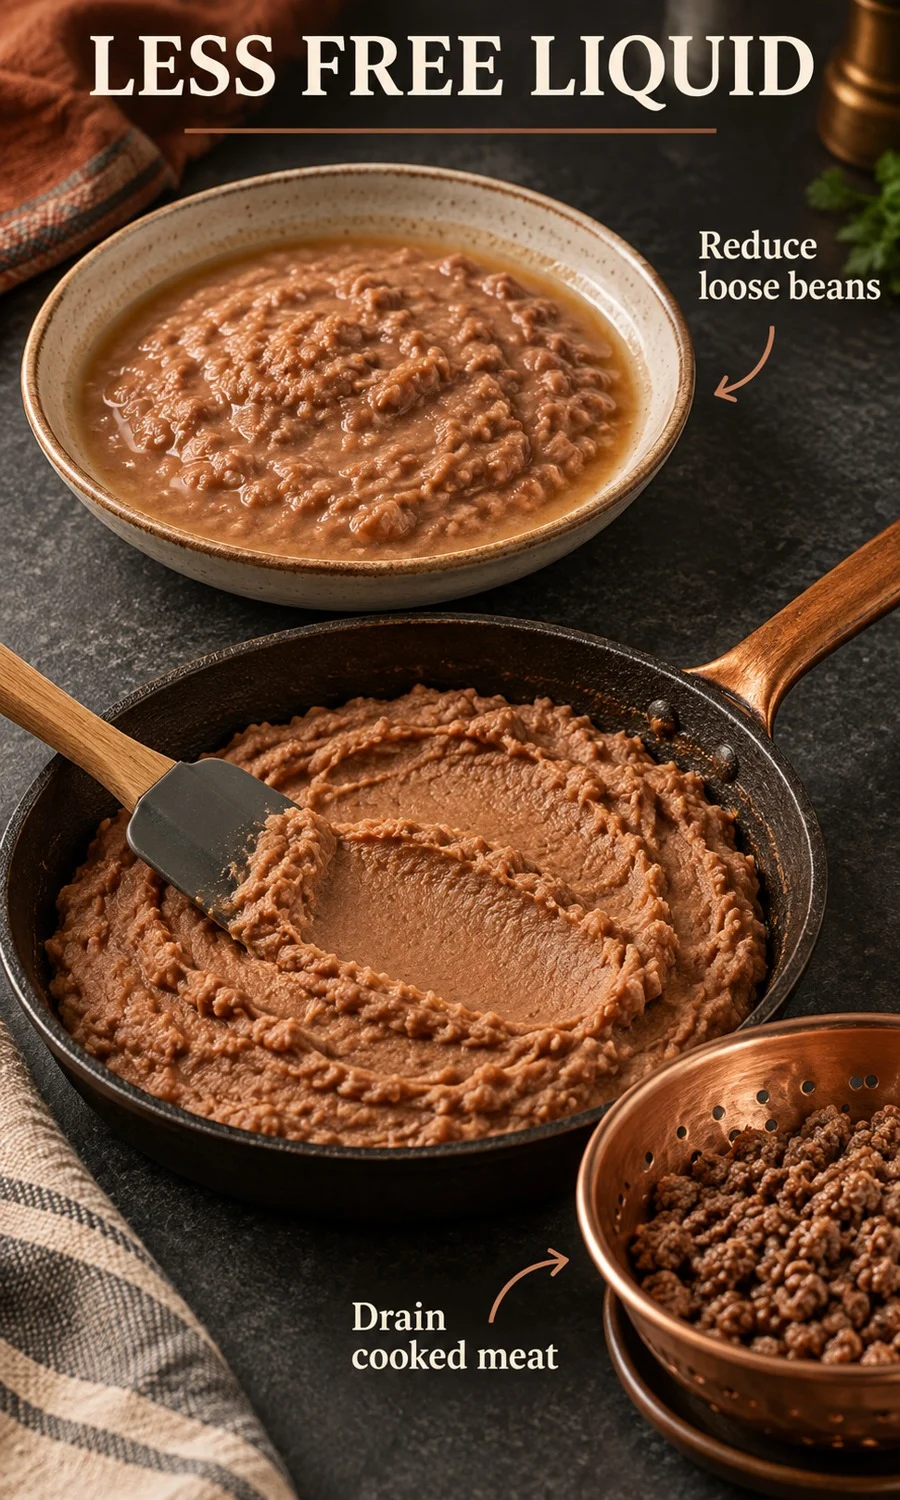
Warm loose refried beans gently in an uncovered pan and stir until they are spreadable rather than pourable. Drain excess juices from fully cooked meat before using it, while retaining enough moisture for an enjoyable filling. Avoid making either component bone-dry: the objective is less free liquid touching the shell, not a dry meal.
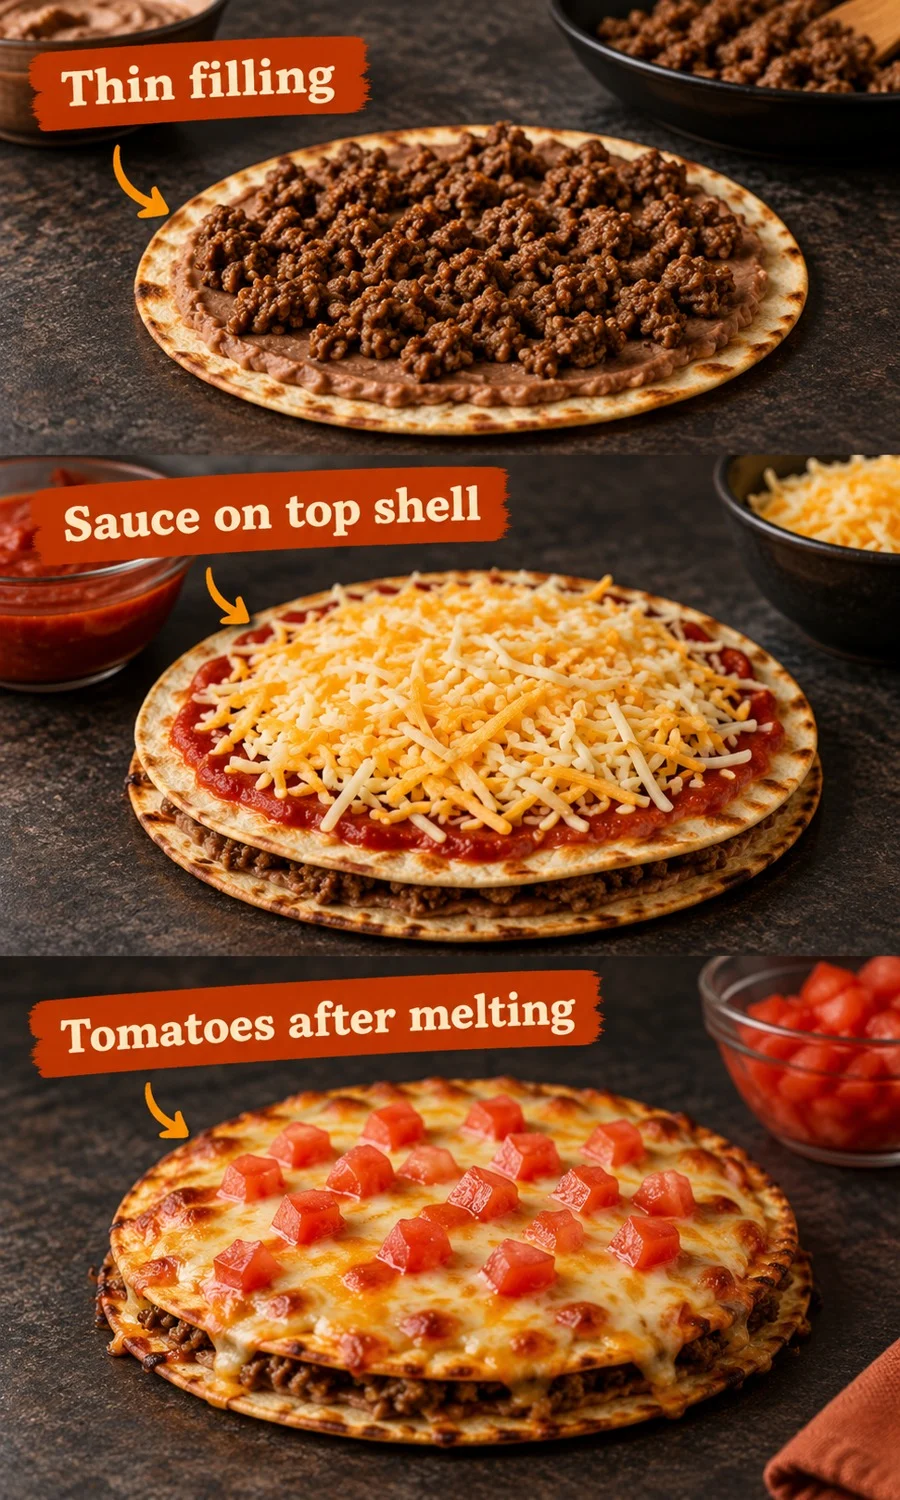
Spread a thin, even bean layer and keep the filling within the shell’s footprint. A thick mound brings more moisture, makes the stack harder to support, and can push the upper shell sideways. For seasoning ideas that do not require adding a watery sauce, the guide to three essential spice blends offers a separate flavor starting point.
Build the layers in a controlled sequence
- Prepare both shells before assembling; keep them separate on a rack.
- Use warm, spreadable beans and drained, fully cooked meat on the lower shell.
- Place the second crisp shell over the filling without pressing hard enough to crack it.
- Put a light layer of sauce and cheese on the upper shell; melt the cheese using your chosen recipe’s finishing method.
- Drain diced tomatoes, add them after the melt, and serve promptly.
A little cheese can help the filling hold together, but it is not a waterproof shield. A thick cheese-and-bean layer can still soften a tortilla and encourage the upper shell to slide. Keep the stack modest, lift it with a wide spatula, and use garnish as a finishing step rather than another wet layer during heating.
Do not steam the crunch away while it waits
A wire rack lets air circulate around an empty shell. Paper towels can blot oil briefly, but leaving shells piled on damp towels or under a cover keeps moisture close to them. Transfer drained shells to a rack and avoid stacking them while they are still releasing steam.
The assembled pizza has a different problem: every extra minute lets wet filling remain in contact with the shell. There is no verified universal ten-, twenty-, or forty-minute crispness limit for this page. For a group meal, prepare components ahead under appropriate storage conditions and assemble small batches near serving time.
Serve wet sides separately so they do not sit against the cut edges. Spicy sesame coleslaw can be a contrasting side, but keep its dressing on its own plate. That choice preserves the dry-shell work without requiring another change to the pizza itself.
Check your next batch with Crisp Layer Studio
Choose when the shell softened, how you prepared it, and whether the filling or holding conditions added moisture. Crisp Layer Studio returns a likely process issue and a short checklist for your next batch. Its suggestions are conditional guidance, not a kitchen test, a safety assessment, or a guarantee of a particular crunch time.
Leftovers need a separate decision
Refrigeration changes an assembled shell because it stays in contact with moist filling. Oven or skillet reheating may improve its surface texture, while a microwave is more likely to leave it pliable. Neither approach makes it equivalent to a freshly crisped, untopped shell; check food safety before pursuing texture.
Follow USDA leftover-storage and reheating guidance: refrigerate perishables within two hours, or one hour above 90°F / 32°C. Keep refrigerated leftovers for three to four days and reheat them to 165°F / 74°C throughout. Discard food that exceeded safe holding limits; a second bake cannot make that batch safe.
Frequently asked questions
Why does the bottom tortilla go soft while the top stays crisp?
The lower shell touches beans and meat juices, so it can receive more moisture than the top. Check for loose beans or pooled meat liquid before changing the shell method. A thin filling layer and prompt serving reduce that contact problem, although they cannot eliminate all softening.
Should I fry or bake Mexican pizza shells?
Either method can produce a usable crisp shell, but the texture and equipment demands differ. Frying needs careful oil-temperature control, while baking needs even drying without leaving chewy patches. Choose the method you can control and judge the untopped shell before assembling it.
Do I have to dock the tortillas?
Docking is most useful when oven-bound tortillas form large bubbles that interfere with even crisping. Pierce the tortilla before cooking rather than reaching over hot oil to puncture it. Small blisters are normal, so the goal is to reduce large pockets rather than create a completely flat surface.
Can I use corn tostadas instead of flour tortillas?
Yes, a ready-made corn tostada is a useful shortcut when you prefer its flavor and brittle texture. It will not reproduce the same flour-shell character, and wet beans can still soften it. Handle it gently and keep the filling light to reduce cracking.
How do I stop refried beans from soaking the shell?
Reduce loose beans until they spread without running, then use a thin layer. Keep excess meat juices out of the filling and assemble near serving time. Beans remain a moist food, so no preparation step makes their contact with a crisp shell moisture-free.
Why does reheating make the shell chewy?
An assembled shell absorbs moisture during storage, and reheating does not remove that moisture evenly. Microwave heating can warm the filling while leaving the tortilla flexible. Use a suitable dry-heat method when possible, verify safe reheating temperature, and expect a different texture from a fresh build.
Your next-batch checklist
- Check the shell before any filling touches it.
- Reduce loose beans and drain cooked meat.
- Keep shells separate on a rack until assembly.
- Use modest layers and add drained tomatoes after the cheese melts.
- Serve promptly, and treat storage safety separately from crispness.