
An attic water-damage follow-up check is a short look for new wetness after the moisture source has been addressed. Five minutes can help you notice a returning problem, but it cannot repair a leak or prove that hidden materials are dry. Start from a safe room-side position, compare the same visible areas, and stop the routine if water, sagging or an electrical hazard appears.
Use this check while following the drying or repair plan for an already assessed problem. If this is your first discovery of water, start with the attic water-damage response and repair sequence; the task here is noticing a change after that initial response, not finding the original source again.
When is a five-minute attic check appropriate?
A short check is appropriate when the source has been addressed, the affected area has been assessed, and you can observe it without entering a hazard. The useful result is a comparison with the previous condition: unchanged, newly changed, or not visible. None of those results is a structural or moisture-clearance certificate.
The phrase “five minutes” describes a manageable observation period, not a deadline for making an unsafe space safe. A repaired roof can still have wet insulation beneath it, and a dry-looking ceiling can conceal damp material. Source control, drying and repair completion are separate jobs; this routine supplements the agreed work rather than replacing it.
Before starting, use these boundaries to decide whether the routine belongs in your situation:
- Continue with observation: the moisture source has been addressed, the ceiling remains intact, and a dry, stable room-side viewpoint is available.
- Arrange prompt reassessment: new wetness, a spreading damp edge, a new musty odor or recurring dripping appears. Do not wait for tomorrow’s scheduled check.
- Keep people clear and obtain urgent help: the ceiling bulges or sags, water is near electrical equipment, or structural damage is suspected. Do not press, puncture or stand beneath the affected ceiling.
- Leave concealed areas unverified: the location is hidden behind insulation, finishes or an unsafe access. Do not move materials just to complete the routine.
Remaining in the occupied room is a valid version of this check. An attic hatch is not a requirement to enter, and an incomplete view is safer than climbing onto unsuitable support. PNNL’s attic assessment guidance identifies damaged framing, hazardous insulation and electrical conditions that require resolution before attic work.
Do not add a daily inspection trip across attic framing. That introduces a new exposure without necessarily improving the comparison. If the relevant repair cannot be seen from an existing safe position, the person responsible for the repair should decide how it will be checked; your room-side observation can still detect a developing problem below.
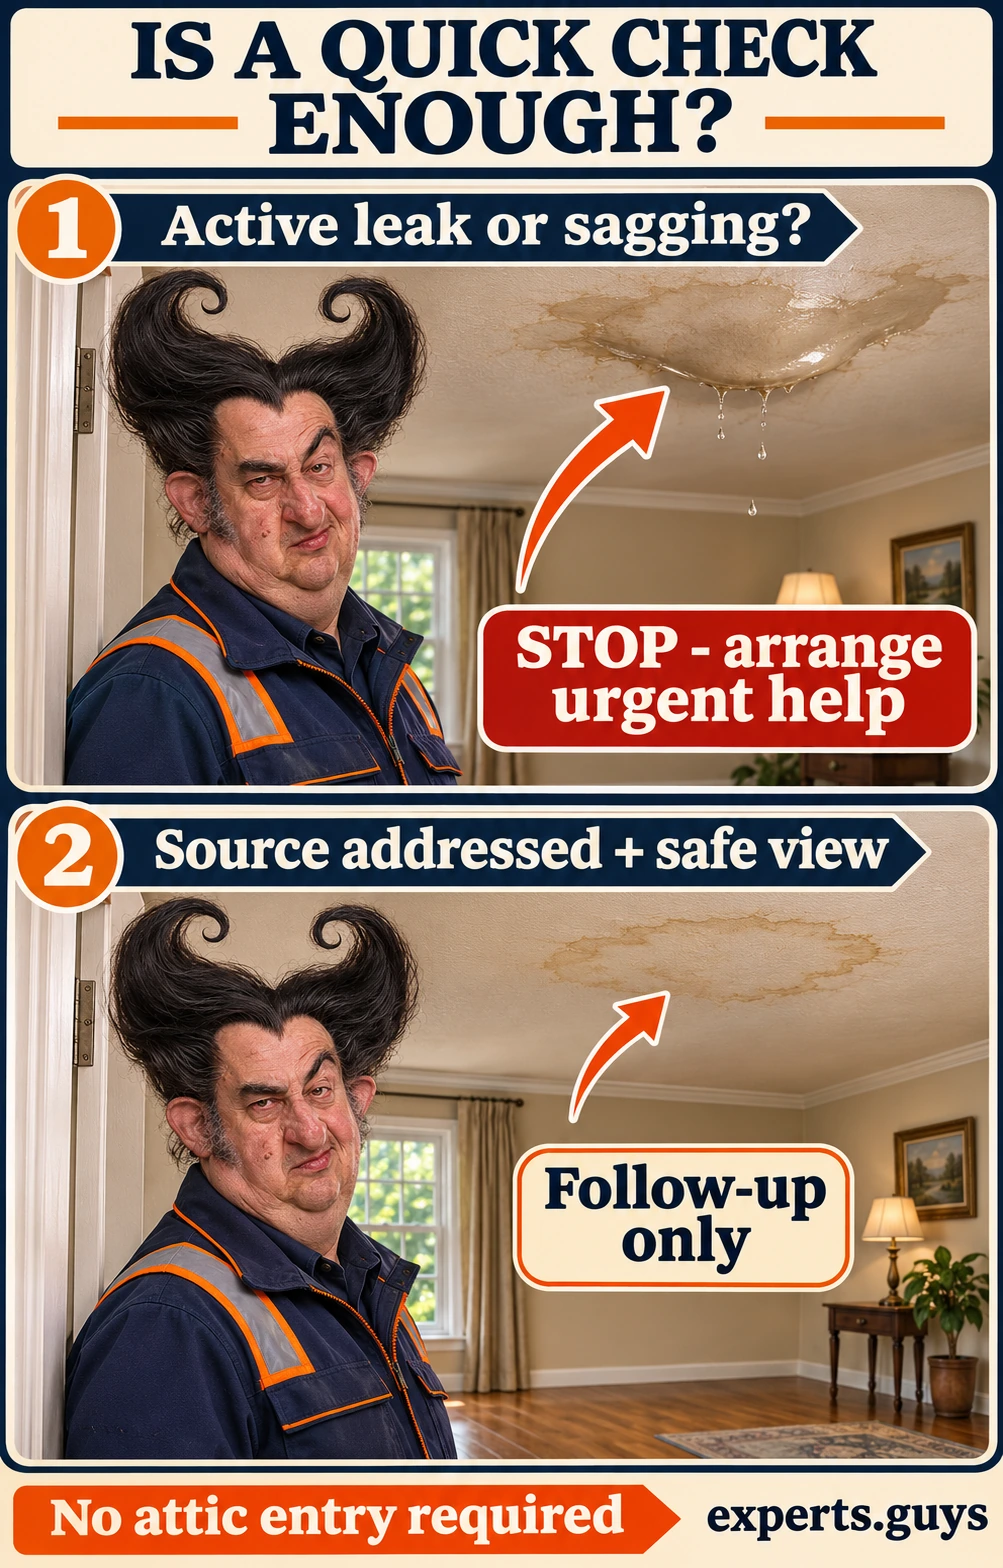
For example, an intact bedroom ceiling beneath a repaired roof can be observed from the doorway while drying continues under an agreed plan. A ceiling that has started to bow is a different situation even if the stain is small. The change in shape overrides the planned five-minute routine.
How do you make the same short check repeatable?
Return to the same safe viewpoint and compare the same visible locations in the same order. This reduces the chance of mistaking a new viewing angle or shadow for a spreading stain. The method is a practical observation aid; it does not measure moisture or establish whether the repair has passed a test.
Set a consistent viewpoint without touching the ceiling
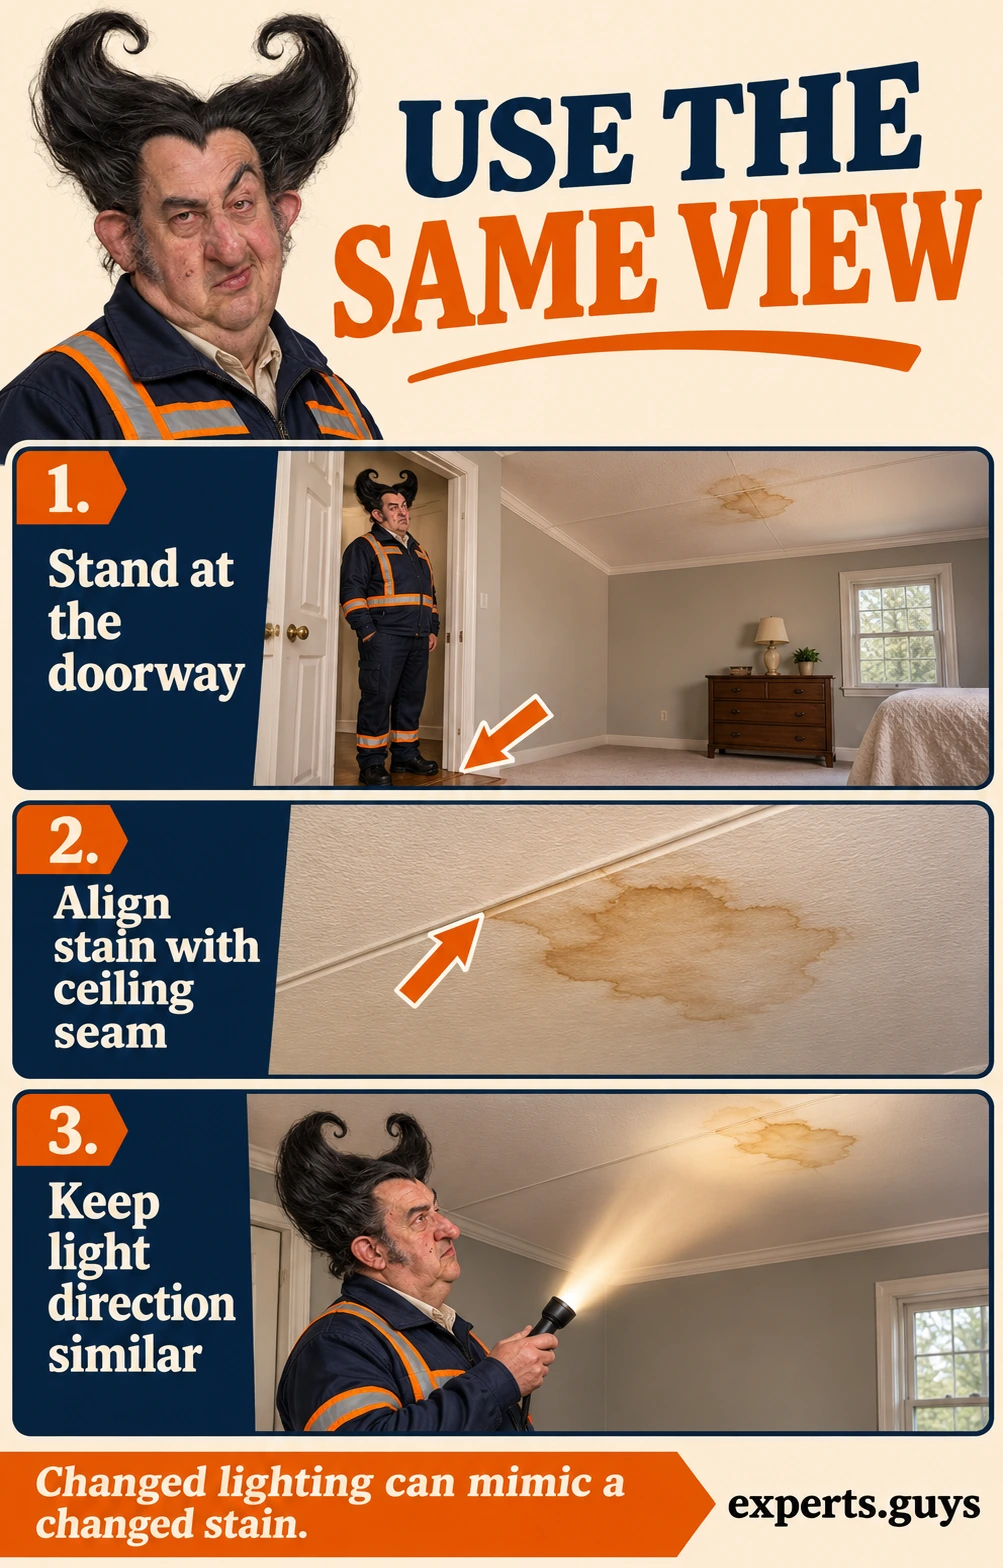
Stand on the dry room floor at a doorway or another stable position outside the affected ceiling footprint. Choose an existing fixed feature, such as a ceiling seam or wall corner, that is visible beside the stain. Look at the stain in relation to that feature rather than relying on its apparent size from a different part of the room.
Keep the room lighting similar when practical. If a flashlight helps, hold it from the same general direction and sweep the visible area without reaching up or moving underneath a suspect patch. A low-angle beam can make surface texture look more dramatic; compare the boundary and any actual beads or drips, not just how dark the shadow appears.
You do not need to draw around the stain, touch it, set up a camera or write a daily log to perform this check. If you cannot remember the previous boundary confidently, treat change as uncertain rather than inventing a comparison. An old photograph or repair record already available may help the repair team, but this routine does not depend on making one.
Compare three locations in one direction
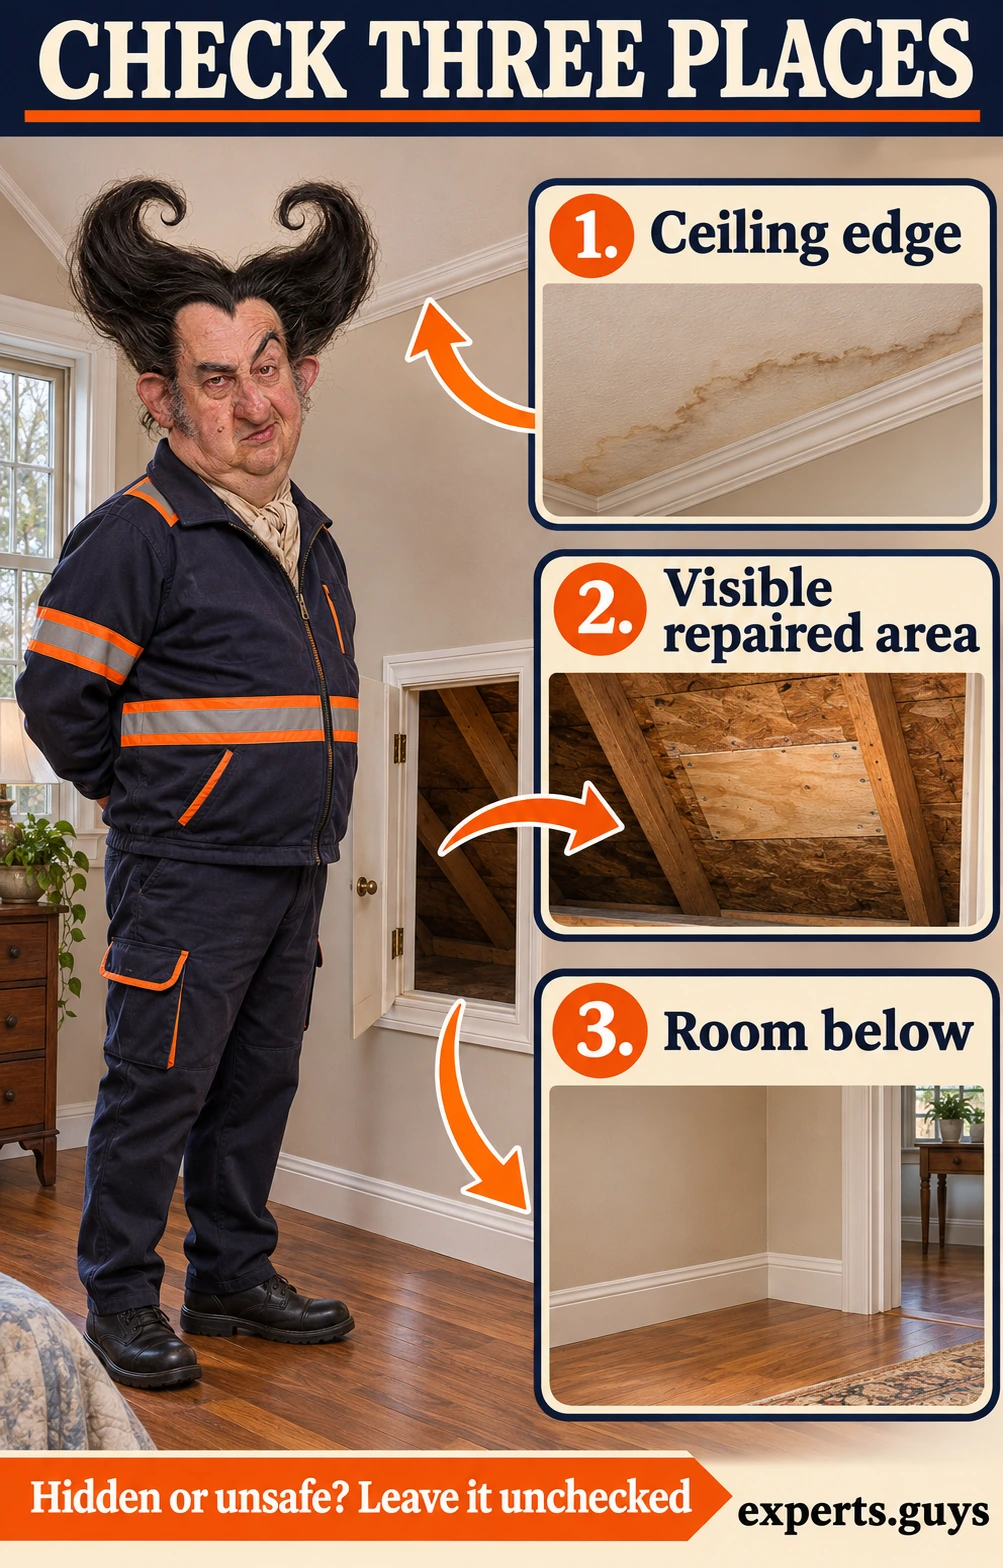
Start with the edge of the affected ceiling area, then look toward the previously affected or repaired location if already visible from safe room-side access, and finish with the occupied-room area below. You are comparing a known route of damage, not following a new drip into the attic. Keep inaccessible sections as “not checked.”
At the ceiling, look for a fresh wet edge, a bead, a new drip or a change in shape. At a safely visible repaired location, look only for obvious renewed wetness; do not pull insulation back or reach past cables. In the room below, look from outside the affected footprint for a new splash, damp patch or water on furnishings that was not there before.
A house with an accessible knee-wall doorway may allow the middle observation from the finished room. A house with only a ceiling hatch may not. In that case, omit the attic view and compare the room-side ceiling and area below; the missing view remains a limitation, not a reason to fetch a ladder.
A fresh lower drip does not tell you where the roof opening is, and an apparently dry upper surface does not rule out water behind it. If new water appears, leave source diagnosis to the separate guide to interpreting attic drip patterns. Repeating that whole investigation during a follow-up check would confuse monitoring with diagnosis.
| Part of the check | Use the time for | Stop or adapt when |
|---|---|---|
| First minute | Confirm the room-side position remains dry and safe. | New sagging, electrical exposure or falling material appears. |
| Next two minutes | Compare the ceiling edge and any already-visible repaired area. | The view requires climbing, reaching or moving insulation. Leave that part unchecked. |
| Next minute | Look at the room below for a new water effect. | Fresh water appears: arrange reassessment rather than continue monitoring. |
| Final minute | Choose the next action from the changed, unchanged or unverified result. | Uncertainty concerns safety or ongoing wetting: get the uncertainty assessed. |
The time split is an editorial aid, not a tested inspection protocol. Finish sooner when there is nothing more safely visible. Do not stretch the routine to reach five minutes, and do not rush an urgent response because the timer has ended.
What changes matter more than stain colour?
Fresh water, a newly wet edge, new deformation and recurring dampness matter more than whether an old brown mark fades. Staining can remain after drying, while some damp materials show little visible change. The comparison therefore asks what is newly happening, not whether the ceiling has returned to its original colour.
Separate an old mark from a new water event
An unchanged, flat stain is compatible with an old event, but appearance alone does not confirm that the assembly is dry. A new bead, drip or wet edge is stronger evidence that liquid water is present now. A spreading mark without an obvious drip is still worth reassessment; you do not need to provoke a leak to make the evidence more dramatic.
Likewise, a dry surface cannot reveal the full condition of insulation, timber joints or enclosed ceiling layers. The Massachusetts guidance on moisture-measuring devices explains that materials may support mold growth without looking visibly wet. Use the dedicated moisture-meter interpretation guide for measurement questions; do not substitute a universal number or a hand-touch test here.
If a new musty odor is noticeable from the occupied room, include it in the reassessment request even if the stain looks unchanged. Do not put your face into an attic opening or sniff insulation to search for an odor. Its presence warrants attention, but its absence cannot establish that concealed materials are dry or free of mold.

Ask whether the repair has faced relevant conditions
Several dry days after a roof repair tell you little about performance in rain. A quiet period is useful observation, but the conditions that previously produced the leak may not have occurred. A check after relevant weather has passed can add information when the room-side position remains safe; it still cannot prove that every possible wind or rainfall condition has been tested.
For an equipment-related problem, the relevant condition may be normal operation rather than weather. Continue only the operating arrangement agreed with the repair provider. Do not restart suspect equipment, block a drain or deliberately run water to challenge a repair yourself. If the original event is unclear, ask which normal conditions matter for the follow-up rather than assuming every attic problem is a roof leak.
Consider an illustrative example: a roof penetration has been repaired on a dry Monday and the ceiling looks unchanged on Tuesday. That observation does not test rain entry. If ordinary rain later occurs and the safely visible areas remain unchanged, the observation is more relevant to recurrence, but concealed drying and structural condition still need their own verification.

This distinction prevents two opposite mistakes: declaring success before the relevant exposure, and treating every permanent stain as proof of a failed repair. The attic drip-pattern guide explains why the timing of water matters when reassessing a source. This page keeps the narrower question: what has changed since the work, and under which conditions?
When should you recheck, escalate or end the routine?
Escalate when a new hazard or renewed wetting appears; continue the agreed follow-up when the visible condition is unchanged but completion remains unverified. End the temporary routine in line with the repair and drying sign-off, rather than after an arbitrary number of clear days. There is no universal daily-check schedule that certifies an attic as dry.
The EPA’s cleanup-completion guidance emphasizes correcting the moisture problem and revisiting the area for recurring damage. A brief visual routine is a way to notice a return, not a replacement for that completion judgment. Where materials were wet, decisions about covering or refinishing them need evidence about the materials, not just a cleaner-looking ceiling.
| Your observation | What it means for this routine | Next action |
|---|---|---|
| Water near electrics, sagging or suspected structural movement | A potential hazard takes priority. | Keep people away; obtain urgent appropriate assistance. Do not approach wet electrical controls. |
| New drip, wet edge or recurring dampness | The problem needs reassessment. | Contact the relevant repair or restoration provider promptly; do not wait for the next daily check. |
| No obvious change, but source or drying status is uncertain | The result remains unverified. | Clarify the unresolved source or material condition and the follow-up arrangement. |
| No obvious change after relevant conditions, with source correction and drying verified | The temporary check may have completed its purpose. | Follow the agreed sign-off and normal property-maintenance schedule. |
When requesting reassessment, give the affected location, the new observation and the condition under which it appeared. “The bedroom ceiling has a new bead after rain” is more useful than “the attic still looks bad.” Add whether the source had been repaired and whether concealed drying had already been verified. You can relay this directly; a written diary is not required.

Do not let a daily habit become a reason to postpone drying. EPA guidance calls for prompt drying of water-damaged areas and items, generally within 24–48 hours to help prevent mold growth; this is not a safe waiting allowance or a promise that every assembly can dry in that time. If water remains, follow the active drying response now rather than completing another observation cycle.
Before painting, ask whether the source correction and affected-material drying have both been verified. Paint can hide the visible comparison point without resolving what is behind it. For the larger sequence of removal, drying and reconstruction, return to the attic damage and restoration guide; those are separate tasks from this short follow-up.
Compare Local Home Specialists Near You
Tell us what kind of help you need, then compare nearby businesses by location, Google rating, review volume and contact options.
HomeFix Local Match
Turn a home problem into a practical local hiring decision. Check the clues, see the specialist types that fit, open focused surrounding-location searches, then compare the strongest three before you call.
 YOUR PROBLEM
YOUR AREA
COMPARE 3
✓ Ready to compare
What is happening?
Choose the closest problem type, then check every clue that applies. Your selections change the specialist order.
Where should the search focus?
Use Google’s “near me” context or enter the area you actually want a specialist to serve.
Simple local search: open nearby Google results, choose the businesses that look suitable, then compare your best three here before you call.
Problem snapshot
Who should you call first?
These are the specialist types most likely to fit the clues you selected.
Search around your location
Compare your top three
Use the same factors for each option so a high star rating does not hide a weak scope, poor diagnosis, missing credentials or unclear aftercare.
Comparison result
Your result combines the Google signals you entered with the practical hiring checks you completed.
Questions to ask every finalist
Use the same questions with each shortlisted business so the comparison stays consistent.
Frequently asked questions
Can I do this check without entering the attic?
Yes. Use a dry, stable room-side viewpoint and observe the ceiling and occupied area below. An attic area you cannot safely see remains unchecked. Do not open unfamiliar access or climb just to complete the routine.
Should I check the attic every day forever?
No. Daily observation may fit a temporary follow-up arrangement, but it is not a universal maintenance requirement. Use the repair provider’s schedule and relevant events; stop the temporary routine when the source and affected materials have been properly addressed.
Does an old brown stain mean the leak is still active?
Not necessarily. A stain can remain after drying. New water, a fresh wet edge or a change in shape deserves attention, while an unchanged stain alone cannot prove either current leakage or complete dryness.
Can I press the ceiling to see whether it is soft?
Do not press, puncture or push a suspect ceiling. Observe it from outside the affected area. Bulging, sagging or other deformation is a reason to keep people clear and arrange assessment.
What if nothing changes but the source was never found?
The result remains unresolved. A quiet interval does not establish that the source has stopped, especially if the relevant weather or operating condition has not recurred. Arrange source assessment rather than using the five-minute check as a substitute.
Can a five-minute check tell me when to paint?
No. Source correction, drying and any necessary material repairs must be addressed before refinishing. A visual check can reveal a new problem, but it cannot certify concealed layers or provide a universal repainting date.
Summary: compare change, then choose the next action
Use the same safe position, compare the same visible locations and respond to what has changed. Leave hidden areas unverified, treat new wetness promptly, and separate a quiet-looking ceiling from verified drying. Five minutes can support a repair follow-up; it cannot replace the repair or its completion checks.