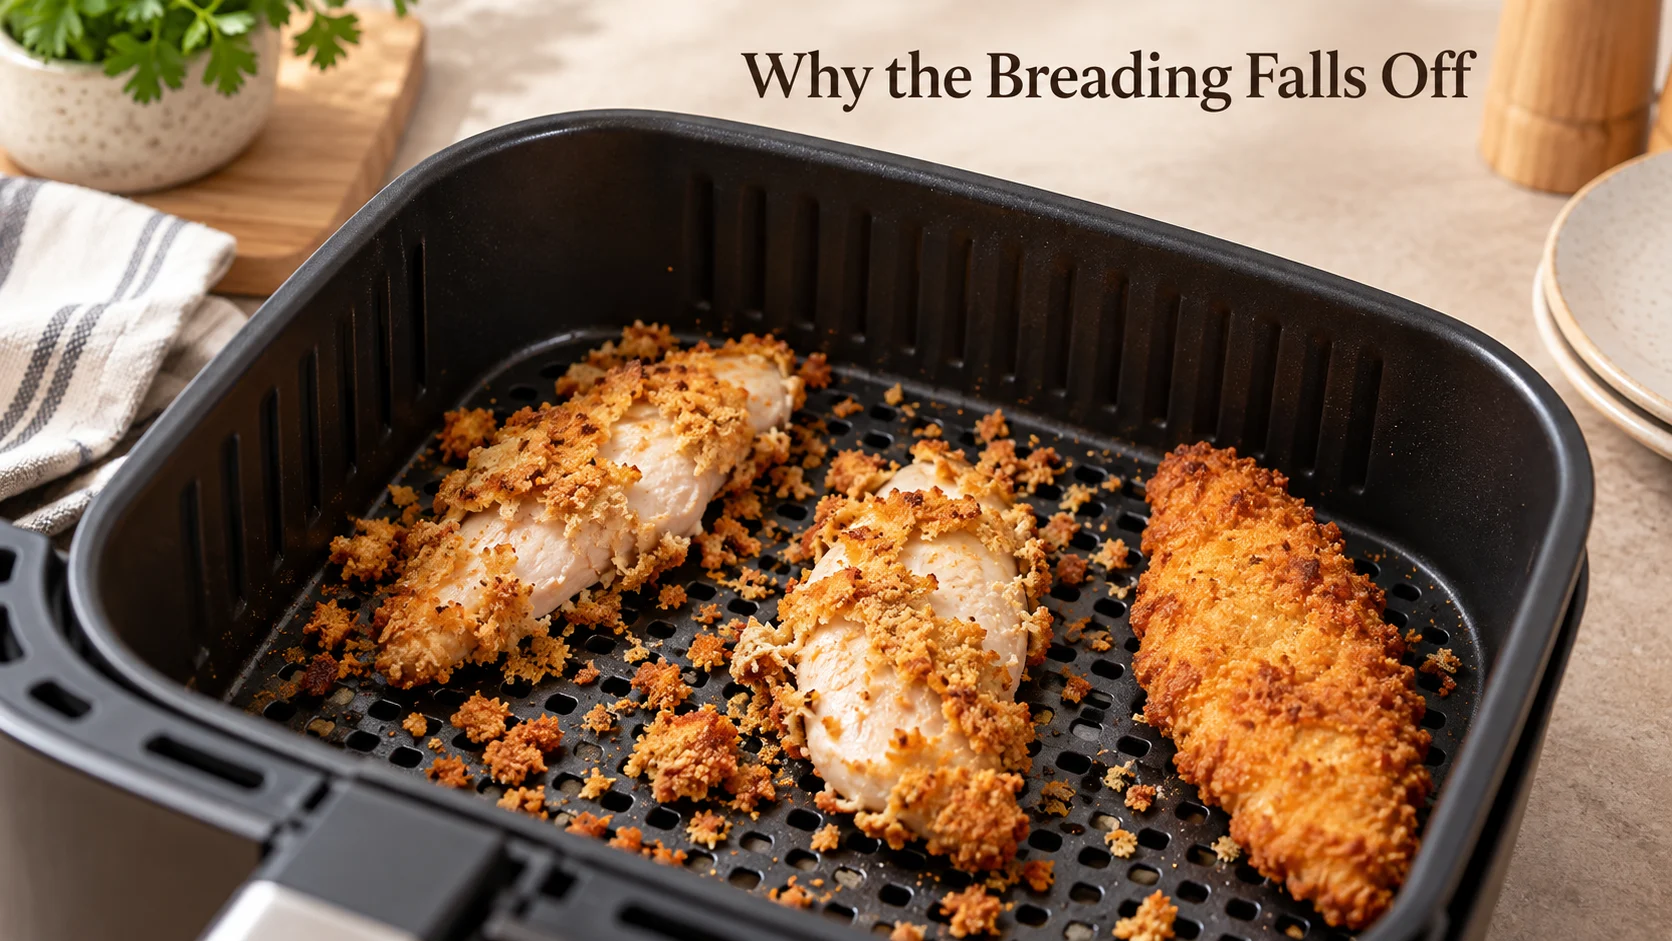
Breading falls off chicken tenders in an air fryer when the coating has a weak bond, loose crumbs are lifted by airflow, or the crust tears against the basket during turning. Dry the surface, remove excess flour if your recipe uses it, press the crumbs firmly, and give the coating a short refrigerated rest before cooking. Then keep the pieces apart and turn them gently when the coating holds together.
The useful clue is where the coating ended up: scattered crumbs suggest a different failure from a whole crust stuck to the basket. Fix that stage rather than adding more oil or cooking the chicken longer. This guide explains the process for homemade breaded tenders; it is not a measured recipe or a report of a controlled kitchen test.
Why the coating separates before the chicken is done
A breaded tender needs contact between the meat, its wet binding layer, and the crumbs. Package liquid can leave the first layer slippery, while a thick dusting of flour can create a powdery seam underneath the egg. Either problem can leave a coating that looks complete on the tray but slides away in the basket.
Airflow makes loose crumbs more noticeable because they can move before the coating has firmed up. Ninja’s AF160 guidance specifically discusses breading being blown off and pressing crumbs onto food. That supports checking adhesion first, although it does not prove that airflow caused every bare patch.
Read the basket before changing the method
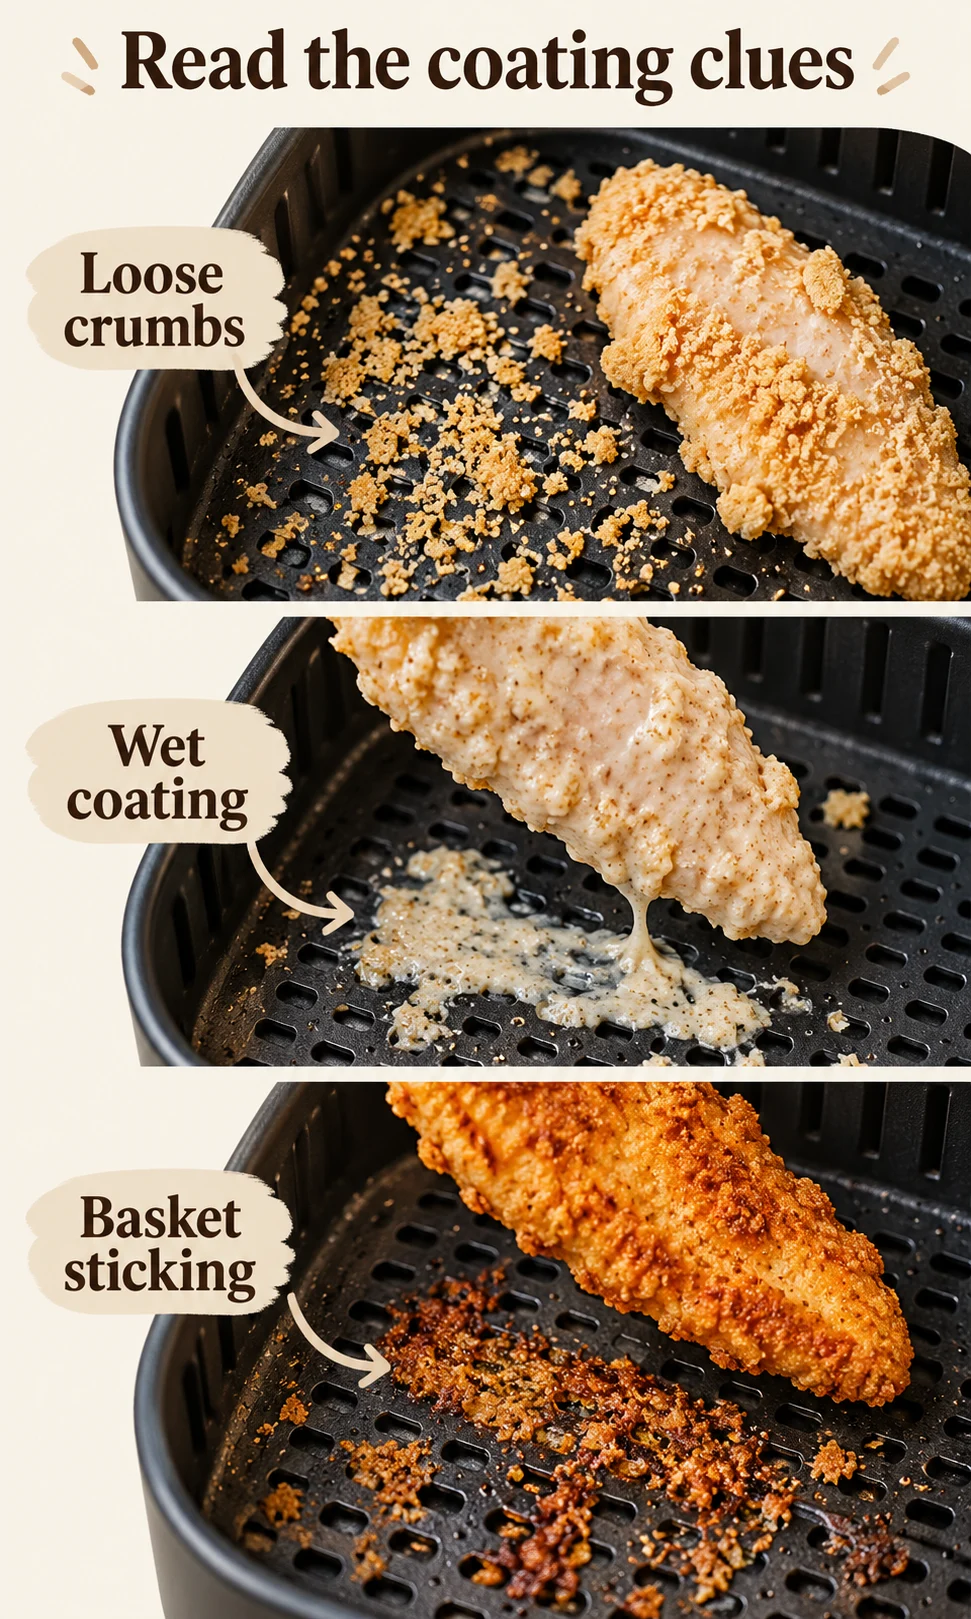
Check whether crumbs were already loose before you turned the tenders. Dry scatter is consistent with crumbs that were not pressed into the binder, whereas a wet smear suggests excess moisture or an unstable wet layer. A bald underside with an intact crust left on the basket points more strongly to sticking and mechanical tearing.
These clues overlap, so treat them as starting points rather than a certain diagnosis. A crowded basket can create moisture and make turning awkward, producing several failures at once. Choose one change for the next batch and compare the same observable clue instead of changing the entire method.
Dry the surface and keep the flour layer thin
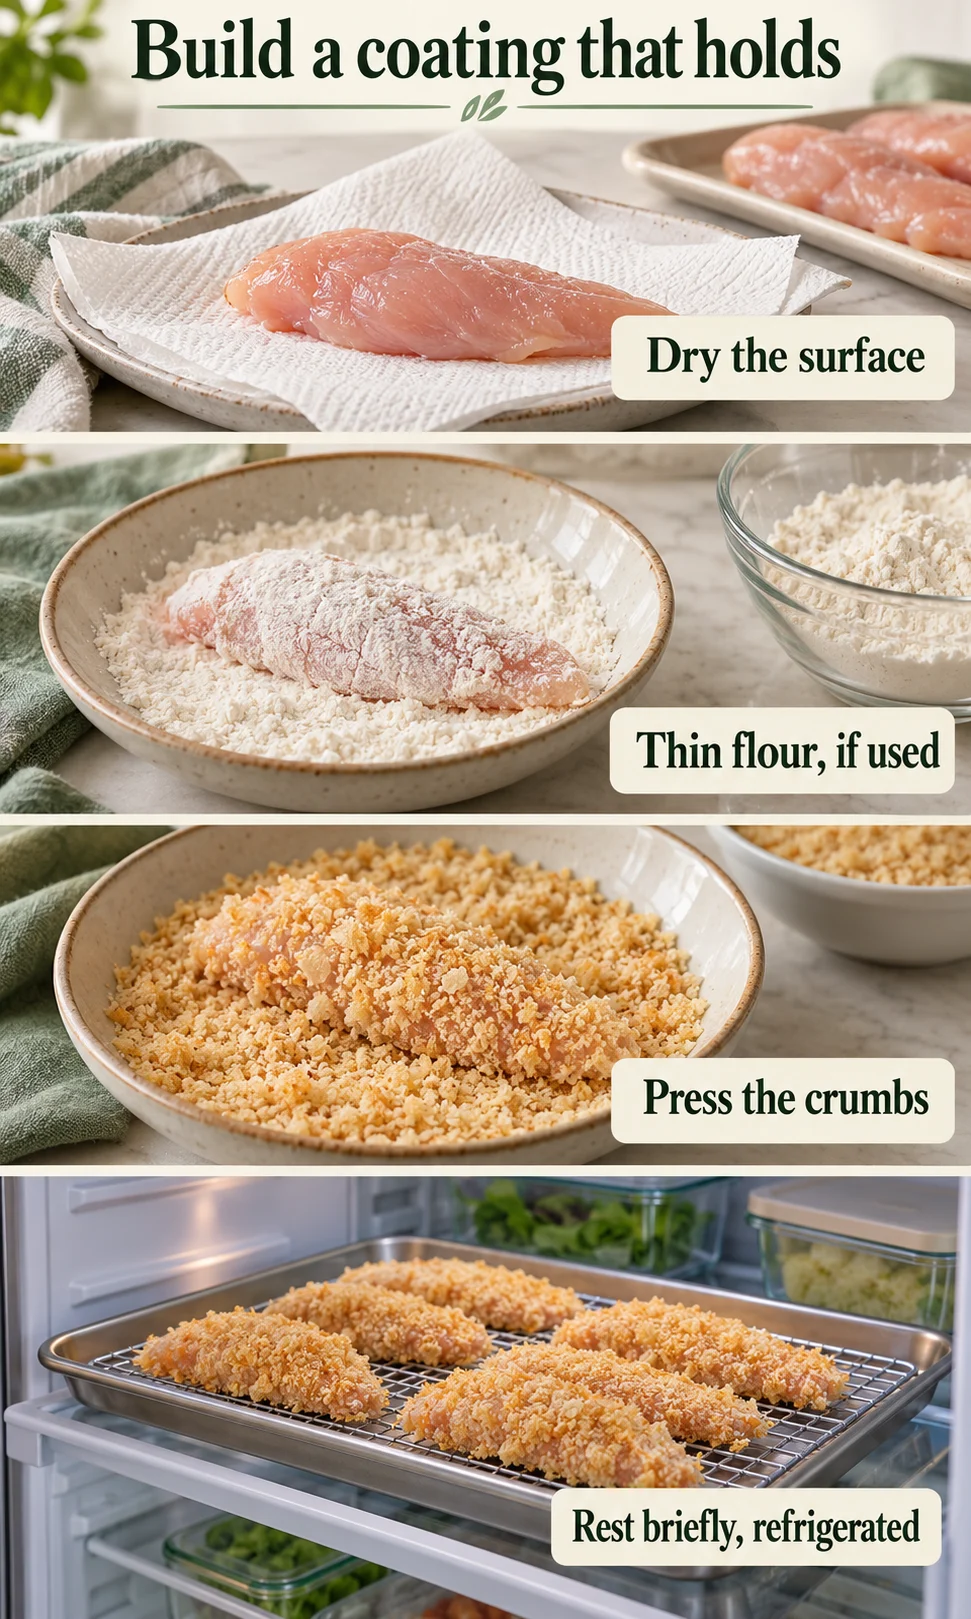
Pat raw chicken with disposable paper towel until visible package moisture is removed; do not rinse it. Drying prepares the surface for breading rather than making the chicken safe to eat. Discard the towel and wash hands and contact surfaces before handling clean ingredients or finished food.
If your chosen recipe uses flour, apply a light dusting and shake off the excess before dipping into the wet binder. A thick blanket of flour can stay loose underneath the next layer, so extra flour is not extra grip. Some valid recipes omit flour altogether; keep the sequence appropriate to the recipe you are following.
Press the crumbs, then rest briefly in the refrigerator
Let excess egg or another recipe-specified binder drip away before placing the tender in the crumbs. Press the crumbs against both sides instead of scattering them over the top, then lift the piece carefully onto a clean tray. You want an attached coating rather than a mound of dry crumbs that falls away on contact.
A short refrigerated rest, around 10 minutes as a practical starting point, can help the coating hydrate before handling. It is a technique adjustment rather than a universal tested optimum, and it will not rescue a puddle of binder or poorly pressed crumbs. Keep the raw chicken cold while waiting and discard breading ingredients that have contacted it.
Load and turn without stripping the crust
Use the basket and crisper plate in the arrangement specified by your appliance manual. Preheat only as your model and chosen recipe direct, and arrange the tenders in one layer with gaps. Do not stack breaded pieces or assume a larger batch needs only a few extra minutes.
Use an appliance-compatible oil application method where the recipe calls for it, keeping the coating lightly covered rather than saturated. Oil helps surface browning; it does not replace a wet binder or fix an unstable flour seam. Skinnytaste’s breaded tender method illustrates an egg-and-crumb sequence with oil on both sides and a single-layer basket, rather than treating flour as mandatory.
Turn according to the chosen recipe when the crust can be lifted without crumbling. Use tongs gently, supporting the piece rather than pinching through the coating, and avoid repeated shaking or scraping. If the underside is attached, loosen it carefully with a suitable non-scratching utensil instead of yanking the meat away from its crust.
Swipe horizontally to compare on small screens.
| What you see | What to check | Next-batch change |
|---|---|---|
| Loose dry crumbs before turning | Crumbs not firmly attached; airflow may displace them | Press into the binder and remove unattached crumbs before loading. |
| Wet coating sliding away | Too much surface liquid or binder | Pat the meat dry and let excess binder drip away. |
| Coating peels as a sheet | An unstable flour or wet layer | Keep any flour dusting thin; avoid a puddled binder. |
| One bare side after turning | Basket sticking or rough handling | Check basket preparation and release the piece gently. |
| Coating stays on but is soft | Moisture, crowding, or restricted airflow | Leave gaps and check that liners and trays suit the model. |
| Coating stays on but looks pale | Insufficient browning rather than failed adhesion | Check oil coverage next time; use temperature to judge chicken safety. |
Check your coating failure
Use Crust Rescue Studio to match the visible failure to a next-batch change and a safe action for the current batch. It distinguishes homemade coating problems from frozen-product instructions and keeps temperature checking separate from appearance. The result is process guidance, not confirmation that your chicken is safe to serve.
Keep the coating where it belongs
Crust Rescue Studio
Match the failure clue to a practical change for your next batch.
Separate loose crumbs, wet coating, basket sticking and pale crust. Your choices stay in this page and are not saved or transmitted.
Start with adhesion
Loose crumbs may not be firmly attached to the binder. Airflow can displace them before the coating firms up.
Next-batch change
Press crumbs onto both sides and remove unattached crumbs before loading. A short refrigerated rest may help handling.
For this batch
Handle gently and finish cooking using your recipe. Do not add new raw breading to partly cooked chicken.
Safety not established: check the thickest part with a food thermometer. Poultry must reach 165°F / 74°C.
The reliable sequence
Dry the surface → thin flour layer if used → drain excess binder → press crumbs → short refrigerated rest → single layer → gentle turn → temperature check.
Process guidance only. Clues can overlap; this check does not confirm food safety, prescribe cooking times, or replace the recipe, package directions or appliance manual.
Pale crumbs are not a reason to keep cooking blindly
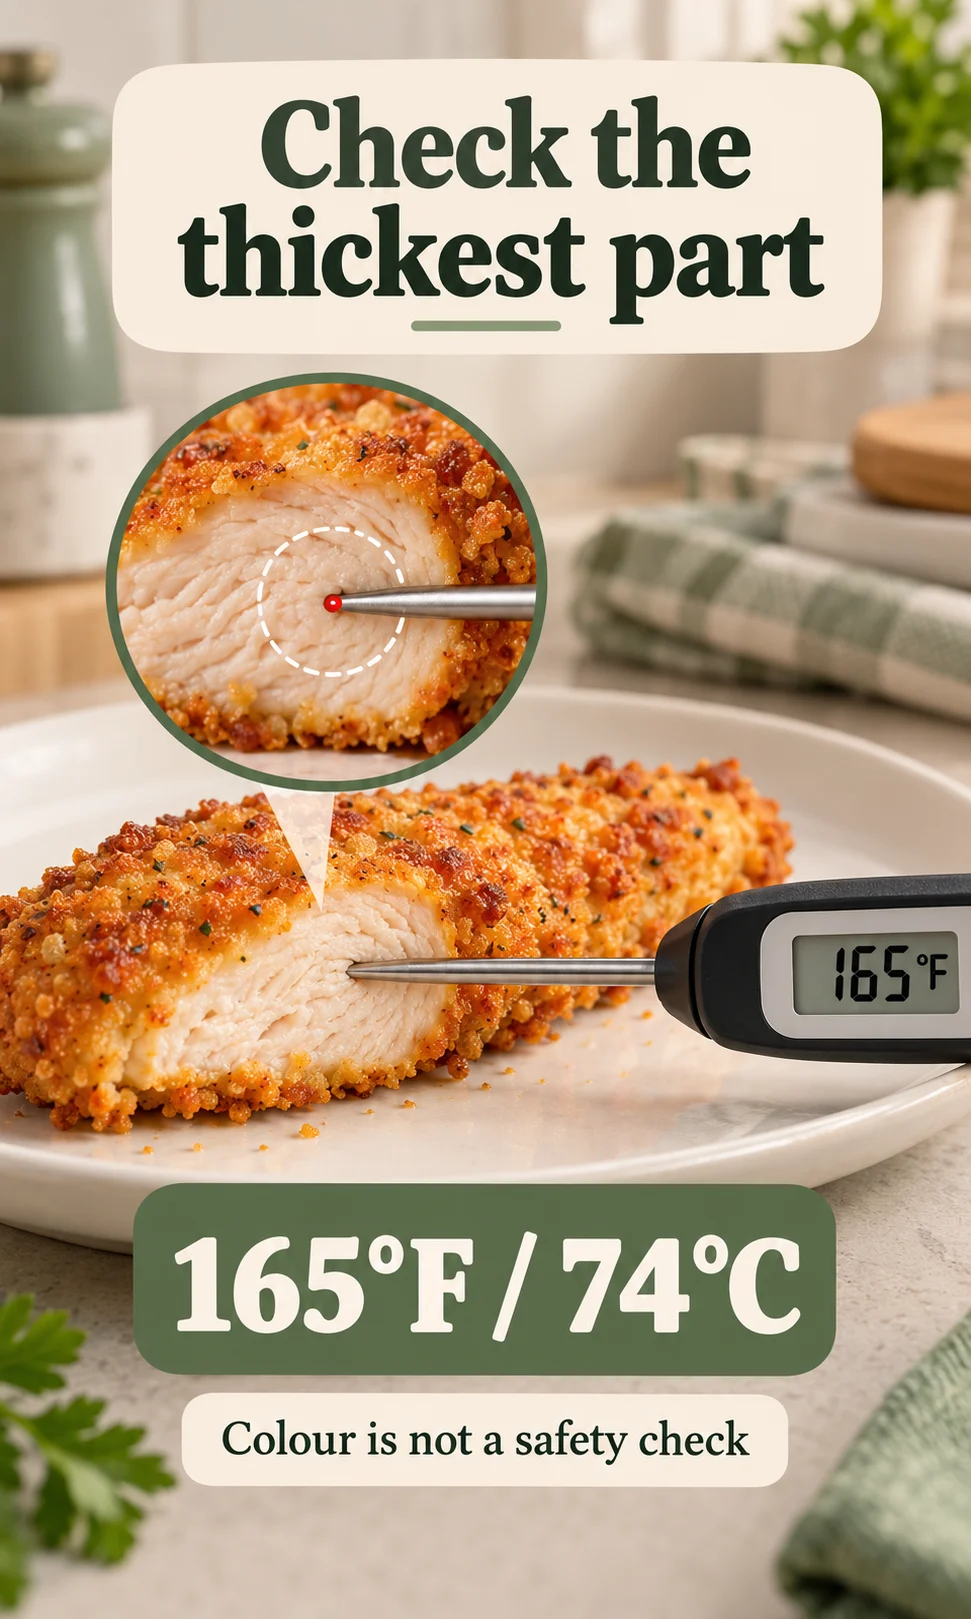
Chicken can reach its safe minimum temperature while the crumbs still look pale. Insert a food thermometer from the side into the centre of the thickest part, keeping its sensing area within the meat rather than against the basket. Check more than one piece when sizes differ, because the thin tips and thick ends do not heat at the same rate.
The FoodSafety.gov temperature chart specifies 165°F (74°C) for poultry. If a piece is below that temperature, continue cooking promptly and check again; colour does not establish doneness. If it has reached the target, do not keep cooking solely to chase a darker crust, because lean meat can lose moisture, as explained in why chicken breast dries out.
When an oven backup makes sense
A conventional oven can reduce the handling needed in a small basket, but it does not repair a loose coating. Use an oven-safe rack over a tray if the recipe allows it, and use that recipe’s oven instructions rather than transferring an air-fryer time unchanged. A convection oven still uses a fan, so switching appliances does not automatically remove airflow from the process.
A rack can give air access to the underside while keeping the tenders away from collected liquid. The broader explanation of how different cooking methods change texture helps separate moisture removal from simple heating. Change the support and handling method only after the dry, bind, and press stages are sound.
What this check cannot fix
Frozen breaded products need their own package directions, including whether they are raw or fully cooked and whether air-fryer use is supported. Do not thaw and recoat them on the assumption that they behave like fresh homemade tenders. If the package specifies an oven only, follow that instruction rather than improvising from this guide.
- Do not serve chicken without a reliable internal-temperature check.
- If the appliance fails, finish cooking promptly in a working appliance; discard when safe handling or completion cannot be established.
- Do not preheat with loose parchment; use liners only as the manual permits, secured by food and away from the heating element.
- Do not reuse crumbs, flour, or binder that touched raw chicken.
Frequently asked questions
How do you keep breading from falling off in an air fryer?
Dry the chicken, remove excess flour if used, let excess binder drip away, and press the crumbs onto both sides. Rest briefly in the refrigerator before loading a single layer. Turn gently when the coating holds together, following your recipe and appliance instructions.
Should breaded chicken rest before air frying?
A short refrigerated rest can help the coating hydrate and become easier to handle. Around 10 minutes is a practical starting point, not a universal optimum. A rest cannot compensate for loose crumbs or an overly wet surface.
Do chicken tenders need oil spray?
A light oil coating can help crumbs brown, depending on the recipe. It does not glue loose crumbs to the meat. Use an oil application method that your appliance manual permits.
Why are tenders soggy when the coating stays on?
The coating may be retaining moisture because pieces overlap or airflow is restricted. Check the single-layer layout and any liner first. Do not assume that extra cooking is the answer once the chicken has reached its safe temperature.
What temperature should chicken tenders reach?
Poultry must reach 165°F (74°C) in the centre of the thickest part. Insert the probe from the side so the sensing area is inside the meat. Golden crumbs alone do not show that the centre is safe.
Can parchment stop tenders sticking?
A suitable liner may reduce contact sticking if the appliance manual allows it. It can also restrict airflow and soften the underside. Never put loose parchment in an empty preheating air fryer, and keep it secured by food away from the heating element.
For the next batch
Start with the earliest visible failure: crumbs falling before turning need an adhesion check, while an underside left on the basket needs a release check. Change one stage, keep the pieces separated, and check internal temperature regardless of colour. That gives the next batch a clear adjustment and keeps a coating problem from becoming an undercooked-chicken problem.