Hardwood floor water-damage repair starts with controlling the leak and the wet floor assembly, before fixing the visible surface. If the area is safe to enter, stop further water, remove accessible clean water and arrange drying checks before anyone sands, coats or replaces the boards.
A small puddle and a lifted plank can appear in the same room, yet call for different decisions. The puddle is water you may be able to remove immediately; the lifted plank is a warning to protect the area and assess what is happening underneath. Work in that order rather than treating every visible defect as a repair you should attempt today.
| Priority | What you can accomplish now | What it does not prove |
|---|---|---|
| Control the event | Keep people clear of hazards and stop further water where safely possible. | The floor assembly is safe or dry. |
| Remove accessible water | Uncover a small clean spill and absorb its surface water. | Water has stayed above the boards. |
| Establish the next stage | Dry suitable materials and identify hidden wetting or physical failure. | The floor is ready for sanding on a fixed date. |
The working rule: act promptly on water; make irreversible flooring decisions from the condition of the assembly. Getting water off a sound surface is useful early action. Cutting out boards, flattening their edges or sealing the surface needs a stronger basis than how the room looks after wiping.
1. Is the area safe, and has the water stopped?
Start from the dry edge of the room. Water near electrical equipment, sewage or floodwater, and a floor that is lifting or losing support change the task from household spill cleanup to controlled access and specialist response. A towel is appropriate only after those conditions have been excluded.
Check the route before stepping onto the floor
Look at the whole route you would need to use, including the doorway. A dry patch near you does not make the far side of a wet room accessible. Keep children and pets out, and avoid walking across raised boards to reach a switch, appliance or valve. Do not repeatedly press a suspect area with your foot to see whether it is still soft.
- Water and electricity: stay clear of wet sockets, cords, appliances and electrical controls. Do not enter water to unplug equipment or reach the electrical panel. Have a qualified person establish safe electrical conditions.
- Water of uncertain cleanliness: keep out when sewage, outdoor flooding or chemical contamination is involved or suspected. Clear-looking water is not evidence that it is sanitary.
- Loss of support or major lifting: restrict access around sagging, a soft area or buckled boards. Do not stand on a ridge or place weights on it.
- Visible growth or substantial hidden wetting: avoid disturbing materials or setting a household fan to blow through the area while the contamination question remains unresolved.
The CDC’s floodwater guidance explains why floodwater should be treated as a potential exposure hazard. The clean-water actions below are for a small, accessible event on a stable floor, rather than an instruction to enter a flooded property.

If you cannot safely reach the affected patch, the useful first result is a protected room and a clear route for the appropriate responder. Leave heavy furniture where it is when moving it would require crossing unstable flooring. In an apartment or shared building, notify the building’s maintenance contact promptly if the source may be outside your unit or water may have entered another space.
Stop the feed without creating another leak
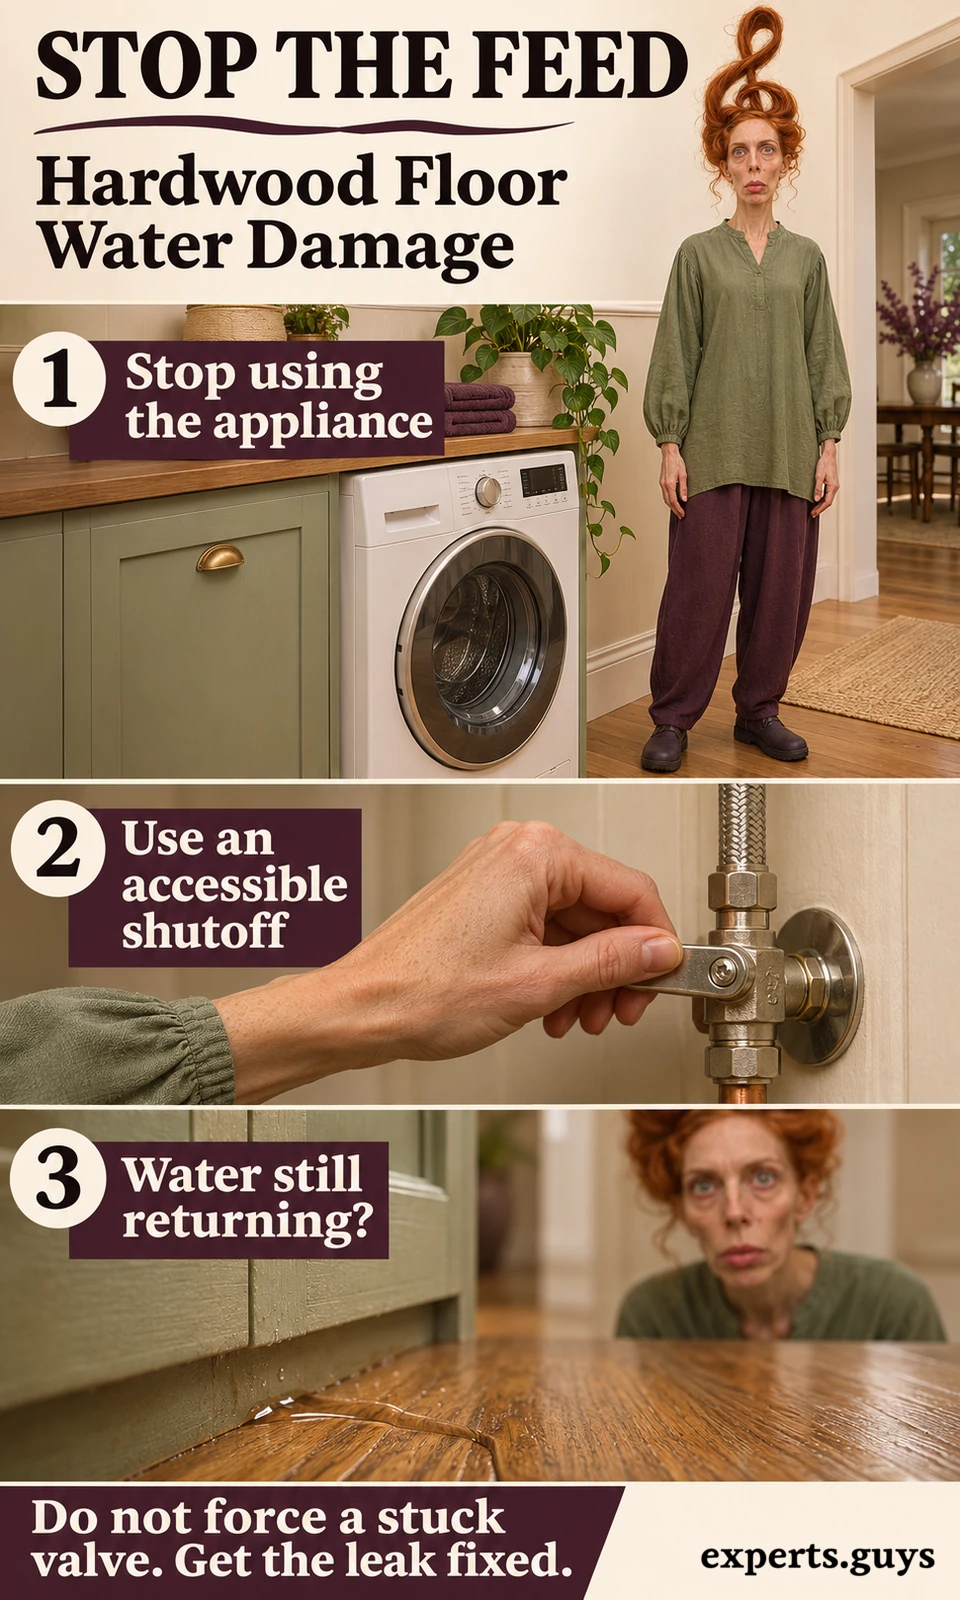
For an accessible appliance or supply leak, stop using the appliance or fixture. Use a familiar, reachable shutoff only if the route is dry and safe and the valve operates normally. Valve designs differ, so follow its markings or operating instructions; forcing an unfamiliar or seized valve is a poor trade for a possible reduction in flow.
- Identify the fixture or appliance associated with the release without pulling it out or disconnecting its lines.
- Stop normal use. If an accessible water shutoff can be operated safely, close it as instructed for that valve.
- From a safe position, look for continued entry of fresh water. Arrange plumbing repair when the flow persists, the source is inaccessible or the cause remains uncertain.
A closed supply valve can limit the event without correcting the failed connection. A drain leak can behave differently again: stopping use may halt it temporarily, but normal use can restart the release. Do not run an appliance through another cycle just to check whether it still leaks onto the hardwood.
Water can also arrive from a window, exterior door, pipe above the room or a neighbouring unit. A puddle beside the dishwasher does not establish that the dishwasher is the source. Use the location as a clue, then match the repair to the actual entry route. For recurring cabinet-side clues, the guide to water damage under a sink explains how plumbing and cabinet symptoms can connect.
Completion checkpoint: further water has been controlled as far as safely possible, and any unresolved source has a specific next step. If the edge keeps becoming wet, return to the source question before adding more drying equipment. An apparent cleanup that continually receives fresh water has not moved into the recovery stage.
2. How do you remove water without adding damage?
For a small clean spill on sound flooring, uncover the wet surface and absorb the water with dry materials. Keep the task limited to what you can reach safely. A broad release, water disappearing under fixed fittings or a spill that exceeds available household equipment needs a drying response beyond repeated towel changes.
Lift a lightweight wet mat off the hardwood
A small rug or mat can conceal water and keep its backing against the boards. Where the floor is stable and the water is known to be clean, lift the item without dragging it across the finish. Carry it to a suitable washable tray or another water-tolerant place so it does not wet a second section of hardwood.
Start with the small loose textile you can handle comfortably, rather than trying to clear the whole room. Use both hands when needed to control its edges and avoid trailing the wet backing. Leave a saturated large rug, heavy furniture or an item trapped beneath furniture for help; the purpose is to expose the patch, not to injure yourself or scrape the boards.

The visible result is an uncovered area that can be assessed and dried. Do not fold the wet mat and leave it beside the spill on the same wood. Likewise, avoid replacing it as soon as the face of the boards feels dry. The floor and the textile each need their own suitable drying assessment.
Absorb the puddle with a press-and-lift action
Use a clean, dry, absorbent cloth on the accessible water. Press it against the puddle, lift it away and replace it when saturated. Work without spreading water across a wider area or pushing it towards open seams. You are removing liquid from the surface, so adding wash water defeats the immediate purpose.
For example, imagine a clean supply leak leaves a shallow puddle at the end of a kitchen runner. Once the feed is stopped and the runner is off the wood, a folded cloth can absorb what remains along the open edge. If the cloth immediately saturates and more water flows out from beneath the cabinets, that is a reason to change the response, rather than keep polishing the same visible patch.
Use a comfortable position on a safe dry area; do not kneel directly into the spill. If reaching the middle requires leaning across a raised board or stretching beyond your balance, stop at the accessible edge. Ask for assistance with the remainder instead of stepping into an uncertain area.

Do not use an ordinary dry vacuum to collect liquid. Larger clean-water releases can require equipment designed for water extraction and an operator who can use it under safe electrical conditions. The distinction is the machine’s intended use and setup, rather than whether its hose happens to fit the puddle.
Keep steam cleaning, abrasive pads, bleach treatments and improvised stain remedies out of this first response. A mark remaining after absorption does not tell you what chemical the finish will tolerate. Follow the flooring manufacturer’s care instructions for any later cleaning; removing the release is separate from choosing a compatible surface treatment.
Completion checkpoint: the accessible free water is removed and the exposed patch can be inspected without a wet covering. This is a surface milestone. Water that entered a seam, underlayment or cabinet cavity may still need assessment even when another dry cloth no longer picks up a puddle.
3. What should drying achieve below the surface?
Drying needs to address the materials that became wet, including concealed layers where water travelled. Household airflow can help a suitable clean-water surface, but a fan running above the boards cannot establish the condition of everything below them. Decide whether the assembly can be assessed and dried in place before treating the room as an equipment-only job.
Give room air a way to lose moisture
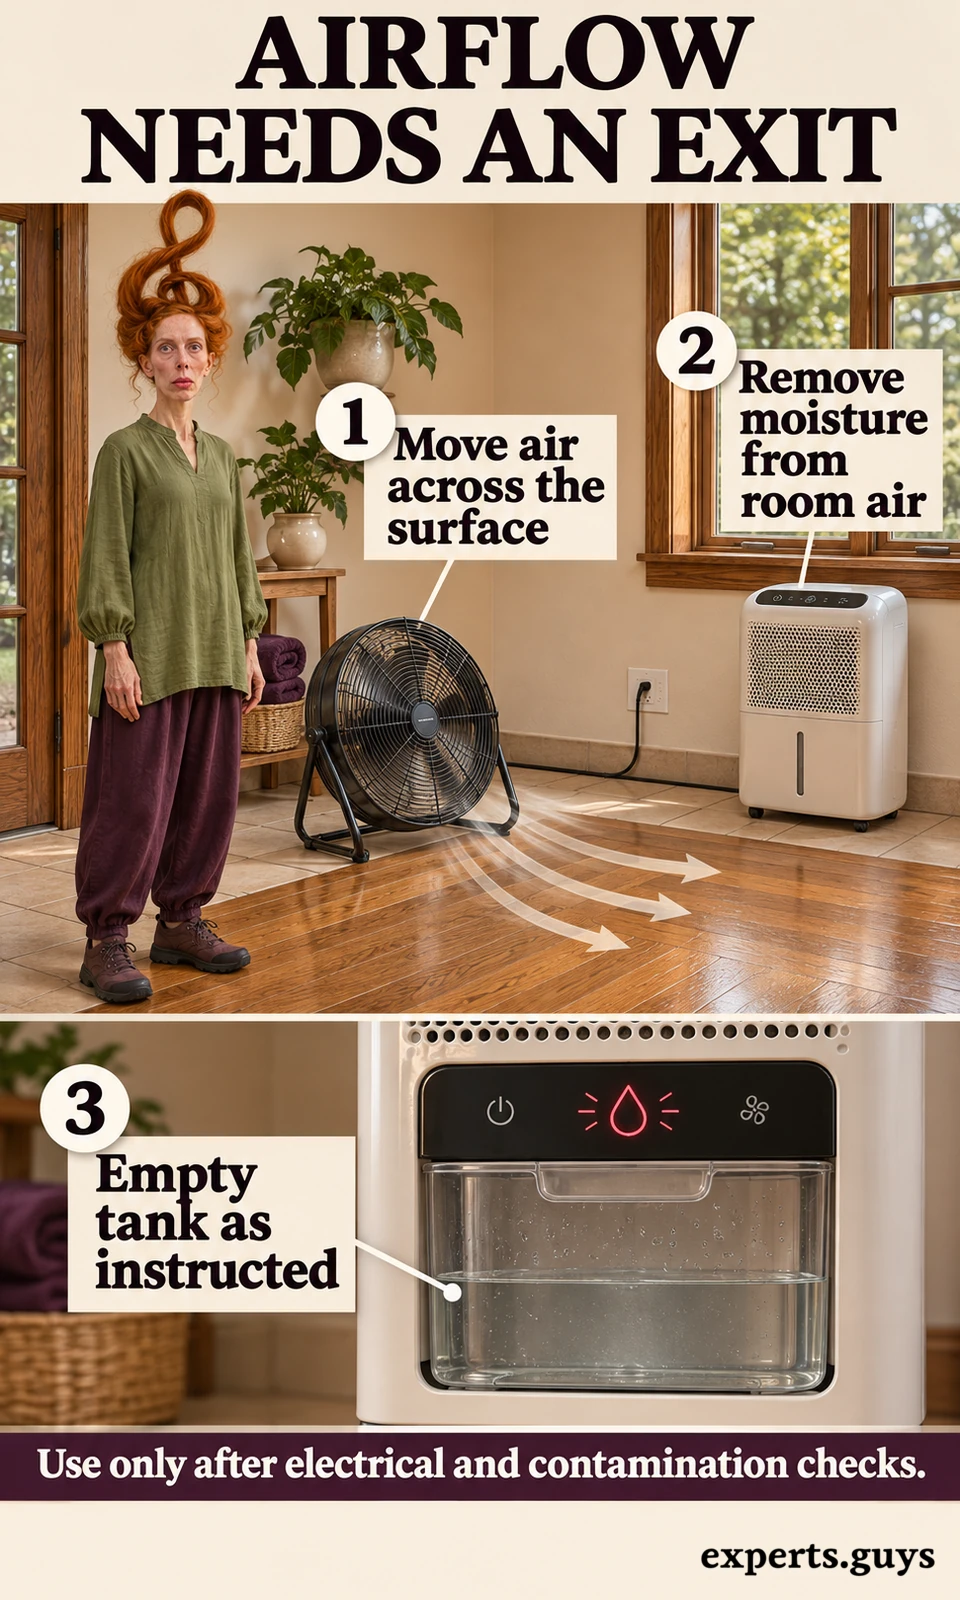
After electrical and contamination checks, arrange suitable equipment on a dry, stable surface with its intakes and outlets clear. Air movement across exposed flooring supports evaporation; a dehumidifier removes moisture from room air. Those are different jobs, so a strong breeze and water collecting in a tank each show only part of what the setup is doing.
- Remove accessible surface water and wet coverings first, subject to the safety limits above.
- Place suitable equipment according to its manual, with dry electrical connections and cords clear of the route.
- Keep the airflow path unobstructed. Follow the dehumidifier’s instructions for room openings, drainage and tank emptying.
- Check that the equipment continues operating as intended. A full tank or blocked intake can interrupt the setup.
Do not aim a heat gun or concentrated heater at the raised edge you want to flatten. Accelerating one visible spot is different from managing the floor assembly. Follow the flooring and equipment instructions, and have the drying approach reviewed when moisture has penetrated beyond an accessible surface.
The EPA’s clean-water response table supports prompt moisture removal and appropriate drying, while warning against using fans before determining that the water is clean. Its 24-48-hour response window is a mold-prevention guideline, not a promise that wet hardwood is ready for finishing within two days.
A useful equipment check is practical: is the intake clear, has a full tank stopped collection, and is more water entering the room? These observations can reveal a failed setup. They cannot certify the moisture condition of the wood or substrate. If a drying company supplied the equipment, use its agreed operating instructions rather than changing settings to chase a faster-looking result.
Recognise the limit of a dry-looking face
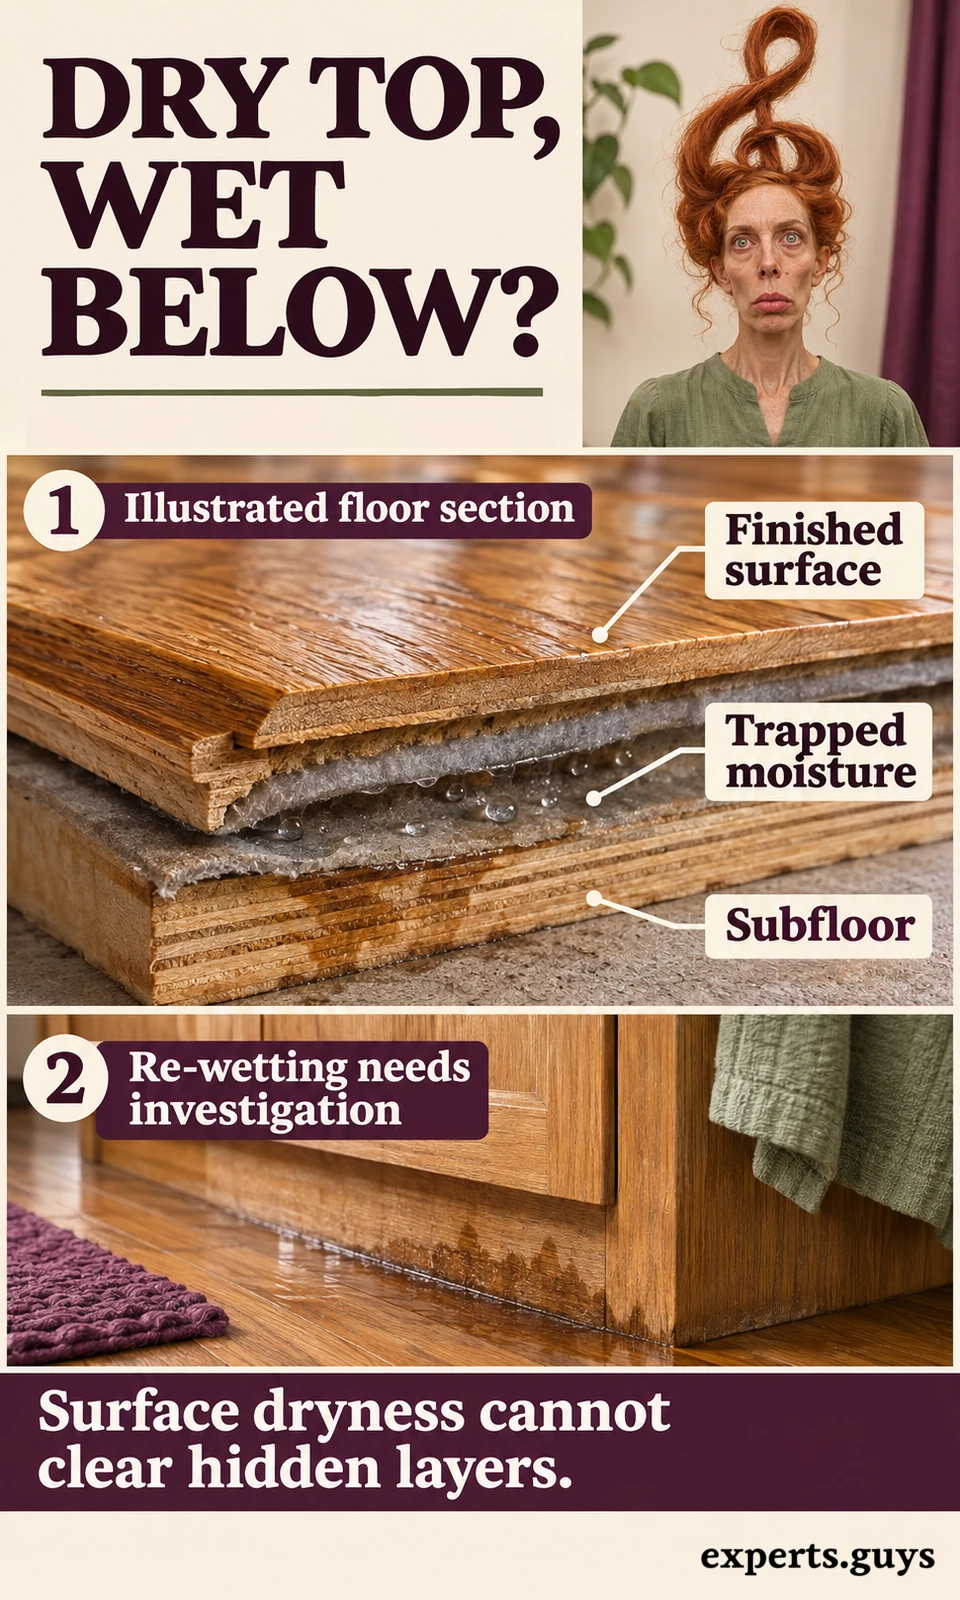
Think of the floor as a stack of materials rather than one board face. An oak surface can look normal while a layer below it still needs attention. The exact stack may contain an adhesive, underlayment, wood-based subfloor or concrete substrate, and that construction changes how the affected layers can be checked.
You do not need to open the assembly yourself to recognise this limit. Water returning from a cabinet edge, changes spreading beyond the original puddle, or new movement after the release are reasons to investigate the concealed route. A clean-looking surface does not cancel those observations, and a dark stain alone does not establish structural failure.
Tell the assessor where the release began, which fittings border the wet area and whether there is already safe access below the floor. Do not pry up a transition, cut a plank or enter a damp crawlspace just to obtain a view. The least damaging access route depends on how the floor is installed and what question the investigation needs to answer.
The distinction between visible wood and supporting material is developed in the guide to water damage beneath the finished floor. This page’s immediate decision is whether hidden layers need investigation; assessing panel strength, replacement support and reconstruction belongs to that separate repair stage.
Use a material assessment rather than a universal number
Ask what was assessed and how it relates to the affected assembly. A reading from the face of one board, a room-humidity display and an assessment of the substrate answer different questions. A meaningful handoff should identify which materials were checked, what suitable dry comparison was used and whether any affected layer remains unverified.
Do not turn a number seen online into a pass mark for your floor. Instruments can use different scales and settings, and the flooring system has its own requirements. The guide to interpreting moisture readings after a leak covers that measurement task in detail. Here, the essential request is to have the relevant layers assessed rather than accept an isolated display as clearance.
| Observation | What it can help you understand | What still needs resolving |
|---|---|---|
| The cloth no longer picks up water. | The accessible face has no remaining puddle at that point. | Whether water entered lower layers. |
| The dehumidifier collects water. | The machine is removing moisture from room air. | Whether all affected materials are drying adequately. |
| The top appears flatter. | The visible shape has changed. | Moisture distribution, support and remaining damage. |
| A material-specific assessment is available. | There is a basis for the next stage. | Any untested area, construction limit or repair requirement noted by the assessor. |
Completion checkpoint: the drying approach addresses the affected assembly, and any inaccessible or unresolved layer is explicitly identified. The result may be continued drying, selective access or a replacement assessment. A sound decision can be to change the plan when the available evidence no longer supports drying in place.
4. Which repair decisions should wait?
Delay cosmetic and flattening work until the moisture source, relevant material conditions and floor stability have been assessed. That pause does not mean leaving a wet room unattended. It means continuing the loss-control and drying work while withholding changes that could remove wood, trap a problem or obscure the evidence needed for the repair.
Understand why cupping is a poor sanding target
Cupping describes boards whose edges stand higher than their centres. The shape can be associated with an uneven moisture condition through the board, but it is not a complete diagnosis of the source or the floor’s future. A row of ridges gives you a reason to assess the floor, rather than a specification for how much wood to remove.
Sanding a cupped board flat removes more material from its raised edges. If its shape then changes as moisture equalises, the altered surface can leave the centre relatively high. The repair has introduced a new shape problem while using up wood that cannot be put back. This is why a floor that seems easy to flatten can be a poor candidate for immediate sanding.
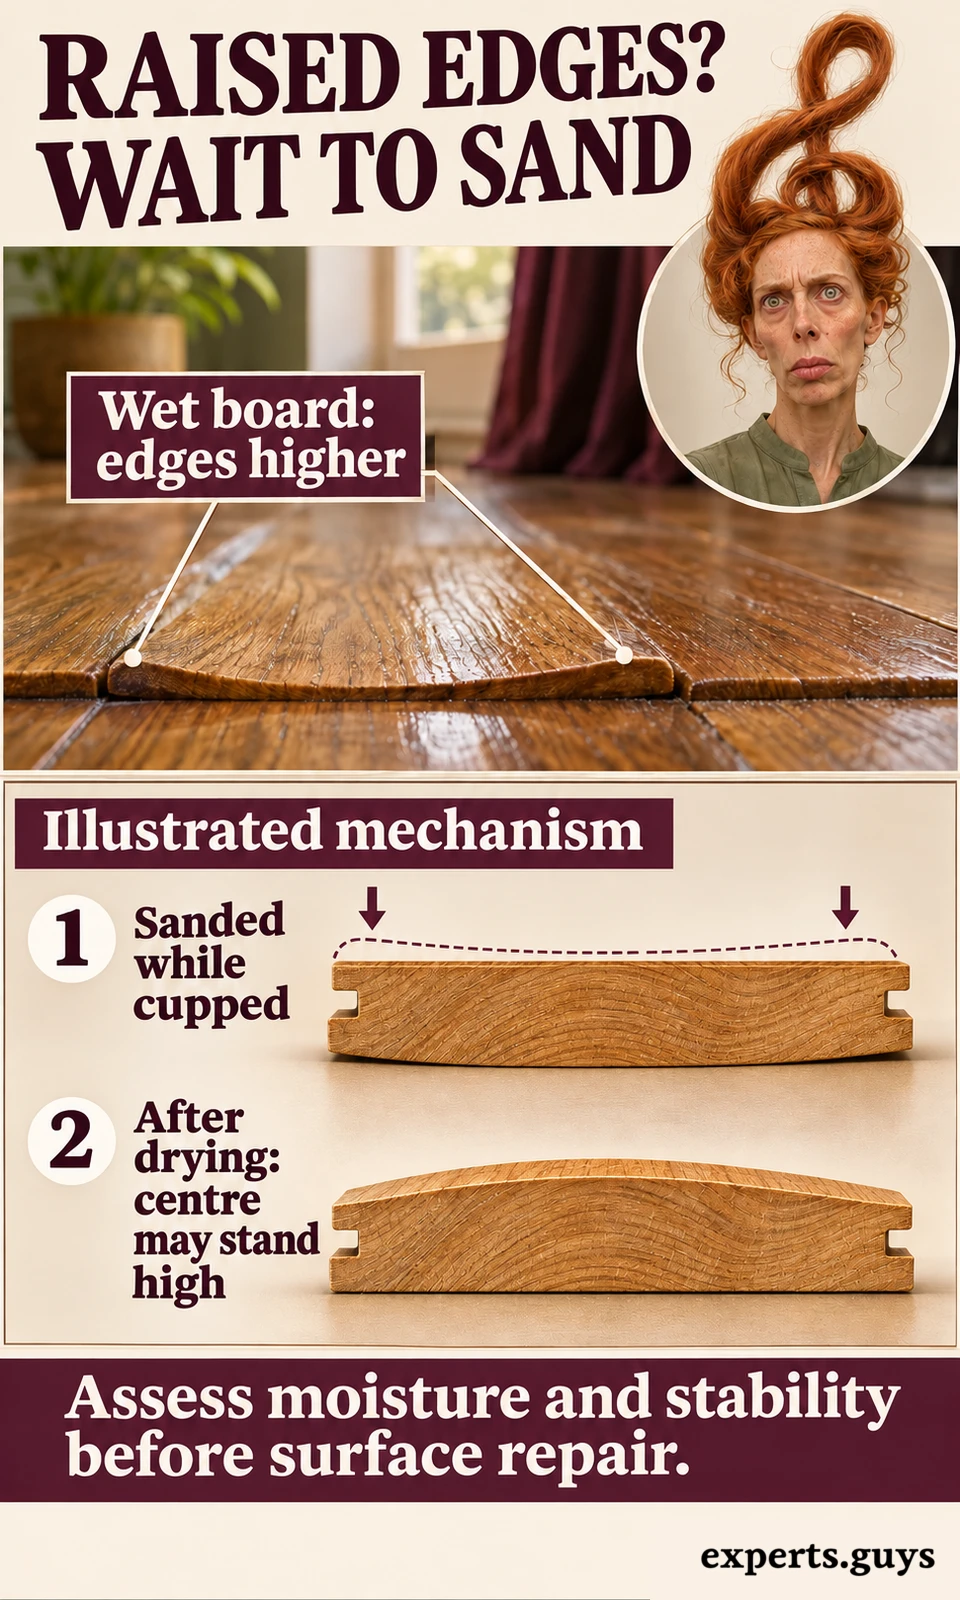
Keep a visibly moving or buckled section out of service and arrange assessment. Do not screw it down, place heavy weights on it or cut an expansion gap as an improvised response. Those actions assume an explanation for the movement and can damage joints or conceal a supporting problem.
Engineered flooring introduces another constraint: a real-wood surface is not permission to sand it. Its available surface layer, construction and manufacturer instructions matter. Laminate or other wood-look flooring needs its own material assessment. If the product is uncertain, use an existing product record or genuine spare board to establish it before approving surface work.
Separate drying scope from appearance scope
A useful proposal distinguishes the cause repair, drying and access work, and the later flooring repair. Those scopes can have different boundaries. Water may require investigation beyond a visible stain, while a sound, dry area may later need wider finishing for appearance. Neither boundary should be guessed from the puddle’s outline.
Before agreeing to irreversible work, ask what finding makes it necessary. A source leak needs a source repair. A failed board joint needs a physical repair decision. A finish mismatch needs an appearance decision after the assembly is suitable. An explanation that connects each operation to its finding is more useful than a blanket instruction to replace everything or sand everything.

The NWFA’s wood-flooring guidance treats moisture conditions in the flooring, substrate and surrounding space as part of assessing water-damage repair options. It is a North American technical reference, and product instructions and applicable local requirements still govern the actual work.
What should a drying-to-repair handoff explain?
A drying handoff should also explain who is taking responsibility for each unfinished question. A plumber may correct the failed fitting without assessing the floor. A flooring installer may identify a damaged joint without managing contamination. A restoration company may dry the assembly without promising an invisible finish match. These roles can overlap, but the proposal should make the actual scope clear rather than leave you to infer it from a company name.
Ask the person proposing work to explain three boundaries in ordinary language: where water travelled, what material needs further attention and what repair decision remains open. You do not need to fill out a chart to use those answers. If one person says the floor is ready and another says it remains wet, ask whether they are discussing the same material and location before assuming that either conclusion applies to the entire room.
The same distinction helps with timing. An equipment collection date, the date a plumber finishes and a refinisher’s available appointment are scheduling facts. They are not interchangeable with evidence that the affected assembly is ready. A sensible sequence can reserve later work conditionally, with the material assessment deciding whether it proceeds. That avoids turning an available appointment into pressure to start irreversible work.
Some removal can be needed during the investigation and drying stage. An instruction to delay sanding should never be read as an instruction to preserve every wet material in place indefinitely. The question is what access or removal is needed to resolve a specific problem, and whether keeping the material prevents appropriate drying or leaves failed support. That decision is different from replacing sound boards solely because their finish looks unattractive.
Ask what the proposed opening is expected to reveal and what would change the plan. A targeted opening may be sufficient for one construction, while another may need broader access. The visible stain cannot settle that choice on its own. Where removal is necessary, have the assessor explain the affected layer and the reason rather than accept an unexplained rule about taking out a fixed number of surrounding planks.
Finally, keep the later repair criteria separate from a guarantee about appearance. Confirming suitable conditions permits an informed repair decision; it does not guarantee that an old stain disappears, a replacement board matches perfectly or every distorted board recovers. Those are material and finishing questions to resolve with samples, product information and an agreed scope at the next stage.
A worked example: a runner hides more than the puddle
Consider an illustrative kitchen with a small supply-line release, a wet runner and otherwise stable oak boards. The route and electrical conditions are safe, the water is known to be clean and the accessible shutoff operates normally. Those assumptions allow a limited first response: stop the feed, move the lightweight runner off the wood and absorb the exposed water.
Now suppose the owner finds fresh moisture appearing from the cabinet edge after the visible puddle is gone. That changes the next action. The useful question is no longer which cloth to use or whether a stain will polish out; it is whether the leak continues or concealed water is escaping from beneath the cabinet. Plumbing and drying assessment need to resolve that distinction.
Alternatively, suppose no water returns, the assembly is assessed as suitable for repair and one dry board retains a cosmetic mark. That is the point to compare finishing and replacement choices. The same initial puddle has led to a different next stage because the evidence changed, rather than because a fixed number of hours passed.
This example demonstrates a handoff between stages. It does not predict that another small puddle will stay local or that all cupping will recover. The value of the sequence is that each decision has a checkpoint: controlled entry, removed surface water, assessed concealed conditions and an explained repair scope.
Once the floor is dry and stable, use the separate guide to choosing a hardwood patch, replacement boards or refinishing. It covers the later questions about finish compatibility, physical board fit and how far a repair needs to blend. Those choices become useful after this page’s drying and stability conditions have been resolved.
Questions that often arise during the handoff
Does a new dark mark mean the hardwood must be replaced?
No. A dark mark does not identify the depth of the damage or prove that a board has lost support. It may remain a cosmetic question after the assembly is assessed, or it may appear beside a separate physical defect. Avoid using the colour alone to decide on demolition, a stain treatment or sanding. First establish whether the area is still wet and whether its joints and support remain sound.
Should every wet baseboard come off immediately?
There is no universal removal rule. The need for access depends on which materials became wet, the construction and whether the area can be assessed and dried adequately in place. A swollen trim face and hidden wetting behind it are different findings. Have any proposed removal tied to the access or material problem it will resolve; do not pry trim away merely because the finished floor has a mark.
Can I put a rug back to hide the patch while waiting?
Keep the affected surface accessible while its condition is unresolved. A replacement rug can hide renewed wetting or changing boards and complicate the agreed drying setup. Wait until the relevant materials are assessed as suitable and the rug itself is dry. If the remaining patch is purely cosmetic, choose any covering according to the floor manufacturer’s care requirements rather than treating the covering as part of the repair.
Can I accept a replacement-board quote before drying finishes?
You can discuss conditional options, product availability and possible scope, but ask what remains provisional. The quantity of damaged boards, the need for substrate work and the extent of finishing may not all be established yet. A useful quote separates investigation or drying from later repair and identifies what finding would change the price or work. A preliminary quotation does not establish that installation should begin.
What if the water came from someone else’s unit?
Report the release promptly through the building’s maintenance or emergency process and keep clear of any unsafe area. Establishing who can stop the source is urgent even when responsibility for the cost remains undecided. Do not reopen a shared service, enter another unit or assume a local shutoff controls the whole release. Building arrangements and responsibility vary; source control and assessment should proceed through the appropriate authorised contact.
Why does the floor look different after the puddle is gone?
The visible change may involve the coating, the wood, board shape or more than one of those. Removing liquid answers only the surface-water question. A later assessment can distinguish remaining appearance issues from changing shape or physical failure. Avoid a quick polish or abrasive trial in the visible patch while that distinction remains unresolved, because the treatment can introduce a new mark without addressing the original problem.
Make the next action match the unfinished stage
If fresh water is still arriving, resolve the source. If accessible clean water remains, remove it safely. If the face is dry but the assembly is unverified, request an assessment of the affected materials before approving surface work. The practical result is a floor moving through the right stage, with a specific reason for each next action.
Compare Local Home Specialists Near You
Tell us what kind of help you need, then compare nearby businesses by location, Google rating, review volume and contact options.
HomeFix Local Match
Turn a home problem into a practical local hiring decision. Check the clues, see the specialist types that fit, open focused surrounding-location searches, then compare the strongest three before you call.
 YOUR PROBLEM
YOUR AREA
COMPARE 3
✓ Ready to compare
What is happening?
Choose the closest problem type, then check every clue that applies. Your selections change the specialist order.
Where should the search focus?
Use Google’s “near me” context or enter the area you actually want a specialist to serve.
Simple local search: open nearby Google results, choose the businesses that look suitable, then compare your best three here before you call.
Problem snapshot
Who should you call first?
These are the specialist types most likely to fit the clues you selected.
Search around your location
Compare your top three
Use the same factors for each option so a high star rating does not hide a weak scope, poor diagnosis, missing credentials or unclear aftercare.
Comparison result
Your result combines the Google signals you entered with the practical hiring checks you completed.
Questions to ask every finalist
Use the same questions with each shortlisted business so the comparison stays consistent.