Introduction
A. Brief on Wood Floor Water Damage
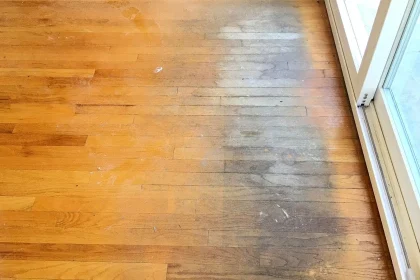
Hey there, friend! So you’ve been grappling with wood floor water damage, huh? It’s a real pain, I know. One day your beautiful, polished wood floor is the pride of your home, and then seemingly out of nowhere, you’re stuck with unsightly stains and warped boards. Waterlogged wood can be a serious hassle, not to mention a danger to the overall integrity of your floor. But don’t worry, we’ve all been there. Whether it’s from a leaky roof, a burst pipe, or even just an overly enthusiastic houseplant watering, the damage can seem overwhelming.
B. The Importance of Quick Damage Control
Now here’s the kicker: fast action is crucial to mitigate the damage. The sooner you can start on that water damage assessment and extraction, the better chance you have to save your precious floorboards from buckling, cupping, or even worse, developing mold. But don’t sweat it! Dealing with moisture damage can seem intimidating, but you’re not alone.
C. Unveiling the 9 Odd-ball Tips
Now, here’s the fun part. We’re going to roll up our sleeves and delve into the nitty-gritty with some out-of-the-box tips for tackling this mess. You might think floor restoration is all about fancy equipment and complicated techniques, but there’s a lot you can do yourself. From basic drying techniques and DIY dehumidification methods to water stain removal and even warped wood repair, there’s a lot of handy tricks you can master in no time.
We’ve rounded up 9 odd-ball tips that will put you back in control of your wood floor maintenance. We’ll cover everything from the conventional, like sanding and refinishing, to the unconventional, like the secret power of mayonnaise in wood care! We’ll also discuss mold prevention, the benefits of protective coatings, the importance of subfloor inspection, and how to properly use floor drying equipment.
This is more than just about floorboard replacement and surface sealing, it’s about empowering you to become the ultimate custodian of your wood floor. So, are you ready to dive into the wonderful world of wood floor refinishing and damage mitigation? Let’s get started!
II. Understanding Wood Floor Water Damage
A. Recognizing the Signs of Wood Floor Water Damage
What’s that? Your floor doesn’t seem quite, right? There’s a good chance you could be dealing with some form of water damage. But don’t worry, friend, you’ve got this! The first step in mastering your wood floor maintenance is learning how to spot the signs of trouble.
From visible stains or discoloration on your wood floor, warping, or buckling of the boards, to a sudden, unusual creaking noise underfoot – these are all possible symptoms of a water-damaged floor. In some cases, you might even notice an unpleasant, musty odor which can indicate the onset of mold – a clear sign that there’s moisture damage afoot.
B. Underlying Causes of Water Damage
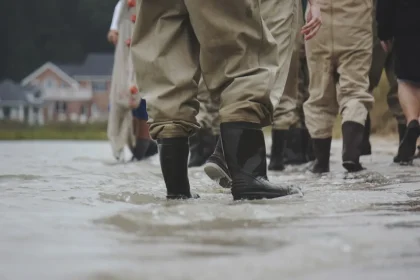
So, where’s all this water coming from? Good question! Identifying the source is key to stopping further damage and planning your floor restoration. It could be from a pesky leaky pipe, excessive humidity in your home, spills that weren’t cleaned up promptly, or even an actual flood. Once you’ve found the source, it’s essential to fix it ASAP. This might mean some plumbing work, or maybe it’s time for a dehumidifier. Either way, you’re one step closer to a dry, happy floor!
C. Types of Wood and Their Vulnerability to Water Damage
Now, it’s important to remember that not all wood floors are created equal. Some types of wood are more susceptible to water damage than others. Hardwoods like oak and cherry are a bit more resistant to moisture, while softer woods like pine can absorb water like a sponge. Knowing what kind of wood you’re dealing with will help you tailor your repair strategy. Whether it’s a solid hardwood floor or a delicate veneer, don’t worry – there’s an odd-ball tip for every kind of timber!
Alright, so now you’ve got the lay of the land – or in this case, the lay of the floor. We’ve spotted the signs of water damage, identified the source, and sized up our floor’s vulnerability. So, what’s next? It’s time to put those odd-ball tips into action and show this water damage who’s boss. So, grab your toolkit (and maybe a jar of mayo), because we’re about to dive into the world of DIY floor repair!
III. Odd-Ball Tips to Repair Wood Floor Water Damage
Tip 1: Use of Non-conventional Drying Agents
First up, we’re going to think outside the box and delve into the world of non-conventional drying agents. Ever heard of using cat litter or baking soda to dry out a water-damaged floor? I bet you didn’t! These household staples can work wonders by absorbing excess moisture from your floorboards, helping to speed up the drying process. Just remember, this isn’t a one-size-fits-all solution; the success of these drying agents can vary based on the severity of your moisture damage.
Tip 2: Harnessing the Power of Sunlight
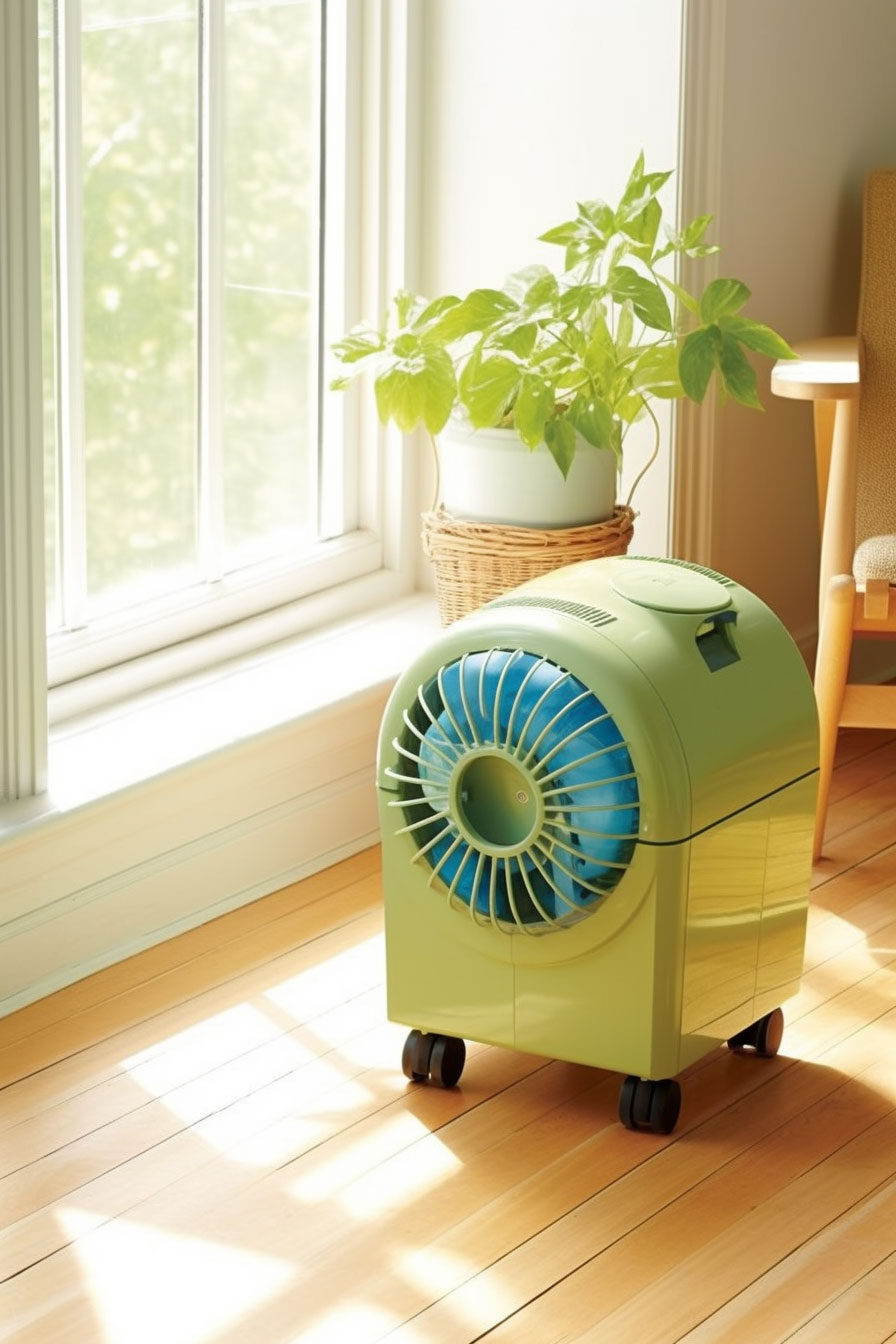
Next on our odd-ball list is a good ol’ fashioned sunbathing session…for your floor, that is! Mother Nature’s very own dehumidifier, the sun, can work wonders for a water-damaged floor. By properly venting your room and letting in loads of natural sunlight, you can significantly aid the drying process. Remember, everything in moderation – don’t let your wood get a sunburn!
Tip 3: DIY Wood Oiling Techniques
Now, let’s talk about oiling. No, we’re not prepping for a BBQ; we’re prepping your floor for a comeback! Applying oil to your water-damaged wood floor can help replenish its lost luster and even provide some moisture resistance. And, guess what, you can whip up your homemade oil solution right in your kitchen! All you need is some linseed or tung oil, a clean rag, and a bit of elbow grease.
Hold on to your hats because we’re just getting started! There’s plenty more odd-ball tips coming up next, including the magic of mayonnaise and the transformative power of bleach. Stay tuned as we journey together towards a restored and vibrant wood floor!
Tip 4: Leveraging Hair Dryers and Heat Guns
Hey, did you know that your trusty hair dryer can be a real game changer when it comes to moisture damage? Yup, you heard right! Applying heat is a great way to accelerate the drying of waterlogged wood, and your regular hair dryer or a heat gun can do just the trick. Now, don’t go all Van Halen on your floorboards! Be sure to apply the heat evenly and keep the device moving to avoid scorching the wood.
Tip 5: Reversing Cupping with Iron and Towel Trick
Well, howdy, folks! Ever noticed those annoying dips in your wood floor, like tiny valleys between the hills? That’s what we call “cupping” and it’s a common issue with water damaged floors. But, here’s an odd-ball tip for you: you can actually use a regular clothes iron and a damp towel to straighten those warped boards out. It’s like ironing a shirt, but for your floor! Just remember, too much heat can cause damage, so keep that iron moving and don’t press down too hard.
Tip 6: The Magic of Mayonnaise
Alright, don’t roll your eyes just yet. This one might sound a little out there, but mayonnaise can actually help remove those pesky water stains on your wood floor. Yes, the stuff from your fridge! The oils in mayonnaise can penetrate the wood and displace the water causing the stain. Just apply, let it sit, and then wipe it off. Just be sure not to leave it on too long, or you might wind up with an oily residue.
There you have it, folks! We’ve made it through the first half of our odd-ball tips for wood floor water damage repair. But stick around because we’ve got some more offbeat tricks up our sleeve, including a creative use for wallpaper steamers and a tea bag trick that you won’t want to miss!
Tip 7: Implementing Wood Bleaching
Stains can be quite a nuisance, right? Especially on your lovely wooden floor. But fret not, because we have an unconventional solution right up our alley – wood bleaching! This process can help lighten stubborn dark water stains that don’t disappear with just drying and oiling. And guess what, you can prepare a homemade bleach solution right in your kitchen using hydrogen peroxide and vinegar. Just make sure to test this on a small, hidden portion of your floor first to ensure it doesn’t discolor the wood.
Tip 8: Creative Use of Wallpaper Steamer
Have you ever heard of a wallpaper steamer being used for floor restoration? If not, you’re in for a treat. This device can work magic on your water-damaged floor, especially in treating warped or cupped wood. The steam can help soften the wood, making it pliable and easier to flatten out. But remember, we’re dealing with heat and moisture here, so be cautious and make sure not to overdo it.
Tip 9: Tea Bag Trick for Stain Removal
Finally, the last tip on our odd-ball list might just be the oddest yet. Have some old tea bags lying around? Well, it’s time to put them to good use. The tannic acid in tea can help to gently lighten those dark water stains. It’s as simple as brewing a strong cup of tea, letting it cool, and then applying it to the stain. Who knew your morning brew could double as a wood restorer?
Phew! Now that we’ve made it through our list of odd-ball tips, you’re armed with a unique arsenal of tools to combat wood floor water damage. But remember, the journey doesn’t stop here. We’ve still got to talk about aftercare and preventative measures. So stick around, as we continue on our quest for the perfect, water-damage free wooden floor!
IV. Aftercare and Prevention
A. Essential Aftercare Steps Post Wood Floor Repair
Hey there, champs! Now that we’ve tackled those pesky water-damaged floorboards, it’s time to talk about aftercare. You see, restoration is not just about repair, it’s also about maintaining that beautiful, water-damage-free floor. So, after you’ve put in all this hard work, consider sanding and refinishing your floor. It might sound like a tough job, but it can really bring out the natural beauty of the wood and give your floor a fresh, new look.
Next up, protective coatings. They can be a real lifesaver for preventing future water damage. Consider applying a waterproof sealant on your floor – it’s like an invisible shield that will help repel any unwanted water.
B. Smart Tips to Prevent Future Water Damage
Now, onto prevention. Trust me on this, a little bit of proactive care can go a long way in protecting your wood floor. Regular cleaning and prompt attention to spills can significantly decrease your chances of future water damage. Consider investing in a good quality dehumidifier, especially if you live in a damp climate. This will help to maintain an ideal level of humidity, keeping those unwanted moisture levels at bay.
And one more thing: routine inspection. Make it a habit to periodically inspect your floor and the subfloor for any signs of water damage. If you catch it early, you might save yourself a whole lot of trouble down the line.
That’s all, folks! Just remember, your wood floor is like a good friend, it needs a little love and attention to keep looking its best. Now, you’re not just prepared to repair, but also to care for your wood floor.
But hold on, we’re not done yet. Up next, we’ve got some professional insights and we’ll tackle some FAQs that might be buzzing in your mind. So stay tuned, we’re almost at the end of our journey!
V. Professional Insights: When to Call in the Pros
Hey there, floor-fixing superstar! You’ve proven yourself to be quite the DIY expert, but sometimes, a situation calls for a little professional touch. If you’re dealing with extensive water damage, mold infestations, or severe warping and buckling, it might be time to call in the pros.
These guys have the advanced tools and knowledge for large-scale water extraction, dealing with complicated mold issues, and complex floorboard replacement tasks. Sure, it might cost a bit, but remember that trying to tackle serious damage yourself could lead to bigger problems down the line. So, don’t hesitate to reach out for professional help when you need it – it’s all part of being a responsible homeowner!
VI. Frequently Asked Questions
Can all types of water-damaged floors be restored?
You’re asking some great questions! Not all water-damaged floors can be restored, unfortunately. If the damage is too severe, the wood may be beyond repair. But don’t worry, with early detection and swift action, most water-damaged floors can indeed be restored back to their former glory.
How can I protect my wood floor from water damage in the future?
Well, first off, great mindset! Prevention is key. Regular cleaning, immediate cleanup of spills, maintaining optimal humidity, routine inspections, and applying a waterproof sealant can all help protect your wood floor from future water damage. And remember, if you see signs of water damage, act quickly!
Can I remove dark water stains without sanding?
Guess what? You can! Our odd-ball tips like wood bleaching, the magic of mayo, and the tea bag trick can help lighten those dark water stains. But remember, results may vary based on the severity of the stain and the type of wood.
Well, there you have it. Our journey through the odd-ball tips for repairing wood floor water damage is complete. Remember, every water damage situation is unique and might require different approaches. But, with these tricks up your sleeve, you’re well-equipped to tackle any water damage drama that comes your way. Stay resilient, friend!
VII. Conclusion: Embracing the Odd-Ball Approach
Well, howdy, partner! We’ve travelled a long road together, navigated through those pesky water-damaged floors, explored unconventional and odd-ball tips, and emerged victorious on the other side. Whether it was treating your floorboards to a little bit of mayo, or transforming your hairdryer into a heat gun, you’ve proven yourself to be a bona fide floor restoration wizard!
But don’t forget, the journey doesn’t end here. Regular wood floor maintenance and vigilant care are what will keep your floor looking its best. And always remember, when in doubt, don’t hesitate to call in the pros.
Thanks for sticking with me through this odd-ball adventure. You’ve learned a ton, and your floorboards are undoubtedly grateful. Remember to respect your wood floor, give it the care it needs, and it’ll reward you with its undeniable charm and elegance.
Here’s to many happy, water-damage-free days ahead!
VIII. Additional Resources
Lastly, let’s talk about resources. There’s a wealth of information out there to further deepen your knowledge of wood floor care and restoration. Here are a few recommended reads and online resources for you to check out:
- “The Complete Guide to Repairing & Restoring Hardwood Floors” – Book by William Buck.
- Online Forums like “DIY Network” and “Home Repair” on Reddit.
- YouTube tutorials: Channels like “This Old House” and “Home Repair Tutor” offer tons of useful DIY videos.
- Your local hardware store: Don’t underestimate the value of a chat with knowledgeable staff!
That’s a wrap, folks! You’re now armed and ready to tackle wood floor water damage. Happy repairing, and may your floors always be dry and bright!
IX. Afterword: The Journey Continues
Hey there, floor-repair hero! You might be wondering, “Where do we go from here?” Well, friend, the journey never truly ends. Just like a road trip across the country, there are always new sights to see and lessons to learn. Remember, home maintenance, especially something as precious as your wood floor, is an ongoing adventure.
Stay curious, keep exploring, and don’t be afraid to try new things. Remember those odd-ball tips? They might have seemed strange at first, but they turned out to be pretty useful, didn’t they? That’s the beauty of stepping off the beaten path.
X. Acknowledgements
And finally, before we part ways, I just want to say a big ol’ thank you. Thanks for sticking around and being a part of this exciting journey through the land of wood floor water damage repair. Your persistence and willingness to learn are truly commendable.
It’s been a pleasure guiding you through these odd-ball tips and strategies. I hope they serve you well in all your future wood floor restoration endeavors.
So, here’s to you, and to all your future DIY successes. May your wood floors always shine bright and your homes be filled with warmth and happiness. Happy repairing, folks!