
An accent wall uses a different finish or color to make one wall stand out. To turn an existing painted wall into a clean focal point, first confirm that its surface is sound and dry, then work through preparation, short wet-edge painting sections, and the coating’s required waiting times. A quick makeover is realistic only when the wall is already ready; fresh color cannot repair a failing surface.
Can this wall become an accent wall today?
A sound, previously painted interior wall is the simplest starting point. This method is for a plain painted finish in a dry room, with the wall and color already chosen. It does not cover removing wallpaper, repairing damp plaster, spraying paint, or installing wood and stone; those jobs introduce different preparation, attachment, and safety requirements.
Decide what “finished today” means before opening the tin. Applying a final coat, allowing the room to be used, and letting furniture or adhesive touch the coating are separate milestones. A wall may look complete while its surface is still vulnerable to rubbing, sticking, or cleaning. Keep the product label available because the paint system, room temperature, humidity, and film thickness all affect the waiting period.
Choose the wall and finish before setting up the work area. If that decision is still open, use the accent-wall paint-color guide; if you want repeated shapes, use the separate pattern layout guide. Here the practical job is producing one continuous, even coat from corner to corner, without letting the advancing paint edge dry between sections.
Keep the project small enough to complete a whole coat without an avoidable interruption. Arrange your brush, roller, tray, compatible tape, clean cloths, floor protection, and the specified primer before starting. Use a stable work platform for high edges and an appropriate extension handle for rolling; never stand on a sofa or stretch beyond a secure reach.
- Proceed: the wall is sound, dry, clean, compatible with the chosen coating, and any required preparation is complete.
- Prepare first: ordinary dirt, unsealed repairs, or a glossy finish needs the coating maker’s preparation system.
- Pause: unexplained damp, recurring stains, loose plaster, mold, or peeling paint needs its cause resolved before decorating.
- Resolve old-coating risk: do not sand, scrape, or cut an uncertain older coating as a quick preparation shortcut.
For example, a U.S. home built before 1978 can contain lead paint. Follow EPA’s lead-safe renovation guidance before disturbing an uncertain coating; other countries have different building histories and rules. Repainting a sound surface and disturbing old layers are not the same activity. This guide does not turn an unsafe substrate into a DIY-ready one.
Look along the wall before committing
Hold a portable work light beside the wall so its beam travels across the surface, then move it slowly along accessible areas. Ridges and raised repair edges cast shadows that front lighting can hide. Inspect rather than scrape: peeling, crumbling, wet-looking areas, or recurring discoloration are reasons to stop and investigate. A light reveals texture; it cannot prove that the wall is dry internally or identify the cause of a stain.
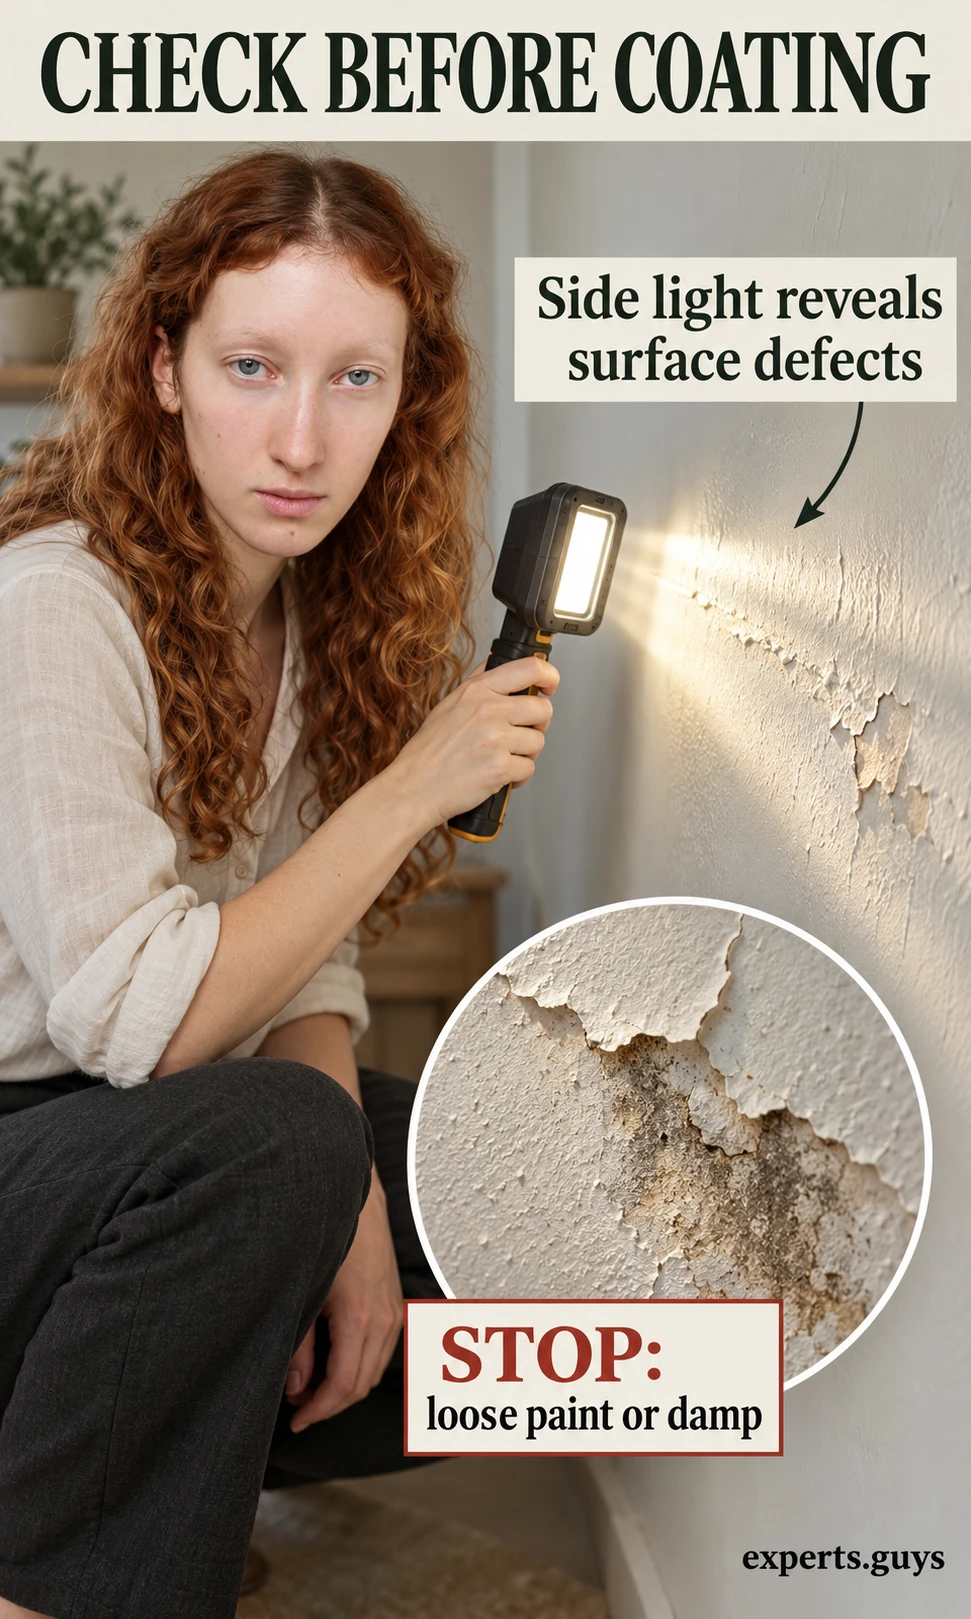
Treat persistent powdering as a coating problem rather than simply adding more paint. The guide to why wall paint becomes powdery covers that separate fault. Likewise, a stain that returns after drying needs its source identified. Selecting a stain-blocking primer is a finishing decision after the underlying problem is solved, not a substitute for that repair.
Peel-and-stick wallpaper is not an automatic same-day escape route. It depends on compatible paint, sufficient cure, and a suitable surface; WallPops’ installation instructions, for example, require at least four weeks for newly painted surfaces. Check the actual product rather than treating that interval as universal. For boards, follow the separate wood accent-wall installation method instead of borrowing paint preparation as a fixing specification.
What preparation gives the new paint a reliable base?
The new coating needs a clean, dry, stable surface and a compatible underlying finish. Cleaning, repair, and priming solve different problems: cleaning removes contamination, repair corrects damaged material, and primer addresses the substrate or coating system. A combined paint-and-primer label does not mean every bare repair, glossy coating, or stain can be ignored.
Clean, rinse, and allow the wall to dry
On a sound coating, remove ordinary dirt with the cleaner and dilution permitted for that surface. Work with a lightly damp sponge or cloth rather than soaking the wall. Follow with a clean damp cloth where the cleaning product requires rinsing, changing the water so you do not redistribute residue. Keep moisture away from sockets and switches, and let the wall dry before any tape, primer, or topcoat is applied.
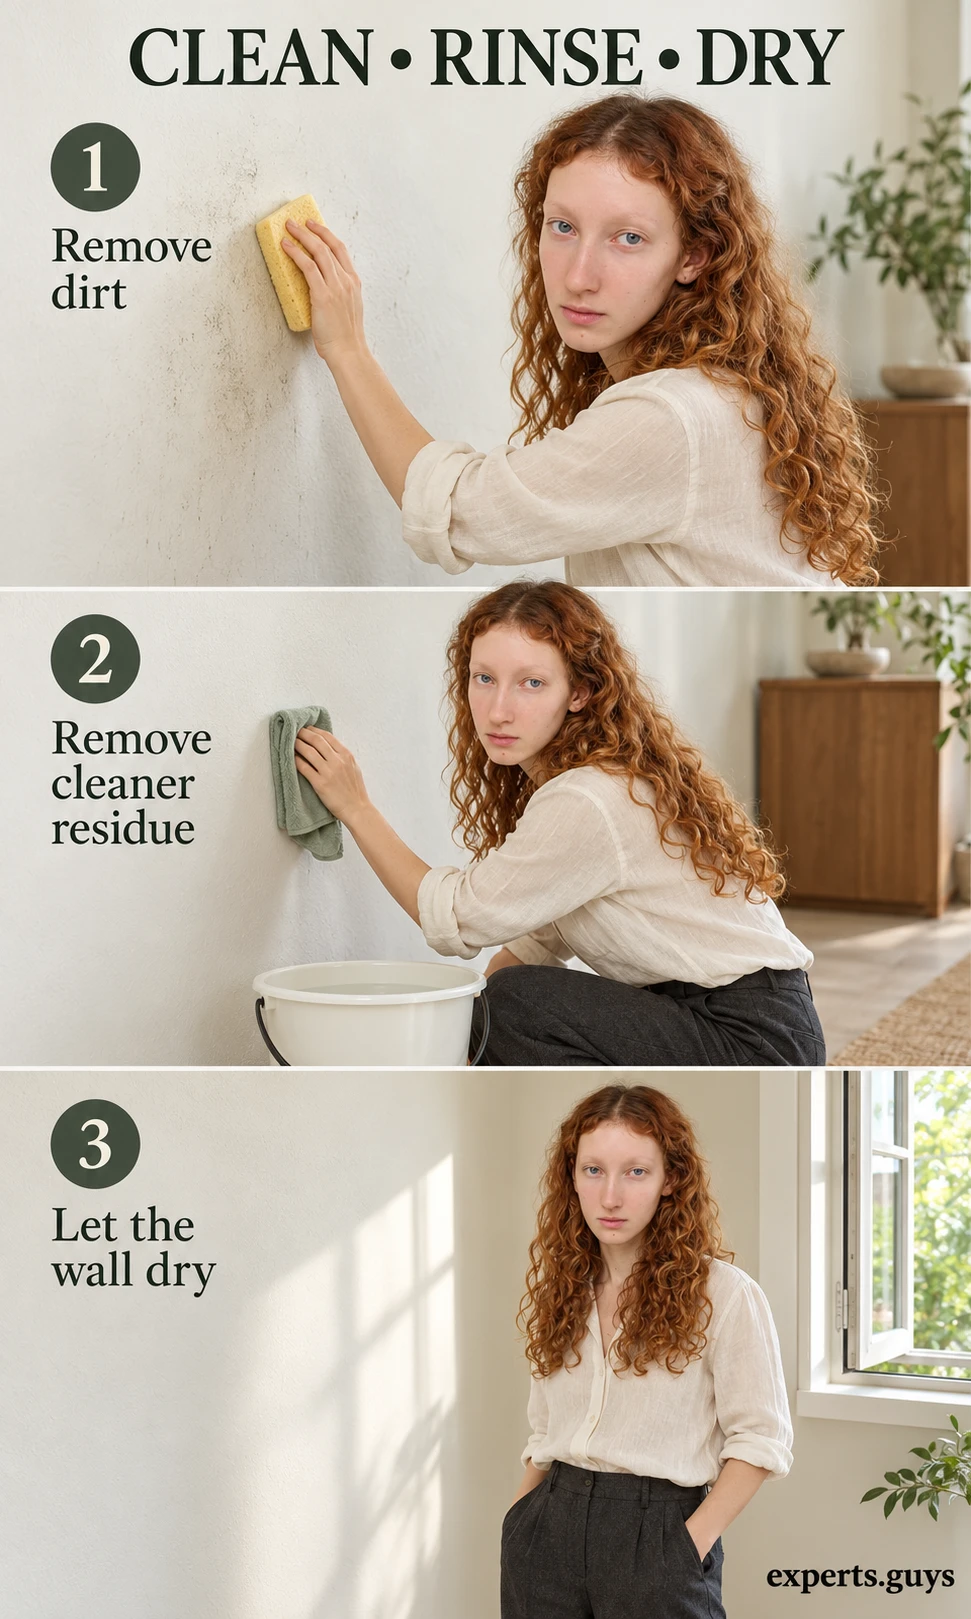
Do not use a stronger cleaner merely because the first wipe did not remove a mark. Some marks are within the paint film or come from behind it. If cleaning softens the finish, transfers significant coating to the cloth, or exposes instability, stop and identify the coating before continuing. The preparation route must suit the wall you actually have, not an imagined smooth new drywall surface.
A repair that looks flat may absorb paint differently from the surrounding surface. Complete any needed repairs using their product instructions and the appropriate old-coating precautions, then use the paint maker’s specified preparation and primer system. Substantial patching, sanding, or damp repair falls outside this ready-wall painting method. Do not shorten repair drying time just to keep a weekend schedule.
Protect the boundary before painting
Cover the floor, clear enough working space, and protect adjacent surfaces. Apply painter’s tape rated for the surface to sound, clean, dry trim or the neighboring boundary; gently press its paint-side edge into contact. Do not stretch tape around an uneven edge or bridge a gap and expect a watertight seal. Check the tape’s clean-removal window and any minimum age required for freshly painted surfaces.
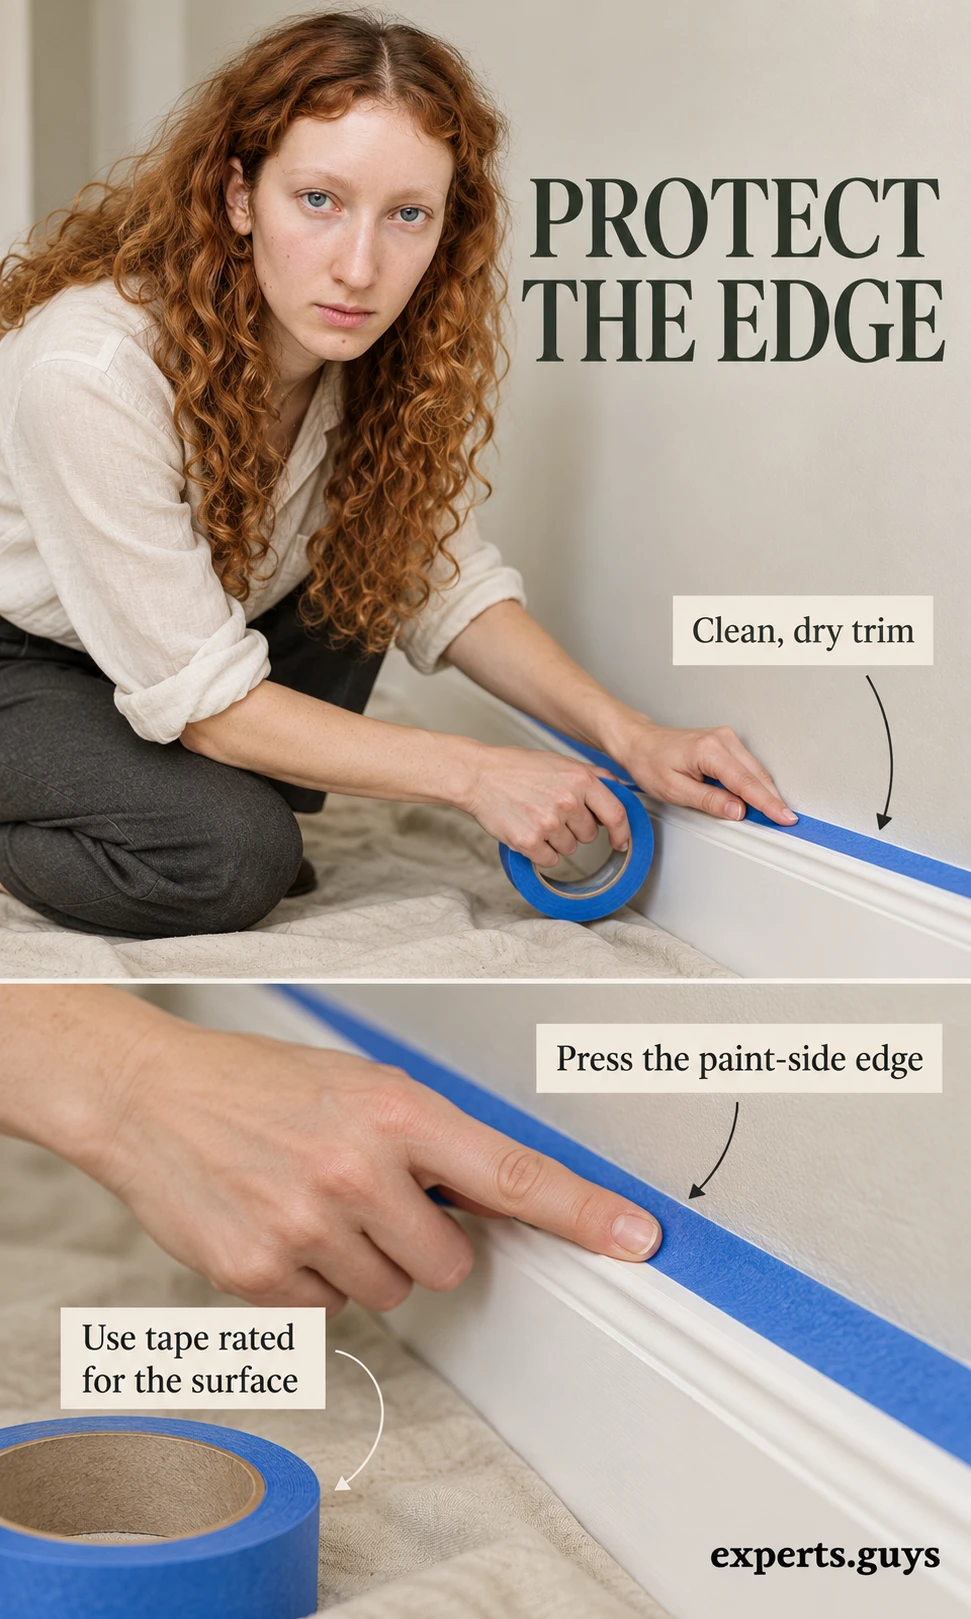
Keep outlets, switches, vents, and removable covers usable and unpainted. Do not push a wet brush behind a cover or treat masking tape as electrical protection. Have any work that exposes electrical parts handled with proper isolation and competence; this painting sequence does not teach electrical work. Trim that is too weak to accept suitable tape needs its own repair before it becomes a dependable boundary.
For a restrained Japandi appearance, an even muted wall and a simple junction with natural wood can be enough. You do not need raised slats, multiple paint effects, or decorative grooves to make the wall intentional. Those additions change the build rather than improving a poorly prepared paint film. Keep the selected sheen consistent across the complete wall and use the applicator recommended for the surface texture.
How do you paint the wall without dry overlap stripes?
Cut in a short area, roll beside it while the edge remains workable, and continue in connected sections. The useful skill is controlling the advancing wet edge: new paint should join paint that can still blend. The right working width depends on your pace, the coating, airflow, temperature, and wall texture, so shrink the section when the edge begins to set before you reach it.
Brush a short section, then bring the roller into it
Stir and prepare the coating as its label directs, and load the roller evenly without leaving it dripping. Start at one end of the wall. With a suitable angled brush, cut in only the nearby corner and boundary that you can promptly roll into. Painting every edge of a large wall before rolling can leave the earliest brushwork too dry to blend with the field.
- Cut in the next manageable section. Keep a neat boundary and avoid a heavy ridge of paint along the tape.
- Roll the adjacent unpainted area. Spread the coating evenly, then overlap into the still-wet edge without forcing a nearly empty roller.
- Even the section with light finishing strokes. Keep direction and texture consistent; do not press hard enough to squeeze paint into ridges.
- Advance while the joining edge remains workable. Continue the same sequence toward the next corner or natural stopping boundary.
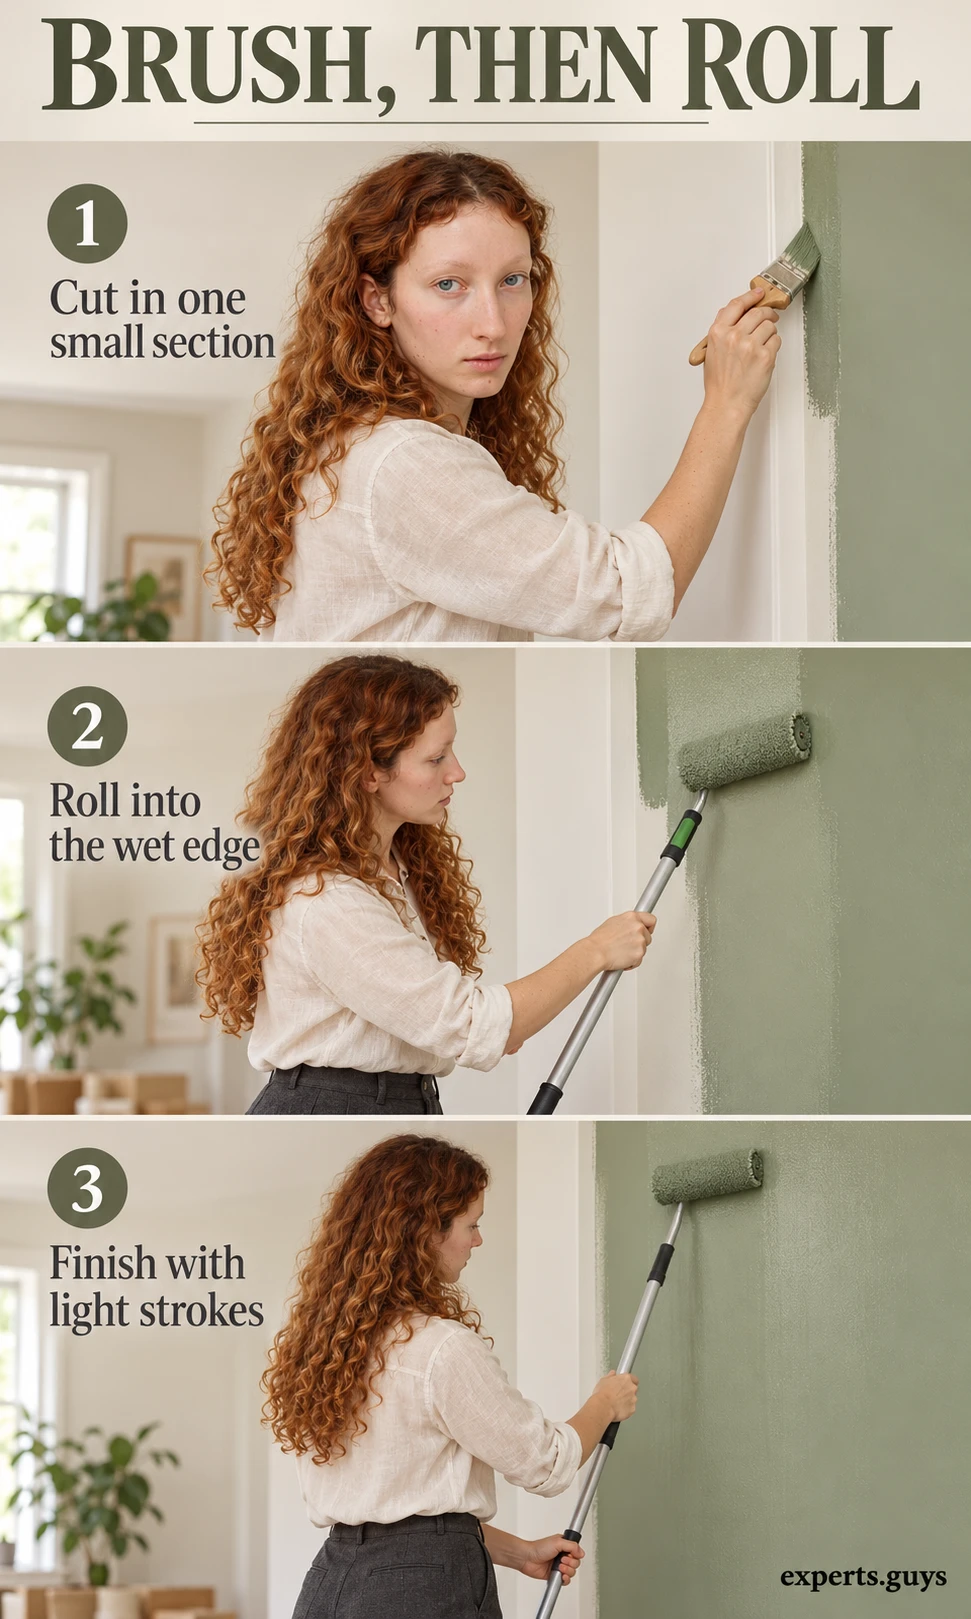
The visible symptom of losing that edge is often a darker or shinier overlap. Sherwin-Williams’ lapping guidance describes working in manageable areas and maintaining a wet edge. Treat that as a pacing problem before blaming the color. A coating that is drying too quickly may also indicate unsuitable room conditions or an absorbent surface that needed a different primer system.
If you need a break, aim for a natural boundary rather than leaving an arbitrary dry seam in the middle of the wall. Keep ventilation consistent with the paint instructions, but avoid a concentrated fan blowing directly across the fresh film. More airflow is not a universal shortcut: excessively rapid surface drying can reduce the time available to blend neighboring sections.
Do not chase every lighter patch while the paint is becoming tacky. Wet paint can look uneven as water or solvent leaves different areas, and extra roller passes can disturb a film that has already begun to set. Let the coat reach the stated inspection or recoat stage. If coverage is insufficient, follow the specified additional-coat process instead of overworking the half-dry patch.
| What you notice during application | Likely working issue | Immediate decision |
|---|---|---|
| The joining edge skins over before rolling reaches it | Section too large or conditions too fast for this coating | Reduce the next working section and check the allowed conditions. |
| Roller leaves heavy edge ridges | Excess pressure or uneven loading | Use even loading and lighter strokes while the section remains workable. |
| Paint drags instead of spreading | Film may already be setting | Stop reworking that area and respect the recoat instructions. |
| Paint pulls away from the underlying finish | Potential compatibility or adhesion failure | Stop; identify the surface and coating system before continuing. |
A small roller can help near a narrow return, but it must suit the same coating and leave a compatible texture. Changing sleeve type midway through a large visible wall can make the finish harder to keep consistent. If a high or awkward area cannot be reached safely and painted continuously, change the access arrangement before starting that coat rather than improvising while holding a loaded roller.
When is the wall ready for another coat and normal use?
Use the coating’s stated recoat interval and conditions, then allow its separate cure period before normal wear. Touch-dry only describes the surface at that moment. It does not establish that another layer, cleaning, furniture contact, or an adhesive decoration is suitable. If the room is colder or more humid than the label’s stated conditions, do not assume the shortest printed interval still applies.

Check your next step before reopening the paint
Use the readiness check below to separate a preparation stop from a timing wait. Enter the recoat interval from your actual coating label and the elapsed time since the previous coat was completed. Its result is a sequence aid, not a moisture test or a guarantee of adhesion; the product’s instructions and the wall’s actual condition still govern the work.
Is your accent wall ready?
Find the next step from the wall condition and your paint label.

Your next step appears here
The check cannot measure moisture, identify lead, or certify adhesion.
Find suitable help nearby
For uncertain surfaces, look for an experienced painting contractor. Ask how the cause will be identified before it is covered.
Compare three candidates you find. Confirm relevant credentials, diagnostic scope, preparation details, written estimate, availability, and warranty terms. No listings or ratings are supplied here.
Entries remain in this page only and disappear on reload. Opening a search sends the entered location to Google.
If you are working without the check, follow the same order: resolve damp or instability, resolve uncertain older paint, finish preparation, confirm the product instructions, and only then compare elapsed time with the stated recoat interval. A timing calculation cannot override a failed earlier condition. When the instructions are unavailable, retrieve the current technical sheet for the exact product rather than borrowing a different paint’s drying time.
Remove tape without tearing the new edge
Use the timing specified by your tape and coating. For example, Scotch’s tape-removal guidance calls for paint to be dry to the touch, releasing the paint bridge at the tape edge, and pulling slowly back on itself at about 45 degrees. Other tapes can differ. Keep a putty knife controlled at the boundary, with your free hand clear; do not gouge the surface or cut into an uncertain older coating.
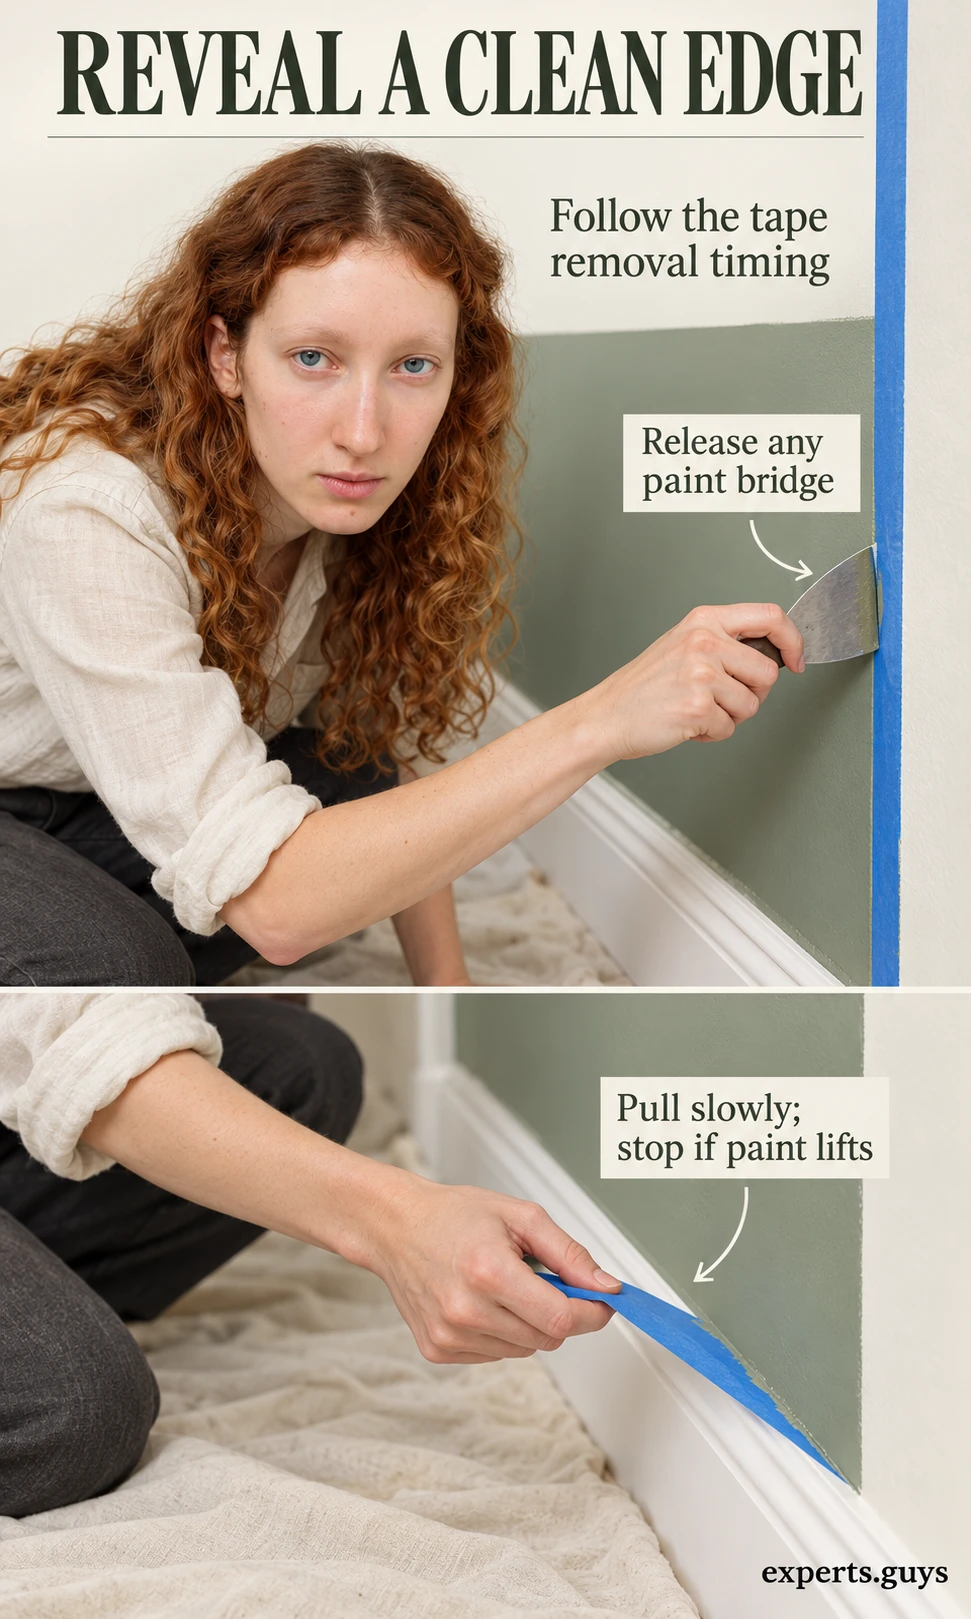
If the wall coating lifts with the tape, stop rather than pulling faster. The failure may be in the new coat, the old finish, or the bond between them. Let the affected area reach a suitable stage for diagnosis and follow a compatible repair system; a longer strip of torn paint makes the correction larger. Do not hide a lifted edge under a thick bead of fresh topcoat.
Judge the dry finish before deciding on a correction
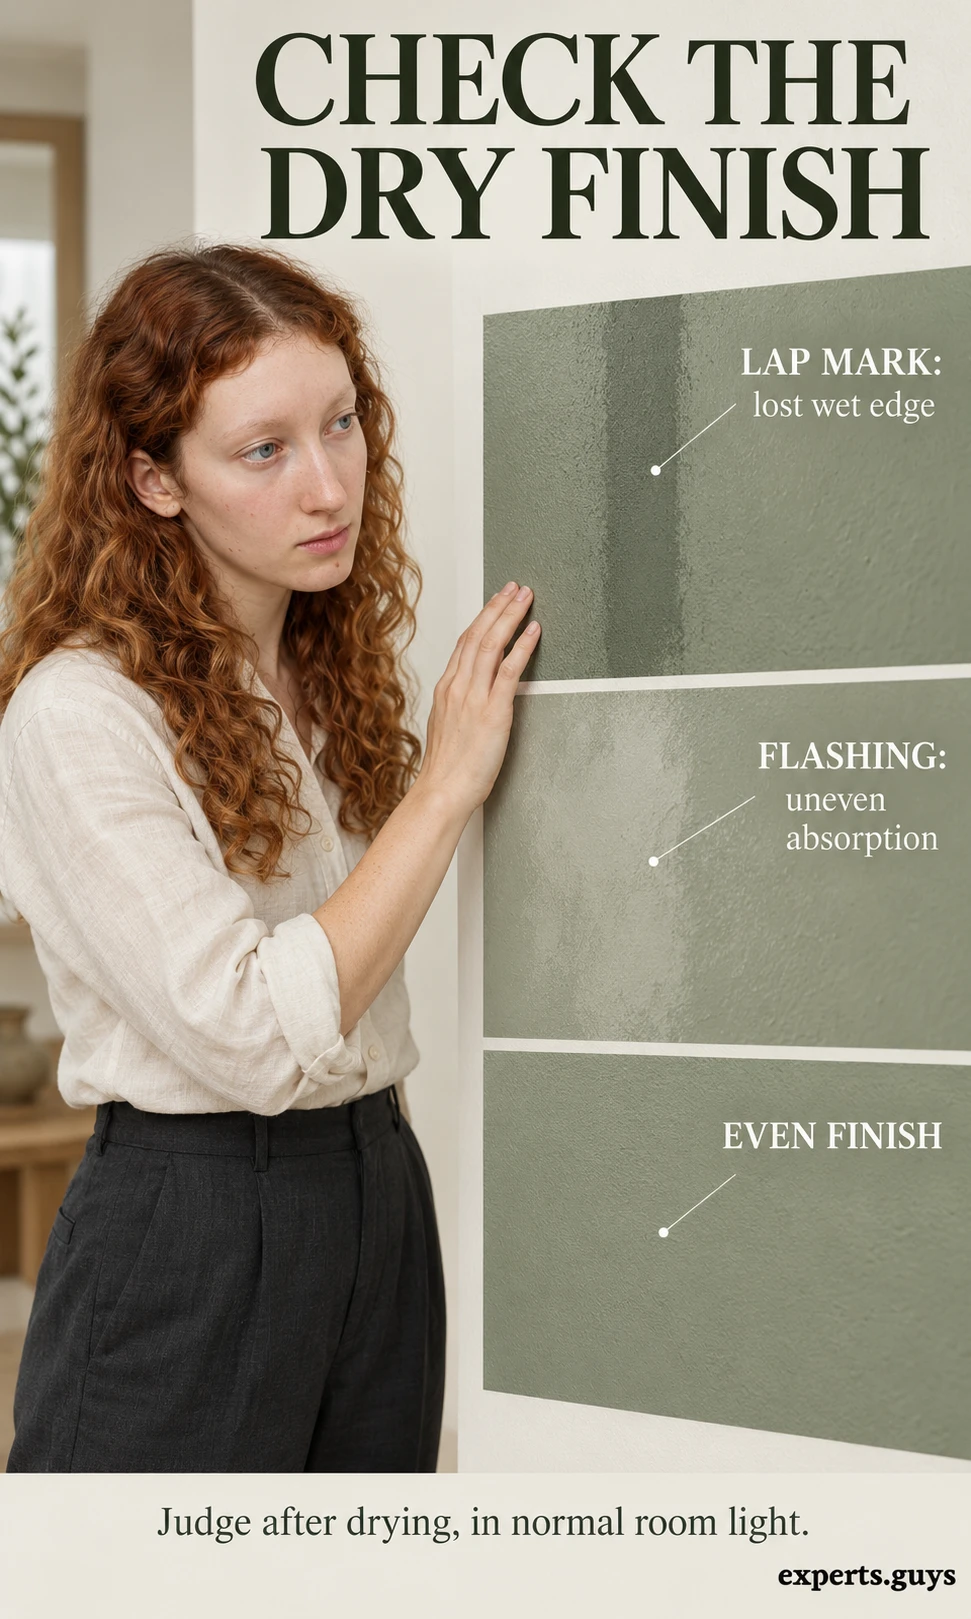
Inspect from the room’s normal viewing positions after the coat has dried as directed. A persistent overlap stripe, a dull repaired patch, and a rough surface are different faults. View the wall in ordinary room light as well as from the side, because extreme grazing light can exaggerate texture that is barely noticeable in daily use. Use the appearance to identify the problem, not to invent a reason to keep rolling wet paint.
| Dry-wall symptom | What to investigate | Avoid |
|---|---|---|
| Darker overlap bands | Wet-edge continuity, application thickness, room conditions | Repeated spot rolling while paint is tacky. |
| Dull or shiny patches over repairs | Uneven absorption, primer coverage, applicator texture | Assuming a darker color alone will hide the difference. |
| Blisters, peeling, or recurring stains | Adhesion, substrate condition, unresolved moisture | Covering failure with another decorative layer. |
| Uniform color but a harsh overall appearance | The chosen sheen, lighting, and surrounding room finishes | Repainting immediately before assessing the room as a whole. |
A visibly even wall is ready to be judged as a design feature, but it may still need protection while it cures. Keep furniture from rubbing the surface and postpone washing or adhesive accessories until the relevant instructions permit them. When the paint job is sound but the room still feels unsettled, the separate guide to balancing an interior accent wall addresses the surrounding composition.
Compare Local Home Specialists Near You
Tell us what kind of help you need, then compare nearby businesses by location, Google rating, review volume and contact options.
HomeFix Local Match
Turn a home problem into a practical local hiring decision. Check the clues, see the specialist types that fit, open focused surrounding-location searches, then compare the strongest three before you call.
 YOUR PROBLEM
YOUR AREA
COMPARE 3
✓ Ready to compare
What is happening?
Choose the closest problem type, then check every clue that applies. Your selections change the specialist order.
Where should the search focus?
Use Google’s “near me” context or enter the area you actually want a specialist to serve.
Simple local search: open nearby Google results, choose the businesses that look suitable, then compare your best three here before you call.
Problem snapshot
Who should you call first?
These are the specialist types most likely to fit the clues you selected.
Search around your location
Compare your top three
Use the same factors for each option so a high star rating does not hide a weak scope, poor diagnosis, missing credentials or unclear aftercare.
Comparison result
Your result combines the Google signals you entered with the practical hiring checks you completed.
Questions to ask every finalist
Use the same questions with each shortlisted business so the comparison stays consistent.
Frequently asked questions
Does an accent wall have to be darker than the other walls?
No. It needs a deliberate visual difference, which can come from color, sheen, texture, or composition. A lighter wall can be the accent in a darker room; there is no universal two-shades-darker rule.
Will a darker paint hide dents and raised repairs?
Not reliably. Strong side lighting and higher sheen can make surface defects conspicuous regardless of color. Resolve the surface problem before choosing a finish to disguise it.
Can I use leftover paint from another room?
Only if it is still usable, suitable for this surface, and available in enough of the same color and sheen for the work. Check its storage history and product guidance; matching the color name alone does not establish a matching finish.
Can a tenant repaint one wall?
Check the tenancy agreement and obtain any required permission before changing the finish. Restoration can require compatible primer and repainting, and removable products can still damage an underlying coating.
Will a fabric accent wall soundproof a room?
Ordinary decorative fabric is not a soundproofing system. Reducing sound transmission involves the wall assembly, gaps, and other sound paths; do not choose fabric on the assumption that it will block noise from another room.
Summary: finish the surface before styling the room
Start with a sound wall, clean it properly, protect the edges, and connect short painting sections while the boundary remains wet. Let the label determine recoating and cure, then inspect the dry finish before adding wear or decoration. The fastest dependable makeover is the one that avoids a repair caused by skipping a necessary stage.