
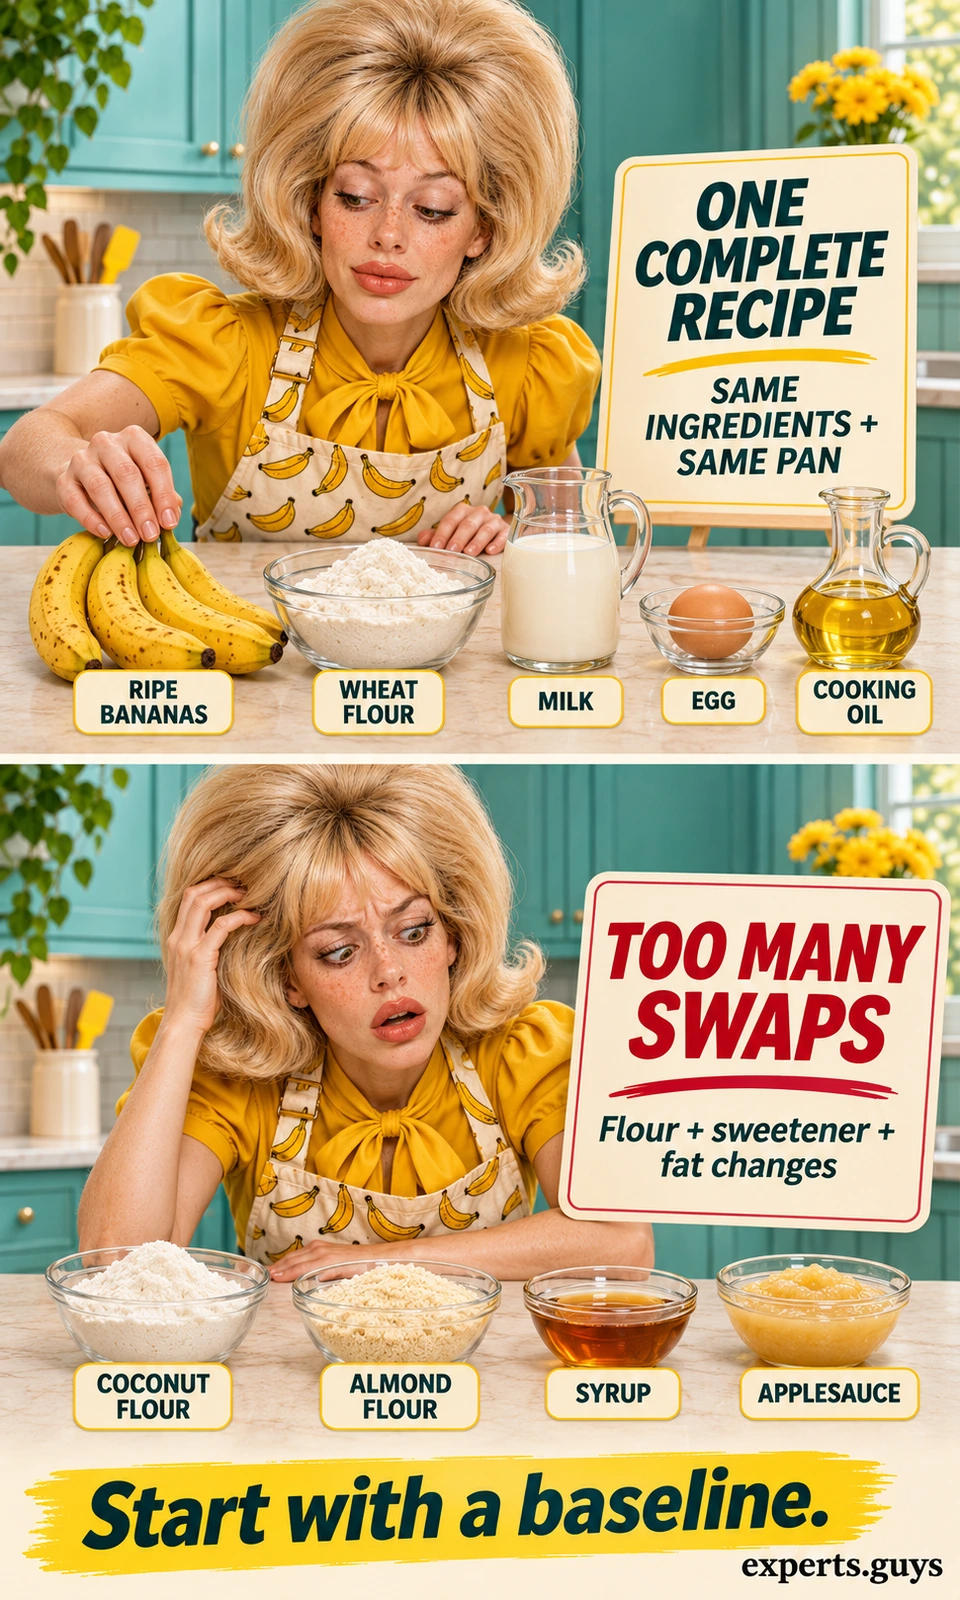
Healthy banana bread for beginners is a simple quick bread whose ingredients, serving size and preparation matter more than a “healthy” label. Start with one complete recipe, match its loaf pan, and prepare a parchment sling before mixing so you can release the finished bread without tearing it.
Which banana bread should a beginner make?
Choose a plain loaf with familiar ingredients and a clear pan size, oven setting and doneness check. A recipe that already includes some whole-wheat flour is a more predictable starting point than replacing several ingredients in an unrelated formula. You do not need a stand mixer, an elaborate topping or a collection of specialty flours for your first loaf.
Here, half of the flour is whole wheat and the other half is all-purpose flour. That describes the grain choice; it does not make the bread sugar-free, gluten-free or suitable for every dietary need. If you require an egg-free, dairy-free or gluten-free loaf, begin with a complete recipe developed for that requirement instead of improvising replacements while the batter is in the bowl.
“Best” means a loaf you can repeat with the equipment and ingredients you actually have. Before starting, read through the method once and check the following four things. Finding a missing ingredient or a mismatched pan now is easier than correcting the problem after the flour is wet.
- The exact flour types and both leaveners are available.
- The pan matches the recipe rather than simply looking loaf-shaped.
- There is enough time to bake and cool the bread before serving.
- The first batch will use the stated formula, without several simultaneous swaps.
Keep the first bake as a useful baseline. If you change the flour, sweetener and fat together, a disappointing loaf gives you little information about which change mattered. This is a practical way to reduce uncertainty, not a claim that other ingredients are inferior; alternative recipes can work well when their proportions are designed together.
One straightforward half-whole-wheat loaf
The ingredient amounts and basic baking method below come from Oregon State’s Whole Grain Banana Bread, which makes 12 servings. Use US measuring cups and spoons. The parchment sling is an added release option; the original recipe also permits a lightly oiled pan.
| Ingredient | Amount |
|---|---|
| Large, well-ripened bananas | 3 |
| Egg | 1 |
| Canola oil | 2 tablespoons |
| Milk | ⅓ cup |
| Sugar | ⅓ cup |
| Salt | 1 teaspoon |
| Baking soda | 1 teaspoon |
| Baking powder | ½ teaspoon |
| All-purpose flour | ¾ cup |
| Whole-wheat flour | ¾ cup |
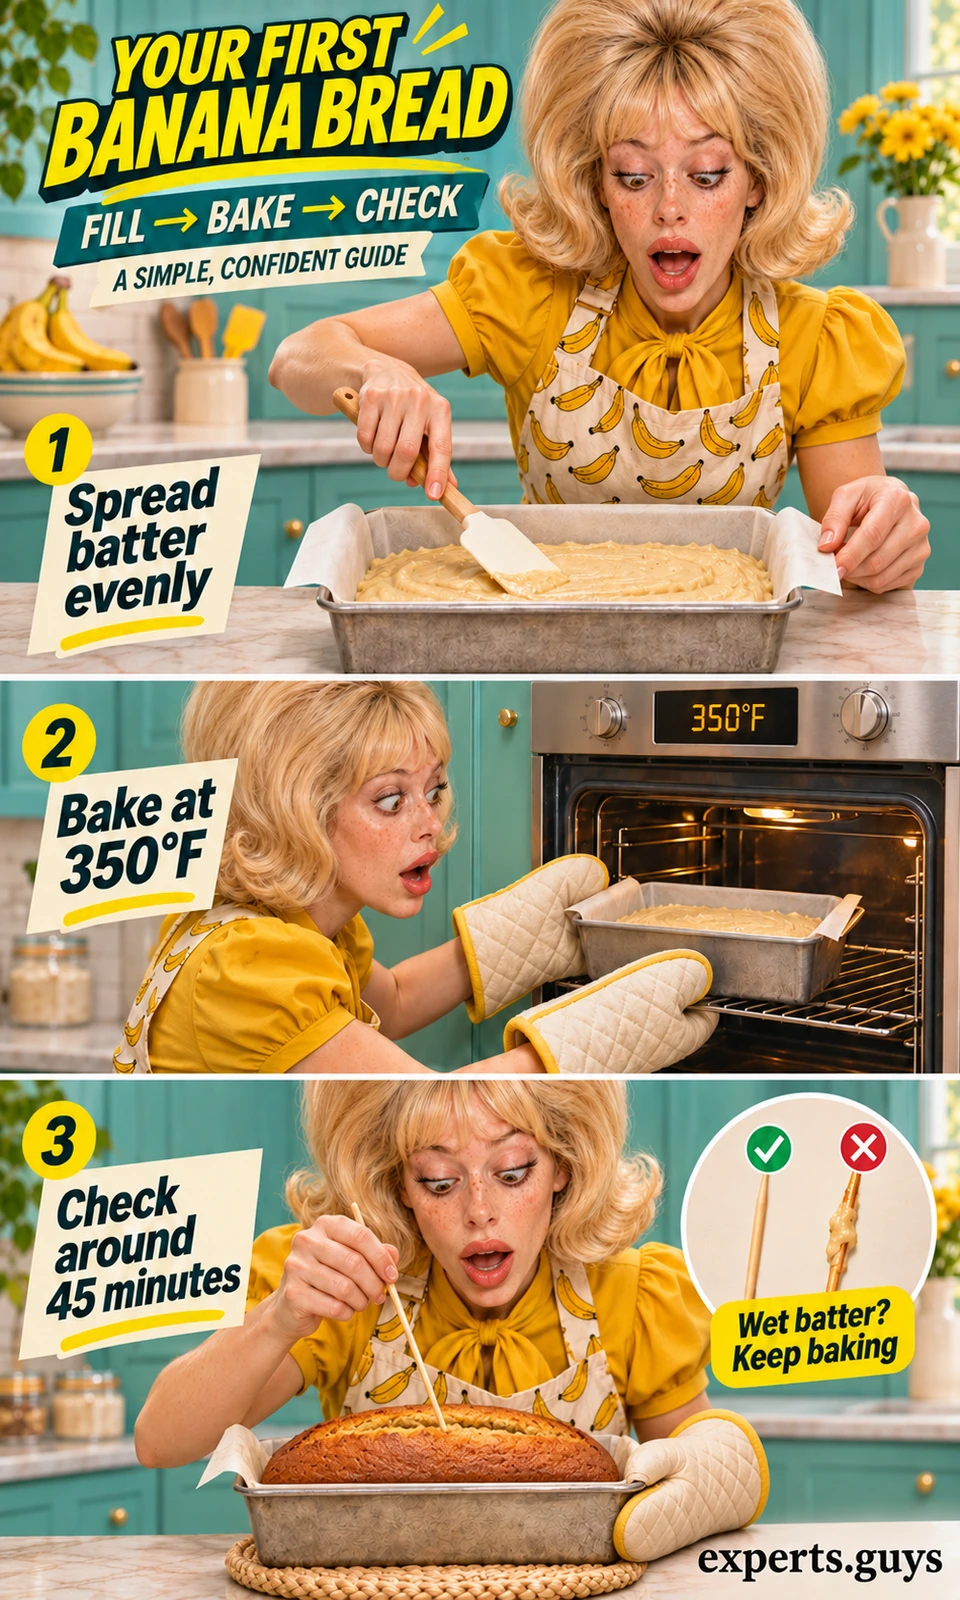
Recipe overview: Heat a conventional oven to 350°F / about 175°C. Mash the bananas; thoroughly mix in everything except the flours. Gently stir in both flours until combined, then fill the prepared 8 × 4-inch loaf pan. Bake for about 45 minutes, checking that a toothpick near the middle comes out clean. Rest in the pan for 5 minutes before removal, then cool before serving.
The word healthy should not hide the rest of the recipe. This loaf still contains added sugar, and honey and syrups also contribute added sugars when used as sweeteners. A serving count describes how the loaf is divided, not a promise about weight change. If you specifically want oats, the oat-banana-bread recipe is a separate formula rather than an instruction to replace this loaf’s flour with oats.
How do you prepare the pan before mixing?
Match the recipe’s pan and give the loaf a clean way out before the batter is ready. To check a pan, place a ruler across its top opening from inside edge to inside edge, first along the length and then across the width. Exclude handles and the outer rim; the inside measurements describe the usable opening. A larger pan spreads the same batter more thinly, while a smaller one makes it deeper, so a different pan is not just a different-looking container.
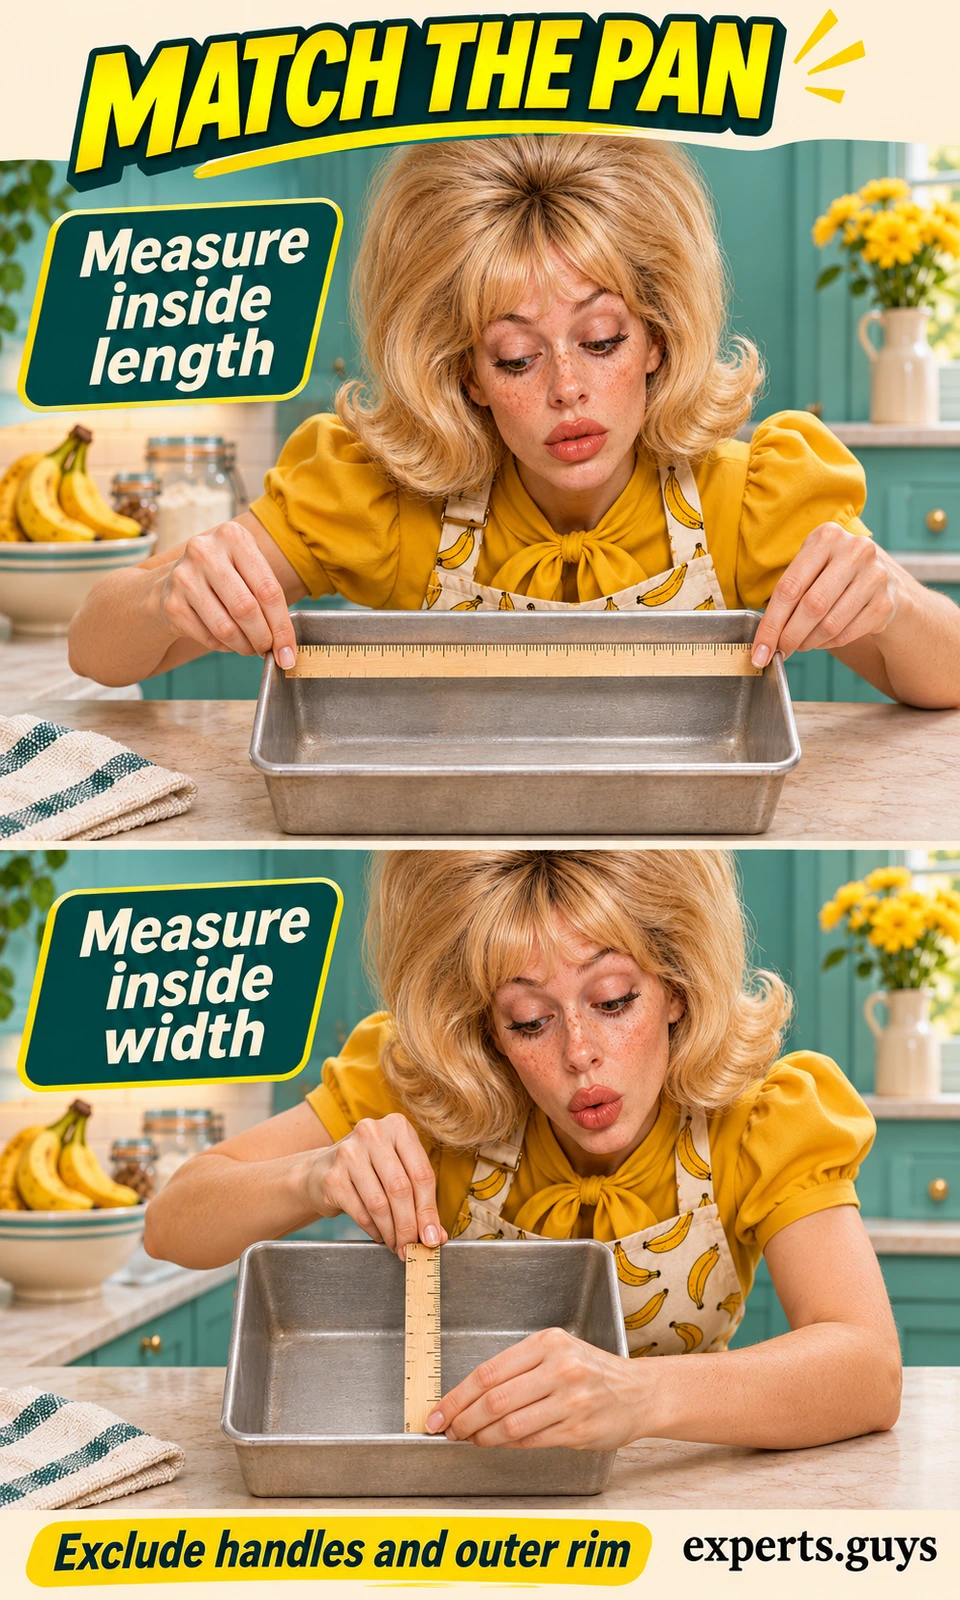
For the first attempt, use a metal loaf pan that matches the stated size. If your pan is substantially different, choose a recipe written for it rather than trying to calculate a new baking time from its length alone. Pan depth and material also matter. This guide does not supply a conversion to mini loaves, muffins or glass bakeware.
Make a fitted parchment sling
A parchment sling supports the bread from below when you lift it. Cut a strip that lies flat along the base and rises up the two long sides; leave the short ends accessible for greasing and loosening. The fit matters more than a decorative fold: paper bunched into a corner can trap batter and make release awkward.
- Lightly grease the pan, then press the parchment firmly into the base and lower corners.
- Leave short, graspable tabs above the two long sides; trim excessive overhang so it cannot fold onto the batter or reach a heating element.
- Lightly grease the uncovered short ends and the parchment surface, following the pan and paper instructions. Check that the base is flat before filling.
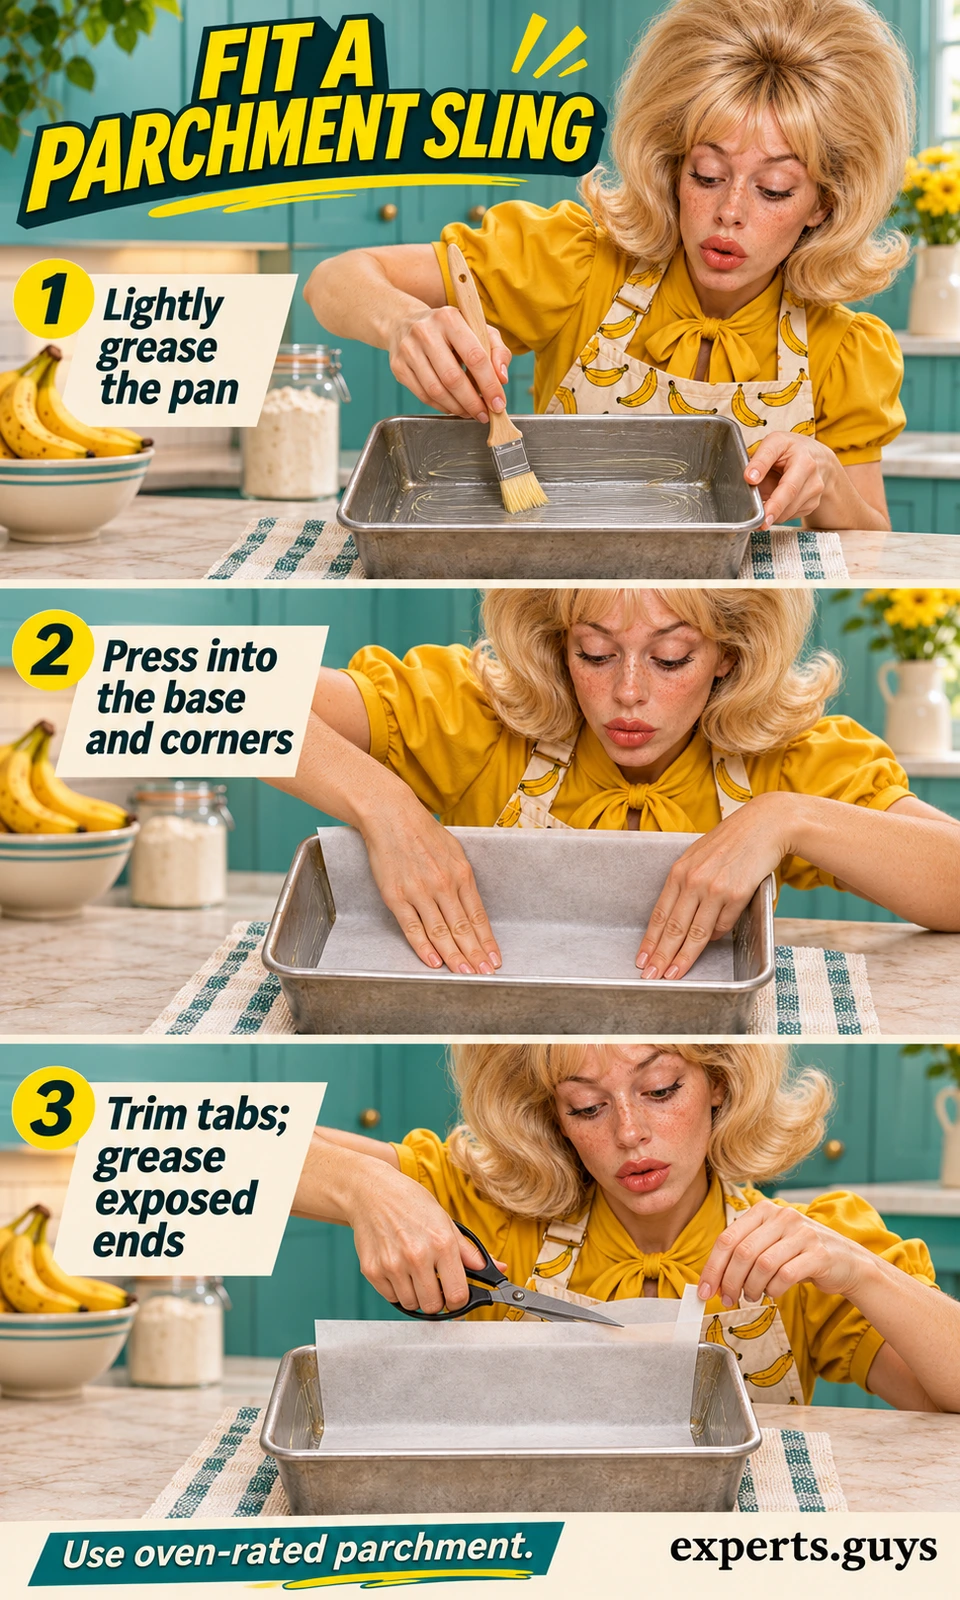
Use baking parchment rated for the oven temperature and follow its package limits. Wax paper is not a substitute for exposed parchment tabs; exposed wax paper can melt in oven heat. Keep all paper clear of heating elements and do not use the broiler for this loaf. For an easier setup, start with a precut sheet and trim it while the pan is cool, or ask someone to hold the paper as you press the corners.
Set out the measuring tools before the wet ingredients
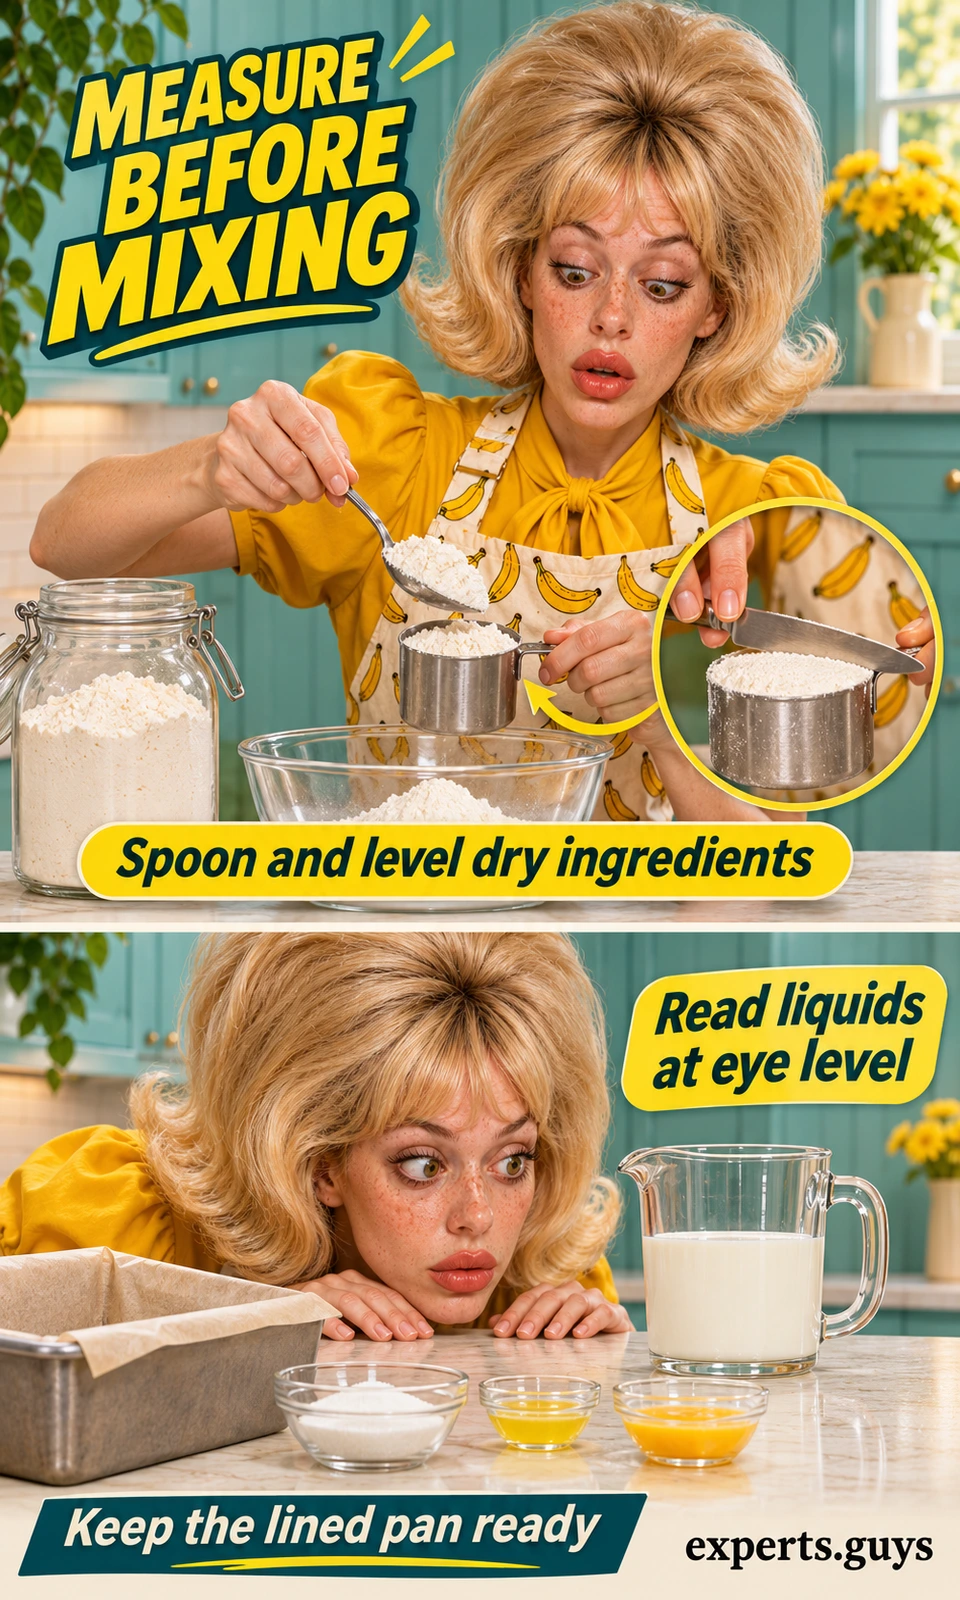
Keep the lined pan, mixing bowl, fork and flexible spatula within easy reach, with the cooling rack and dry oven mitts ready nearby. Place the ingredients in recipe order and move each measured container aside once it has been used. This simple arrangement reduces double additions without requiring a handwritten list, a phone log or extra equipment.
Use dry measuring cups for the flours: spoon flour in gently and sweep the top level without packing it down. Use level measuring spoons for the small quantities, and read milk in a liquid measure resting on the counter at eye level. These different measuring methods prevent a heaped dry cup or a tilted jug from silently changing the formula. A scale is useful when a recipe provides weights; do not invent a gram conversion for this one.
How do you mix without losing your place?
Treat mixing as two stages: finish the banana base, then add the flours. Use ripe fruit that is soft enough to mash easily, and break it down with a fork in a roomy bowl. Small soft pieces are easier to incorporate than large chunks, but a blender is unnecessary. Keep raw ingredients separate from ready-to-eat food, and do not taste raw batter, because flour and eggs can carry harmful germs.
Follow the overview’s order rather than borrowing a mixing method from another loaf. Make sure the banana base is evenly combined before the flours go in, with no unbroken egg or visible pockets of the small dry additions. Baking soda and baking powder have different formulations; having both in this recipe is intentional. Neither a pinch of extra soda nor an equal spoonful of the other product is a reliable correction for a missing ingredient.
Once the flours are added, use the spatula to reach the bottom of the bowl and bring the mixture over itself. Stop when you no longer see dry flour, rather than beating until the batter looks glossy or perfectly smooth. The difference from the earlier stage is the stopping point: complete incorporation is the goal, not prolonged mixing. If dry flour remains underneath, one deliberate scrape is more useful than many fast strokes across the surface.

Do not keep adjusting the batter because another recipe’s photograph looks different. Banana size, flour type and lighting can change its appearance; a photograph is not a calibrated consistency test. If you know you omitted an ingredient, address that specific omission before baking. If you cannot tell whether a leavener was already added, adding another dose “just in case” makes the uncertainty worse.
| First-bake temptation | Why it adds uncertainty | Better decision |
|---|---|---|
| Swap both flours for almond or coconut flour | The structure and liquid needs change. | Use a complete recipe developed for that flour. |
| Replace sugar with the same volume of syrup | Sweetness and liquid change together. | Keep the first formula intact. |
| Add more banana for extra moisture | The amount of fruit changes the balance. | Use the listed fruit amount. |
| Keep mixing to erase every lump | Small fruit pieces are different from dry flour pockets. | Stop once the flour is incorporated. |
How do you bake, release and serve the first loaf?
Spread the batter evenly in the prepared pan, keeping the parchment tabs out of the mixture. Have the oven preheated before this stage, and place the pan on a middle rack with space around it. Do not force excess batter into a smaller pan to make it look full; pan matching was the earlier checkpoint. A timer helps you remember when to check, but it does not establish doneness.
At the recipe’s checking time, test near the center rather than only at the edge. A browned top can appear before the deepest part is ready. If the tester carries wet batter, continue baking and check again after a short interval; use dry oven mitts whenever moving the hot pan. A clean center test and a properly baked structure matter more than making the clock match a photograph.
Lift the loaf without pulling its crust apart
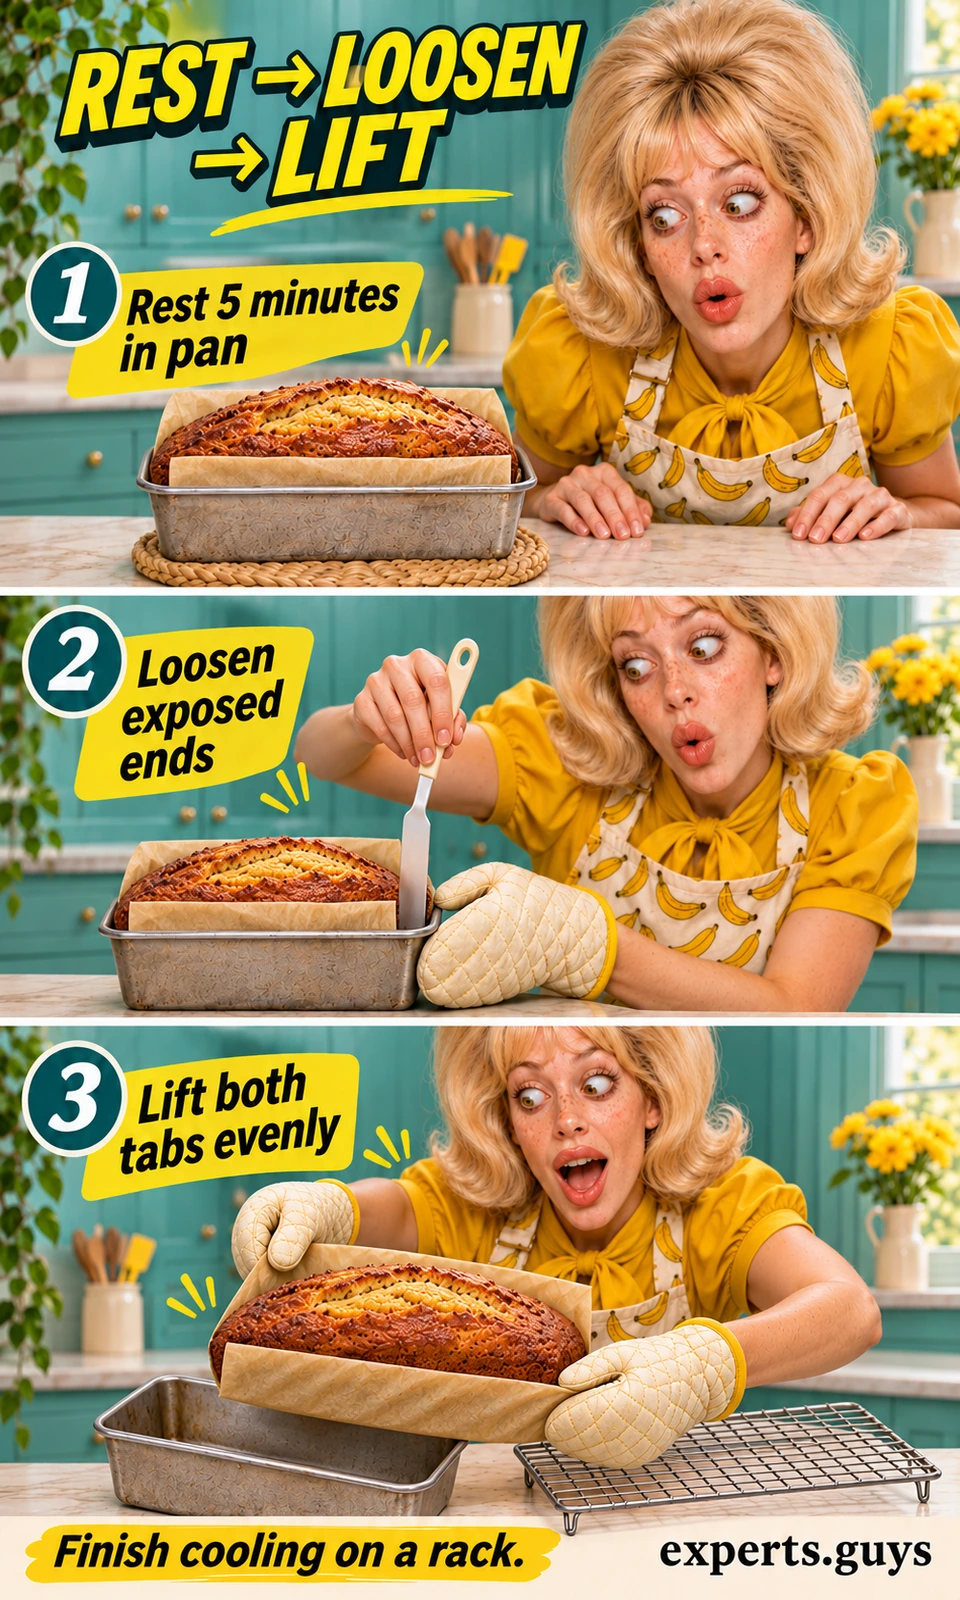
Set the hot pan on a heatproof surface for the recipe’s brief rest. Place the rack close enough that you will not have to carry the loaf across the kitchen. A sling is a lifting aid, not a reason to ignore the heat of the pan or the fragility of newly baked bread. If the paper feels weak, do not test it by holding the loaf high above the counter.
Loosen the two uncovered short ends with a thin nylon spatula, keeping the tool against the pan rather than digging into the crumb. Grip both tabs evenly with dry heat protection and lift gently toward the waiting rack. If the loaf resists, set it down and loosen the remaining stuck area; pulling harder can tear the bread or the paper.
Once the loaf is supported on the rack, ease the parchment away from its sides so it can finish cooling. The rack should support the entire base. Keep the pan on its heatproof surface until it is cool enough to handle; do not use the still-hot pan as a serving dish.
Wait for a sliceable crumb
Allow the loaf to cool before cutting. Warm quick bread can compress or smear under a blade, so an impatient first slice can look worse than the cooled loaf will. Cooling does not repair uncooked batter; that is why the center check happens before release. If the loaf is still warm and delicate, leave it supported on the rack rather than repeatedly picking it up.
Transfer the cooled loaf to a stable cutting board and use a serrated knife with a gentle back-and-forth motion. Keep the supporting hand behind the cut with fingers clear, and let the teeth work instead of pressing straight down. The source’s 12-serving yield is a reference for dividing the loaf; a thicker slice is a larger portion, not the same serving with a different shape.

After the first cut, judge the result against what you actually did. A torn corner points you toward release and handling; a flattened slice may reflect warm cutting or downward pressure. Neither observation proves a single cause of every dense loaf. Keep the pan and formula consistent on the next attempt so that a small process correction has a clear purpose.
| What you notice | First thing to check | Useful correction next time |
|---|---|---|
| Paper folds into the top | Tabs were too long or fell inward during filling. | Trim and crease the sling before adding batter. |
| A corner stays in the pan | An uncovered end was not greased or loosened. | Prepare and release those short ends carefully. |
| The loaf is much flatter than expected | The pan may be larger than the recipe’s pan. | Check inside dimensions before mixing. |
| The first slice squashes | The loaf may still be warm, or the knife is being pressed down. | Cool fully and use a gentle sawing motion. |
| Wet batter appears on the center tester | The middle is not ready. | Continue baking before removing the loaf. |
For what happens after cooling, follow the recipe’s storage directions and use suitable covered cold storage when guidance is unclear. Detailed wrapping, freezing and thawing belong in the banana-bread storage guide. The useful achievement here is a first loaf made from a consistent formula, released intact and cooled enough to slice—not a promise that one food will change your health.
Frequently asked questions
Do I need an electric mixer?
No. This recipe uses a fork and a spatula. A roomy bowl and ingredients measured in advance are more useful than buying a mixer for this particular loaf.
Can I use self-rising flour?
Not as a direct substitute here. Self-rising flour already contains added ingredients, so combining it with this formula’s salt and leaveners changes the recipe. Choose a formula written for self-rising flour.
Can I make this loaf vegan or gluten-free?
Not by simply removing the egg or exchanging the flours. Use a complete recipe developed for the dietary requirement, and check every ingredient for the relevant allergen or certification.
Do I need to add nuts or a sliced banana on top?
No. The baseline recipe here has no topping. Extra decoration adds another variable to the first bake and is unnecessary for learning pan preparation and release.
Can I double it in one larger pan?
This guide does not establish a larger-pan baking time. For a first attempt, make the stated batch in the stated pan; a deeper mass of batter does not necessarily bake in the same time.
Is this a low-calorie or weight-loss recipe?
No such claim is made. Whole-wheat flour describes part of its composition, while the ingredients and the portion you eat determine what is in your serving. A food name alone cannot predict weight change.
Make the first loaf repeatable
Choose one complete formula, check the pan before mixing and fit the parchment so it supports the loaf. Then use the recipe’s sequence, bake the center properly and release the bread gently before cooling and slicing. A repeatable first result gives you a sound starting point for deciding what, if anything, to change later.