
A steel mesh zero gravity chair usually means a steel-framed recliner with a flexible fabric mesh seat, not a seat woven from steel wire. The useful buying question is whether the frame, sling, suspension and controls suit your needs and can be maintained or replaced. Start with the exact model label, then assess each part separately.
The phrase alone does not identify a steel grade, a load rating or a replacement-fabric size. A thick-looking tube does not reveal its wall thickness, and a neat finish does not prove the condition underneath. Treat photographs as a starting point and the matching manufacturer documentation as the specification.
For an existing chair, keep the inspection unloaded and on a firm, level surface. Visible damage, missing parts or an unexplained change in stability means stop using it while you establish the cause. These checks help you decide what to do next; they cannot certify structural safety.
| What you find | What it means | Useful next action |
|---|---|---|
| Steel frame + fabric mesh | Separate materials with separate failure points | Identify the model and read both material specifications. |
| Dirt on intact fabric | A cleaning task may be enough | Use the care label and gentle cleaning sequence below. |
| Frayed cords or torn fixing points | The suspension or sling needs attention | Stop use and confirm a model-approved remedy. |
| Cracked joint, distorted tube or broken control | A potential structural or mechanical fault | Keep it out of use; seek the manufacturer’s repair or replacement route. |
| Unknown model or incompatible spare parts | A repair decision has missing evidence | Resolve compatibility before spending money. |
What does “steel mesh” actually tell you?
The frame carries the chair’s structure; the fabric provides the seating surface. Laces, clips or another attachment system connect that surface to the frame. A useful listing describes each component separately rather than relying on “heavy duty” or “premium mesh”.
For example, this manufacturer’s material specification lists steel and Textilene as separate materials. Its stated capacity belongs to that product family, not every chair described as steel mesh. Use this as an example of the information to look for, not a recommendation or a tested comparison.
Method 1: Match the label to the listing
Use this check before buying second-hand, ordering a replacement sling or interpreting a capacity claim. Have your phone, the seller’s listing and the manufacturer’s product page available together. Matching identifiers prevents a visually similar chair from supplying the wrong instructions.
- Photograph the label with the model or reference number; include a wider view showing where it is attached. Save the seller’s listing or your receipt in the same phone folder.
- Find the manufacturer’s matching manual and check the frame material, fabric, stated capacity and intended use. Compare the actual model code, not only the product name.
- Check the manufacturer’s safety notices and the product-safety authority for your market. For U.S. products, search the CPSC recall database using the brand and model; a name-only search is not conclusive.
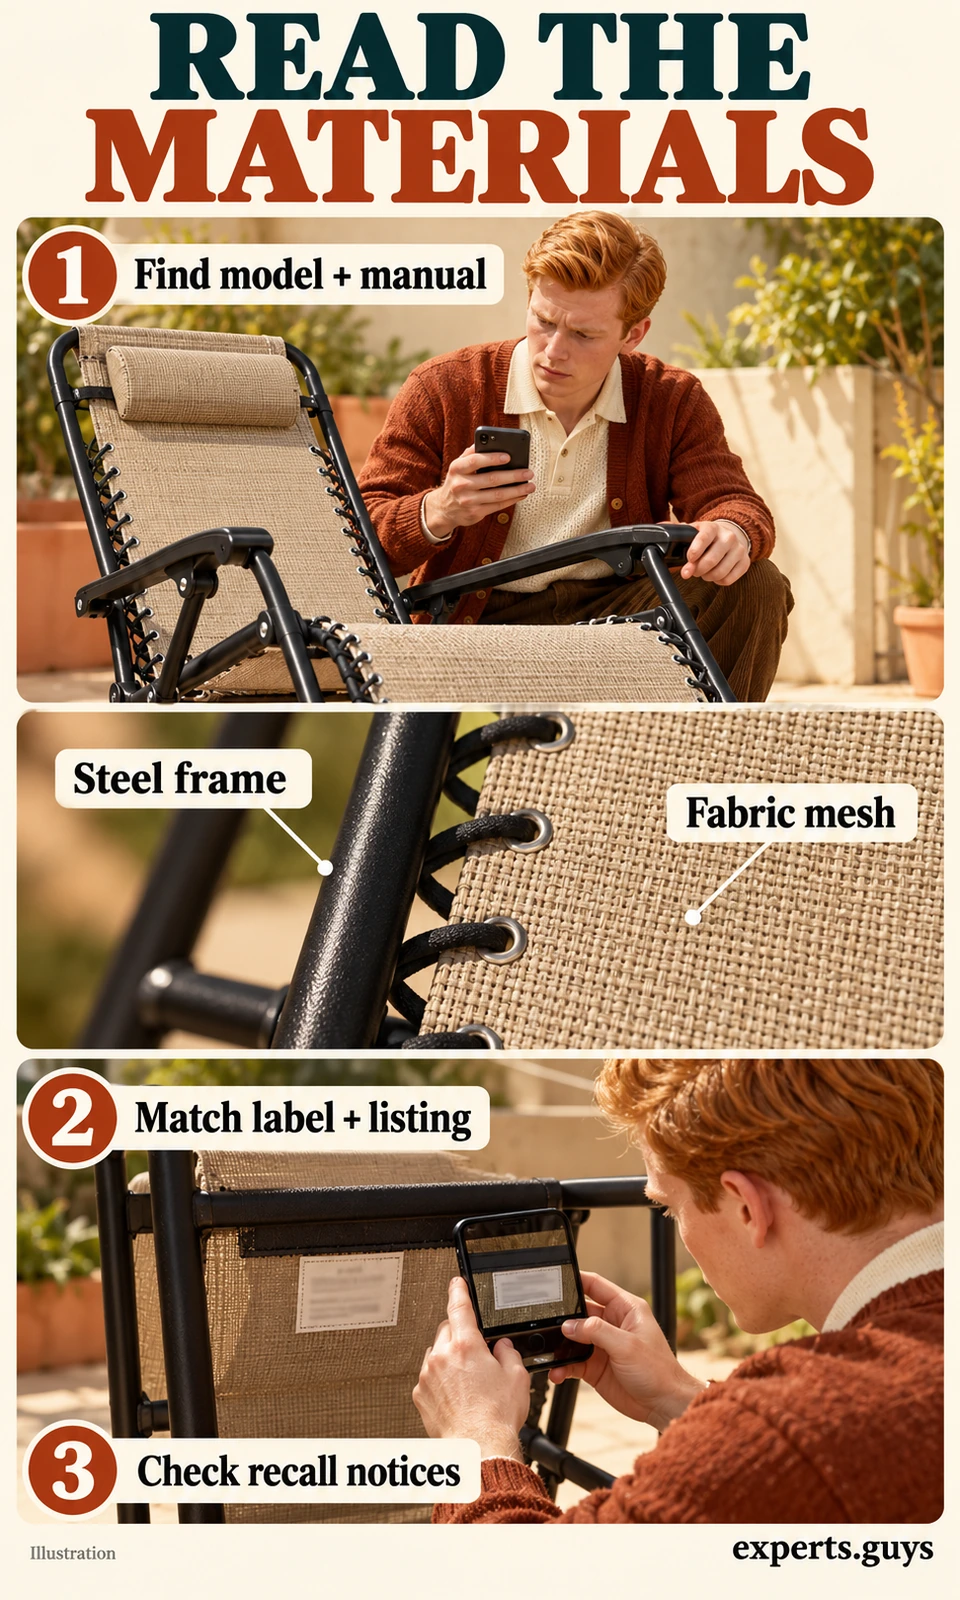
Suppose a listing says “300 lb” but the label leads to a manual for a different capacity. Do not choose the larger number or average the two. Ask the manufacturer to reconcile the exact model and revision; if the seller cannot provide a label photo, treat that uncertainty as part of the buying decision.
The common mistake is treating a missing recall result as approval. It only means the search did not identify a matching notice, and it says nothing about wear on the particular chair. The checkpoint is a consistent model, manual and specification, with any relevant recall instructions resolved before use.
Which parts should you inspect before using an older chair?
Inspect the frame, fabric suspension and controls as separate systems. A sound-looking seat does not compensate for a damaged frame, and an intact frame does not make a torn sling usable. The matching BCP instruction manual, for example, directs users to stop using its product when parts are missing, broken, damaged or worn.
Method 2: Look for frame damage before cleaning it away
Start with the empty chair where you can see its feet, crossmembers and joints without reaching into the folding mechanism. Use a phone camera zoom if bending or getting close is awkward. This is a visual check, not a strength test or a rust-removal procedure.
- Look along exposed tubes for bends, splits and areas that no longer align normally. Examine welded joints and the areas around pivots without moving your fingers between parts.
- Look for lifted coating, rust flakes, deep pits or staining emerging around a joint. Do not scrape, drill or flex the tube to investigate.
- Photograph the whole chair and a close-up of each suspect area. Keep the chair out of use if a crack, distortion or substantial corrosion is present, or if you cannot judge the extent.
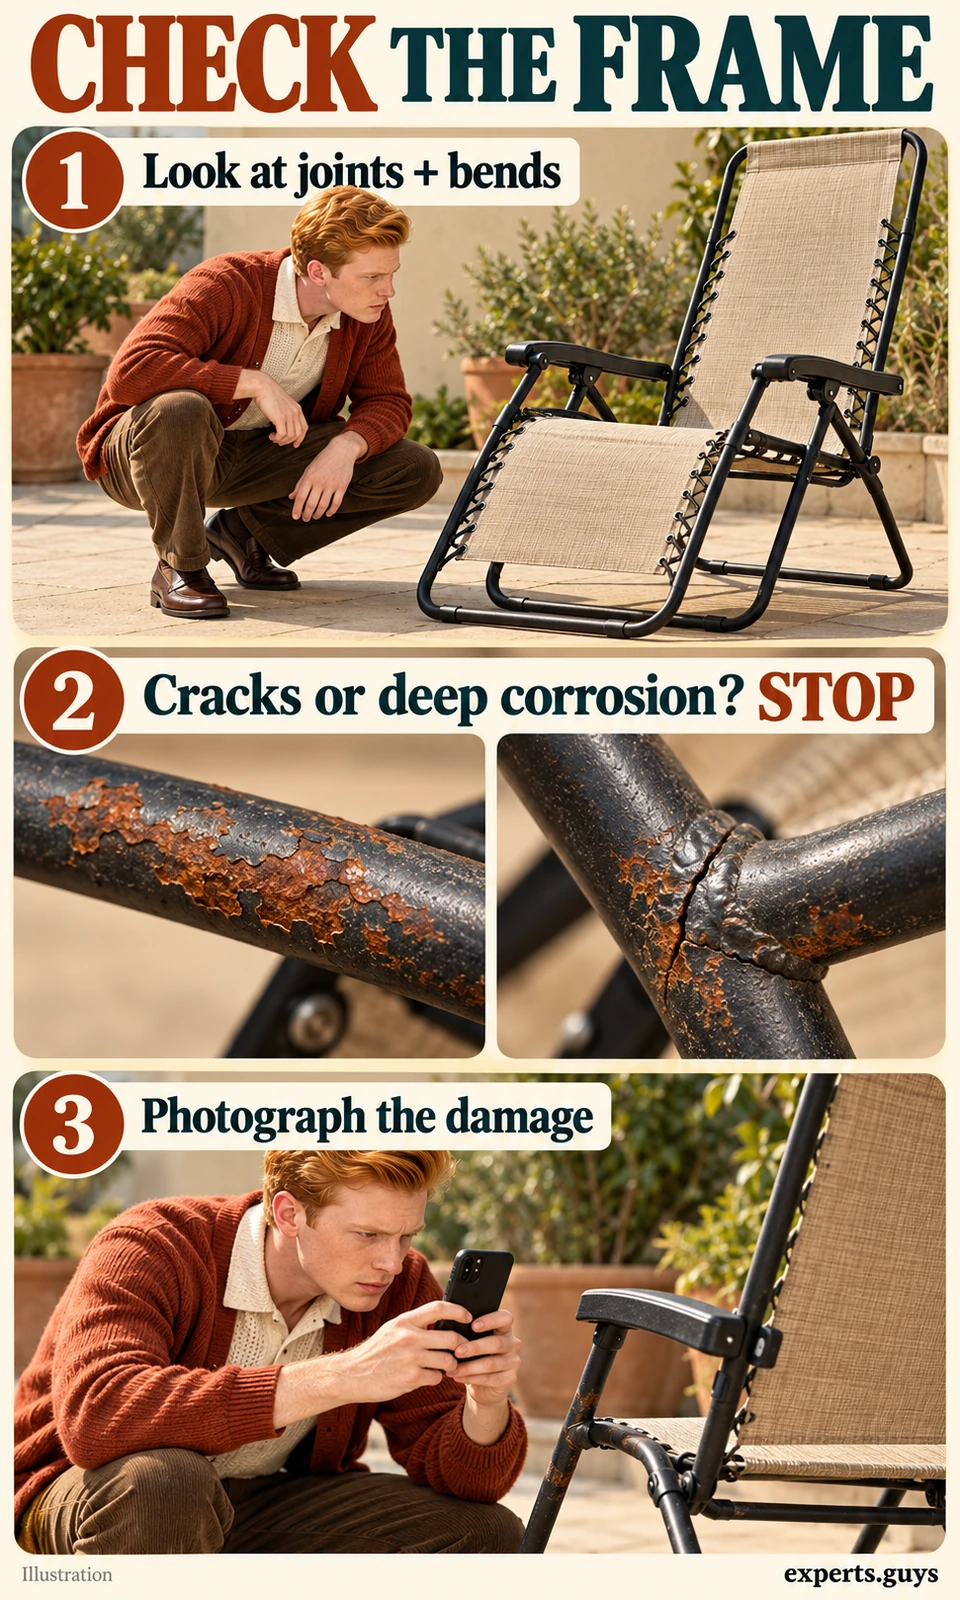
An orange mark on the surface and a pitted tube are different observations, but colour alone cannot establish how much metal remains. Painting over either one before identifying the problem removes useful evidence. If the view is obscured, ask for an assessment using the photos rather than testing the chair with someone sitting in it.
The useful outcome is either no visible frame concern found or a specific fault to resolve. “No visible concern” is not a guarantee because concealed corrosion and fatigue may not be apparent. Where a structural repair is proposed, require the manufacturer’s approved route; cosmetic touch-up is not a substitute for restoring strength.
Method 3: Trace the mesh, cords and fixing points
Fabric wear often becomes visible at the places where the sling transfers force into its fixings. Look at the edges and attachments as well as the middle of the seat. On a laced chair, a problem in a cord and a problem in the surrounding fabric require different replacement decisions.
- With the chair empty and stationary, follow the fabric edges from backrest to seat and foot section. Look for splits, thinning areas and separation at seams.
- Inspect each visible cord or clip and the fabric around it. Note frayed cord covers, broken clips, distorted eyelets or tears spreading from a fixing.
- Compare left and right visually and photograph any difference. Stop use for damaged support components; do not pull the cords tighter, cut them under tension or sit down to “see if they hold”.
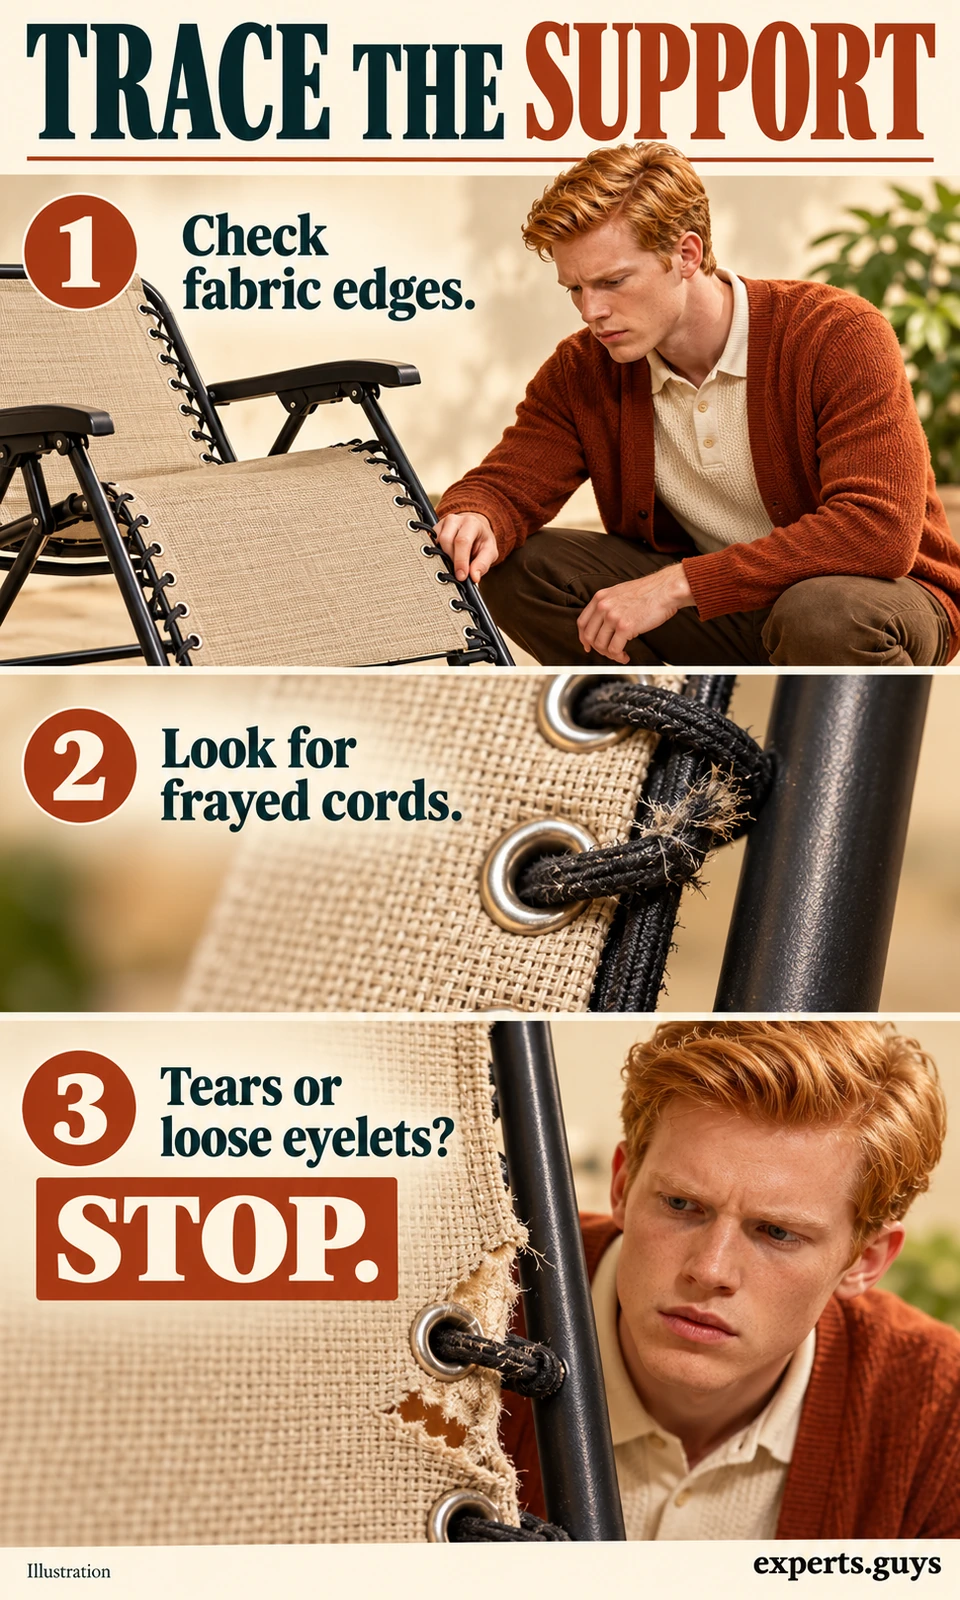
For example, a loose-looking section beside a torn eyelet is not solved by purchasing stronger cord. The surrounding sling may be the failed component. If you cannot see the rear edge, a phone photo from a safe angle is easier than dismantling a chair without its instructions.
The common mistake is diagnosing every sag as loose lacing. Sag can involve fabric, cords, attachments or the model’s intended shape, so it is not a universal tension setting. Your checkpoint is an identified affected component and a compatible repair route, not a guessed number of extra turns or knots.
Method 4: Inspect controls against the model manual
A control under the armrest may be a lever, knob or another mechanism. Similar-looking controls can work differently, so a generic “turn clockwise” instruction can be wrong. Keep this check to identification and visible condition when the chair’s reliability is in doubt.
- Open the matching manual on your phone and locate the control illustration. Identify every control it describes, including both sides where applicable.
- Look for missing pieces, broken housings, obvious looseness or a control that differs from the documented arrangement. Keep hands clear of moving joints and do not force anything.
- If there is damage, unexpected movement or a history of slipping, keep the chair out of use. Send the model photo and fault description to the manufacturer for the correct remedy before further operation.
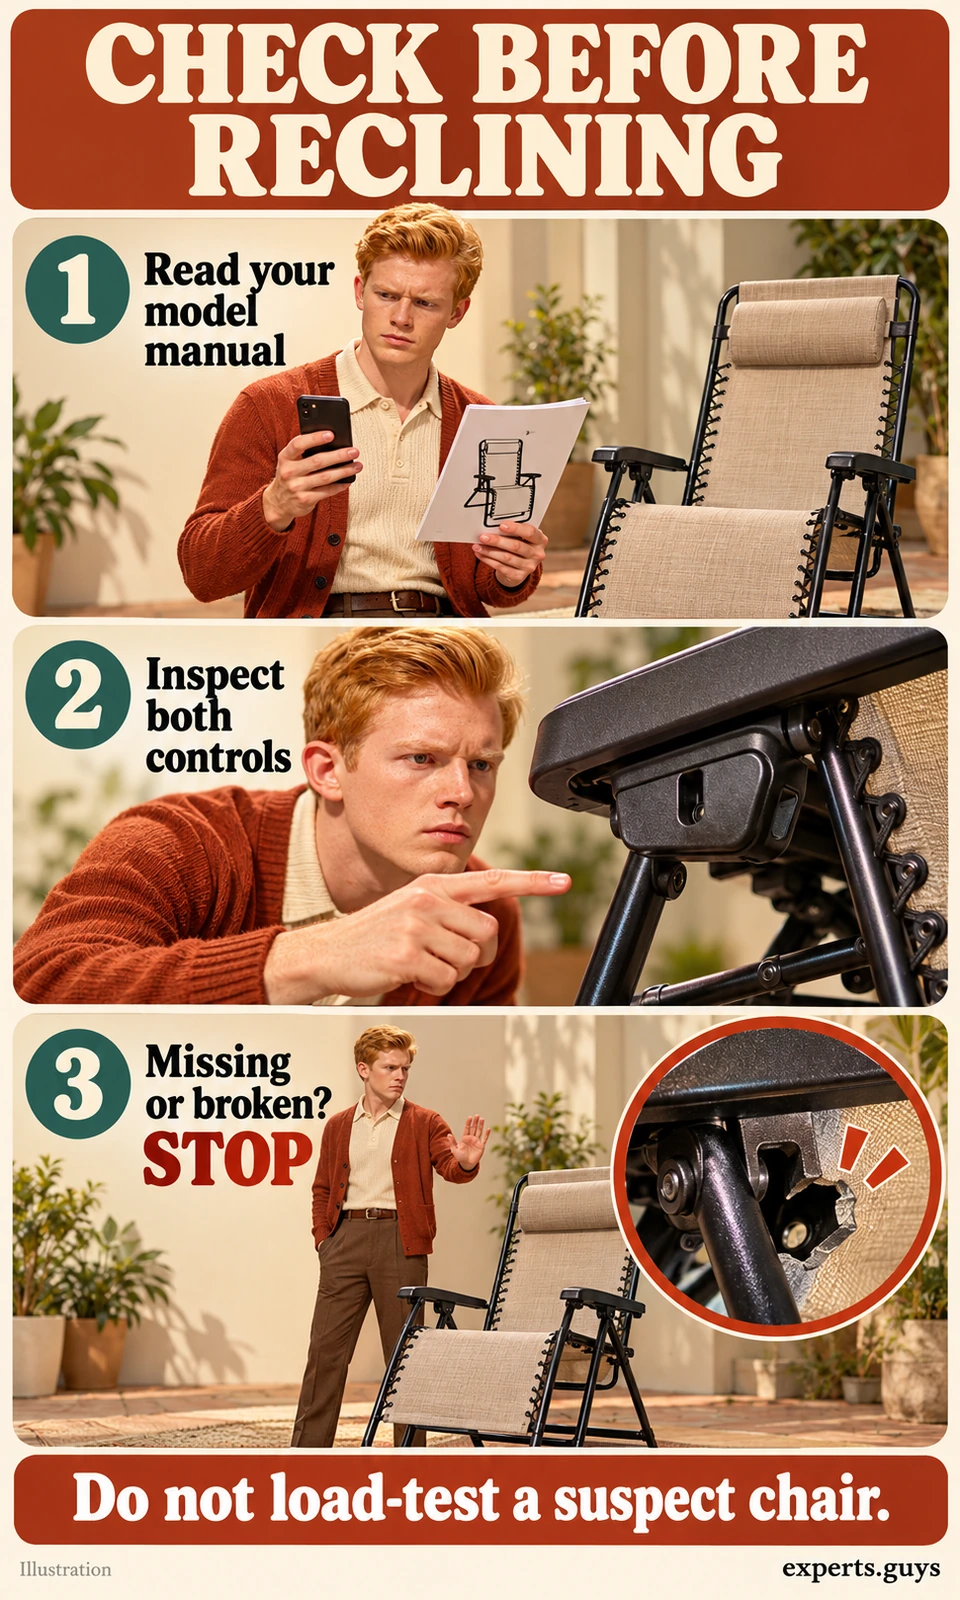
If one side is missing a handle, copying the position of the other handle does not restore the mechanism. A spare part must be approved for that model and installed according to its instructions. Do not improvise a clamp, lubricate an unknown friction surface or tighten an unspecified fastener until the manufacturer identifies the correct action.
The result of this check is a clear control identification and a decision about whether further use is appropriate under the manual. It is not a load test, and there is no universal recline angle or force that proves safety. For a chair with no identified fault, follow its operating instructions rather than the movement sequence shown for a different product.
How should you care for mesh without damaging the chair?
Treat cleaning and structural repair as different tasks. Gentle cleaning can remove residue from intact materials, but it cannot restore a frayed cord, cracked joint or degraded sling. A weather-resistant description also does not remove the need for drying and suitable storage.
Method 5: Clean gently, then dry before storage
Use this routine only on an intact chair after checking its care instructions. Prepare a soft sponge or cloth and the cleaner permitted for that fabric; mild soapy water is common but not universal. Lafuma’s care guidance illustrates why fabric type matters and recommends non-abrasive cleaning for its relevant outdoor furniture.
- Remove loose surface debris gently. Use the approved cleaner as directed, testing a discreet area if the product instructions require it; avoid aggressive scrubbing.
- Clean the fabric without saturating areas unnecessarily, then remove cleaner residue as its instructions specify. Wipe the frame with a soft cloth, keeping liquids away from mechanisms where the manual requires it.
- Leave the chair open to dry in a suitable ventilated place. Check seams, folds and attachments before folding or covering it, then store it in the dry, sheltered conditions specified for that model.
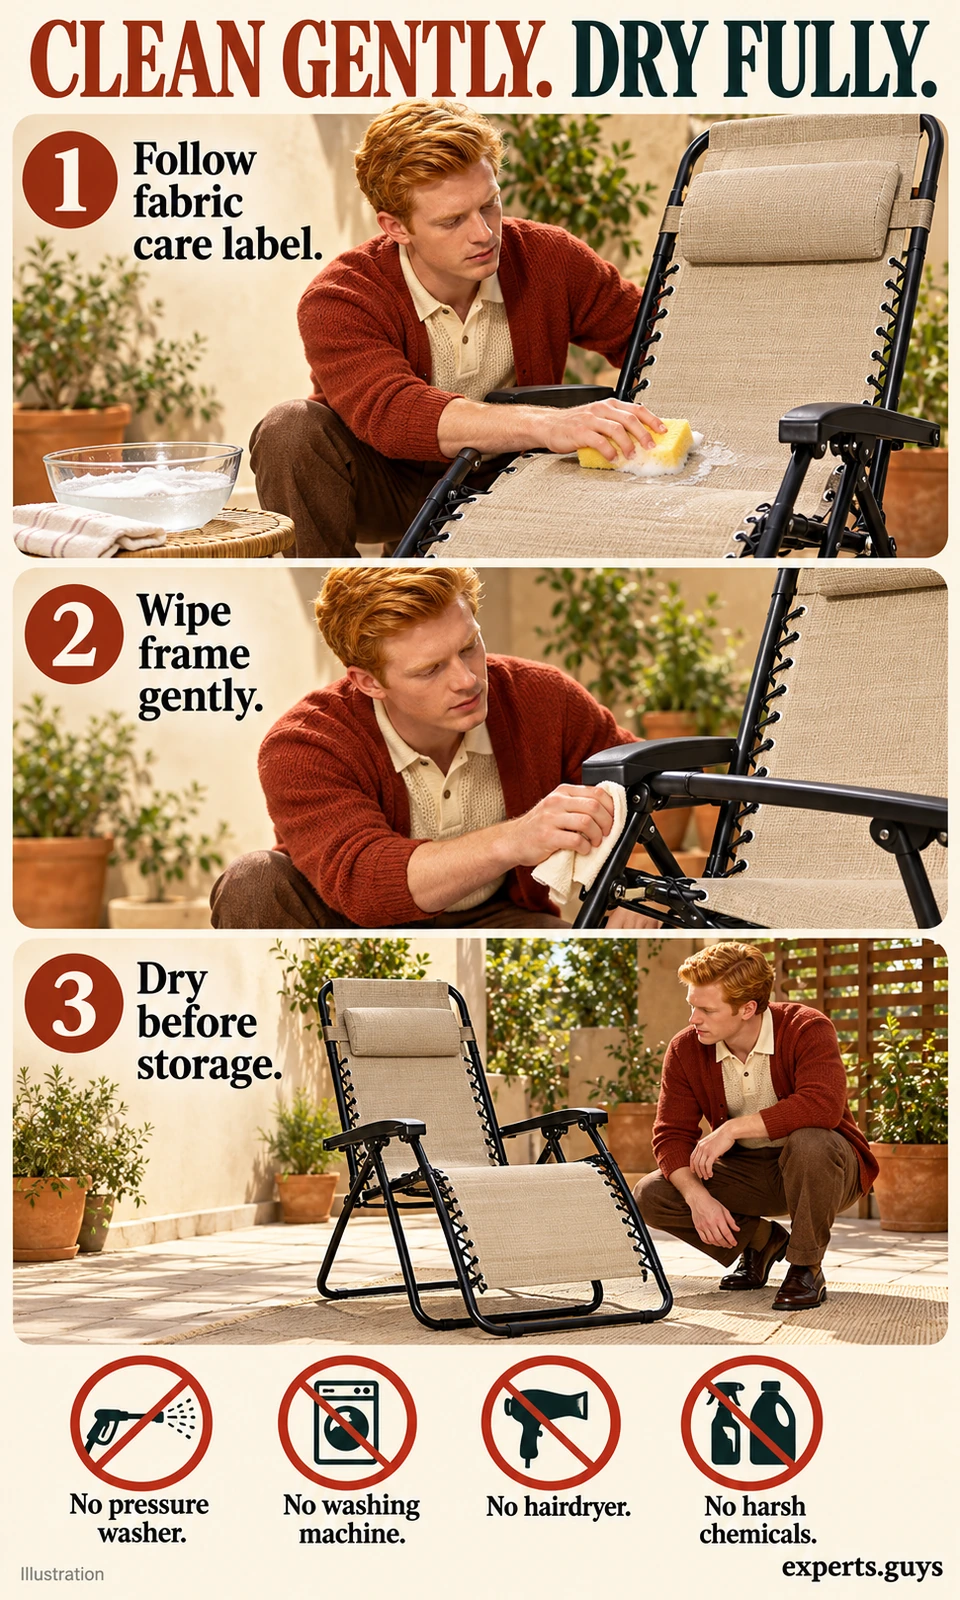
After a muddy splash, begin with the least aggressive permitted method rather than a pressure washer. If residue remains, repeat only as allowed by the fabric-care instructions instead of escalating to bleach or solvents. On a small balcony, clean one area at a time with a cloth and catch drips rather than soaking the entire chair.
The checkpoint is clean material, no cleaner residue and fully dry fabric and attachment areas. A chair that feels dry across the seat may still hold moisture in folds. Do not use a fixed “two-hour” rule, because drying depends on the fabric, humidity, airflow and how wet it became.
For storage, the manufacturer’s storage guidance is a better starting point than assuming outdoor furniture can remain exposed indefinitely. Choose a location that stays dry and follow the model’s folding instructions with fingers clear of joints. If your available space cannot provide suitable storage, that is a material drawback when comparing chairs.
When is replacing the mesh worth doing?
Replacement is worth considering when the chair has an approved repair route, the frame and mechanism do not have unresolved damage, and the total cost makes sense. Fabric dimensions alone do not establish compatibility. The choice also depends on attachment type, model generation and whether the manufacturer supports that replacement.
Method 6: Confirm the replacement system before ordering
Build a small digital comparison from the label photo, an attachment close-up and the proposed part listing. The purpose is to confirm fit before removal, so do not dismantle the chair just to see what happens. A photograph can help identify the system, but it does not replace the supplier’s explicit compatibility statement.
- Match the exact model or reference number to the replacement listing. Check standard versus XL sizing and any generation or revision restrictions.
- Compare the attachment system: laces and eyelets, clips or another specified fixing. Match the required part set, including any fittings the instructions say must be renewed.
- Confirm the manufacturer’s stated dimensions and fitting instructions for that specific part. If compatibility remains unclear, send your saved photos and request written confirmation before ordering.
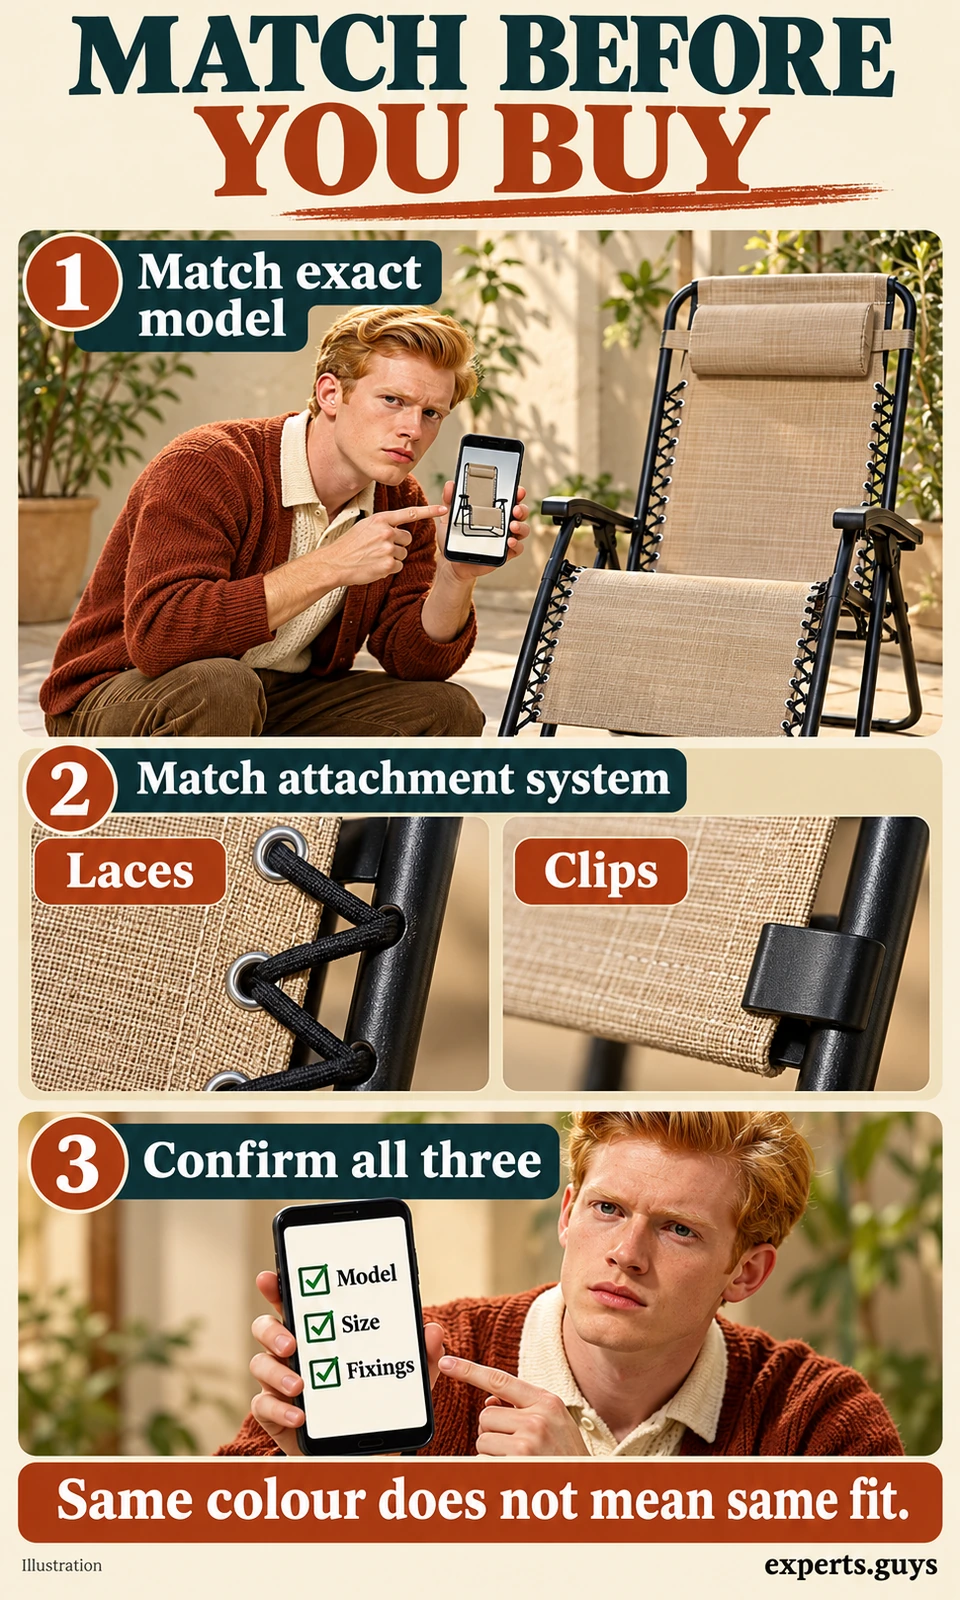
A beige replacement sling advertised for “most recliners” can still have the wrong fixing pattern. Likewise, a visually similar clip does not prove a lace-to-clip conversion is permitted on your chair. Lafuma’s replacement guidance distinguishes its attachment systems and directs customers to the product reference; that does not authorize conversion on other brands.
The easy alternative to guessing is to buy through the model’s official parts route or request a confirmed part number. Colour is the last choice, after fit and support have been established. The checkpoint is a specific compatible kit with instructions, not a basket containing an approximate fabric size and generic bungee cord.
Method 7: Compare the complete repair cost
Do the price comparison only after the damage and compatibility questions are resolved. Check the warranty or recall remedy first, because paying for a part may be unnecessary. Then use your phone calculator to compare complete costs in the same currency, including delivery and any fitting charge.
- Check whether an applicable warranty or recall provides the remedy. Keep the purchase record and model photos ready for that claim.
- Get the total for the approved part, required fittings, delivery and any installation service. Include tax consistently on both sides of the comparison.
- Compare that amount with a suitable replacement chair delivered to you, considering support, fit and storage needs. Choose the supported option; a low repair bill does not override unresolved structural concerns.

| Illustrative cost item | Amount |
|---|---|
| Approved replacement kit | $28 |
| Delivery | $8 |
| Fitting charge | $0 (only if approved self-installation applies) |
| Total repair | $36 |
| Suitable new chair, delivered | $80 |
| Difference | $44 less to repair |
These figures are a hypothetical arithmetic example, not current market prices or a repair recommendation. The $36 option is only a candidate when the kit is compatible and there are no unresolved frame or mechanism concerns. If additional damage appears, the original comparison no longer describes the job.
Avoid a fixed rule such as “repair whenever it costs less than half a new chair”. Price does not capture uncertainty, the availability of proper parts or the suitability of the replacement chair. If parts cannot be confirmed, pause the purchase; if the chair cannot be restored through an approved route, choose replacement and appropriate local disposal.
Questions that still come up
Does “alloy steel” mean stainless steel?
No. “Alloy steel” alone does not identify stainless steel or establish corrosion performance. Look for the actual material and finish specification rather than interpreting a broad listing term as a rust-proof guarantee.
Will a thicker cushion fix a sagging mesh seat?
A cushion can change how the seat feels, but it does not repair damaged fabric, cords or attachments. Keep the chair out of use if a support component is damaged. Any accessory must also be suitable for the chair and must not interfere with its mechanism.
Can I use the same replacement kit on two chairs that look identical?
Only if the kit documentation confirms both exact models. Similar appearance can hide different sizes, fixing patterns or production revisions. Check each label separately before ordering a pair of kits.
Can these checks confirm how many years the chair has left?
No. A visual inspection cannot establish remaining fatigue life or reveal every concealed defect. Use the checks to identify concerns and the next appropriate action, not to assign a guaranteed lifespan.
Your next action
- Save the model label and matching manual on your phone.
- Choose the relevant check: frame, suspension, controls, cleaning or replacement compatibility.
- Keep a damaged chair out of use and resolve the specific fault before comparing repair prices.
Visuals are created instructional illustrations of generic chairs, not photographs of product testing. Use your own model’s manual for operating and repair instructions.
Compare Local Home Specialists Near You
Tell us what kind of help you need, then compare nearby businesses by location, Google rating, review volume and contact options.
HomeFix Local Match
Turn a home problem into a practical local hiring decision. Check the clues, see the specialist types that fit, open focused surrounding-location searches, then compare the strongest three before you call.
 YOUR PROBLEM
YOUR AREA
COMPARE 3
✓ Ready to compare
What is happening?
Choose the closest problem type, then check every clue that applies. Your selections change the specialist order.
Where should the search focus?
Use Google’s “near me” context or enter the area you actually want a specialist to serve.
Simple local search: open nearby Google results, choose the businesses that look suitable, then compare your best three here before you call.
Problem snapshot
Who should you call first?
These are the specialist types most likely to fit the clues you selected.
Search around your location
Compare your top three
Use the same factors for each option so a high star rating does not hide a weak scope, poor diagnosis, missing credentials or unclear aftercare.
Comparison result
Your result combines the Google signals you entered with the practical hiring checks you completed.
Questions to ask every finalist
Use the same questions with each shortlisted business so the comparison stays consistent.